> ## Documentation Index
> Fetch the complete documentation index at: https://docs.wandb.ai/llms.txt
> Use this file to discover all available pages before exploring further.
# Hugging Face AutoTrain
> 1つのCLIパラメーターで、コード不要のモデル トレーニング向けに Hugging Face AutoTrain で W&B の実験管理を使用できます。
[Hugging Face AutoTrain](https://huggingface.co/docs/autotrain/index) は、自然言語処理 (NLP)、コンピュータービジョン (CV)、音声、表形式データの各タスク向けにモデルをトレーニングするためのコード不要のツールです。
Hugging Face AutoTrain は W\&B と直接統合されており、実験管理と設定管理を利用できます。実験で使用するには、CLI コマンドで1つのパラメーターを指定するだけです。
このページでは、Hugging Face AutoTrain でモデルをトレーニングする際に W\&B の実験管理を有効にする方法を説明します。追加のコードを記述しなくても、すべての run のメトリクスと設定を取得できます。このページは、すでに AutoTrain に慣れており、トレーニング ワークフローに可観測性を追加したいユーザーを対象としています。
## 前提条件をインストールする
モデルをトレーニングして結果を W\&B にログする前に、AutoTrain CLI と W\&B クライアント ライブラリをインストールします。`autotrain-advanced` と `wandb` をインストールします。
```shell theme={null}
pip install --upgrade autotrain-advanced wandb
```
```notebook theme={null}
!pip install --upgrade autotrain-advanced wandb
```
これらの変更点を示すため、このページでは数学データセットで LLM をファインチューニングし、[GSM8k Benchmarks](https://github.com/openai/grade-school-math) の `pass@1` を評価します。
## データセットを準備する
トレーニングの前に、データセットが AutoTrain で想定されている形式に一致するよう準備してください。Hugging Face AutoTrain で正しく動作させるには、CSV のカスタムデータセットを特定の形式にする必要があります。
トレーニングファイルには、トレーニングで使用する `text` 列が含まれている必要があります。最適な結果を得るには、`text` 列のデータを `### Human: Question?### Assistant: Answer.` 形式に従わせる必要があります。例として、[`timdettmers/openassistant-guanaco`](https://huggingface.co/datasets/timdettmers/openassistant-guanaco) を参照してください。
ただし、[MetaMathQA dataset](https://huggingface.co/datasets/meta-math/MetaMathQA) には `query`、`response`、`type` の各列が含まれています。まず、このデータセットを前処理します。`type` 列を削除し、`query` 列と `response` 列の内容を結合して、`### Human: Query?### Assistant: Response.` 形式の新しい `text` 列を作成してください。トレーニングには、こうして作成したデータセット [`rishiraj/guanaco-style-metamath`](https://huggingface.co/datasets/rishiraj/guanaco-style-metamath) を使用します。
## `autotrain` を使用してトレーニングする
環境とデータセットの準備ができたら、トレーニングを開始できます。コマンドラインまたはノートブックから `autotrain` advanced を使用してトレーニングを開始できます。`--log` 引数を使用するか、`--log wandb` を使用して結果を [run](/ja/models/runs/) にログできます。`--log wandb` 引数を指定すると、この run で W\&B integration が有効になります。
`` は Hugging Face のアクセストークンに、`` は対象のリポジトリーアドレス (たとえば `your-username/your-repo`) に置き換えてください。
```shell theme={null}
autotrain llm \
--train \
--model HuggingFaceH4/zephyr-7b-alpha \
--project-name zephyr-math \
--log wandb \
--data-path data/ \
--text-column text \
--lr 2e-5 \
--batch-size 4 \
--epochs 3 \
--block-size 1024 \
--warmup-ratio 0.03 \
--lora-r 16 \
--lora-alpha 32 \
--lora-dropout 0.05 \
--weight-decay 0.0 \
--gradient-accumulation 4 \
--logging_steps 10 \
--fp16 \
--use-peft \
--use-int4 \
--merge-adapter \
--push-to-hub \
--token \
--repo-id
```
```notebook theme={null}
# ハイパーパラメーターを設定する
learning_rate = 2e-5
num_epochs = 3
batch_size = 4
block_size = 1024
trainer = "sft"
warmup_ratio = 0.03
weight_decay = 0.
gradient_accumulation = 4
lora_r = 16
lora_alpha = 32
lora_dropout = 0.05
logging_steps = 10
# トレーニングを実行する
!autotrain llm \
--train \
--model "HuggingFaceH4/zephyr-7b-alpha" \
--project-name "zephyr-math" \
--log "wandb" \
--data-path data/ \
--text-column text \
--lr str(learning_rate) \
--batch-size str(batch_size) \
--epochs str(num_epochs) \
--block-size str(block_size) \
--warmup-ratio str(warmup_ratio) \
--lora-r str(lora_r) \
--lora-alpha str(lora_alpha) \
--lora-dropout str(lora_dropout) \
--weight-decay str(weight_decay) \
--gradient-accumulation str(gradient_accumulation) \
--logging-steps str(logging_steps) \
--fp16 \
--use-peft \
--use-int4 \
--merge-adapter \
--push-to-hub \
--token str(hf_token) \
--repo-id "rishiraj/zephyr-math"
```
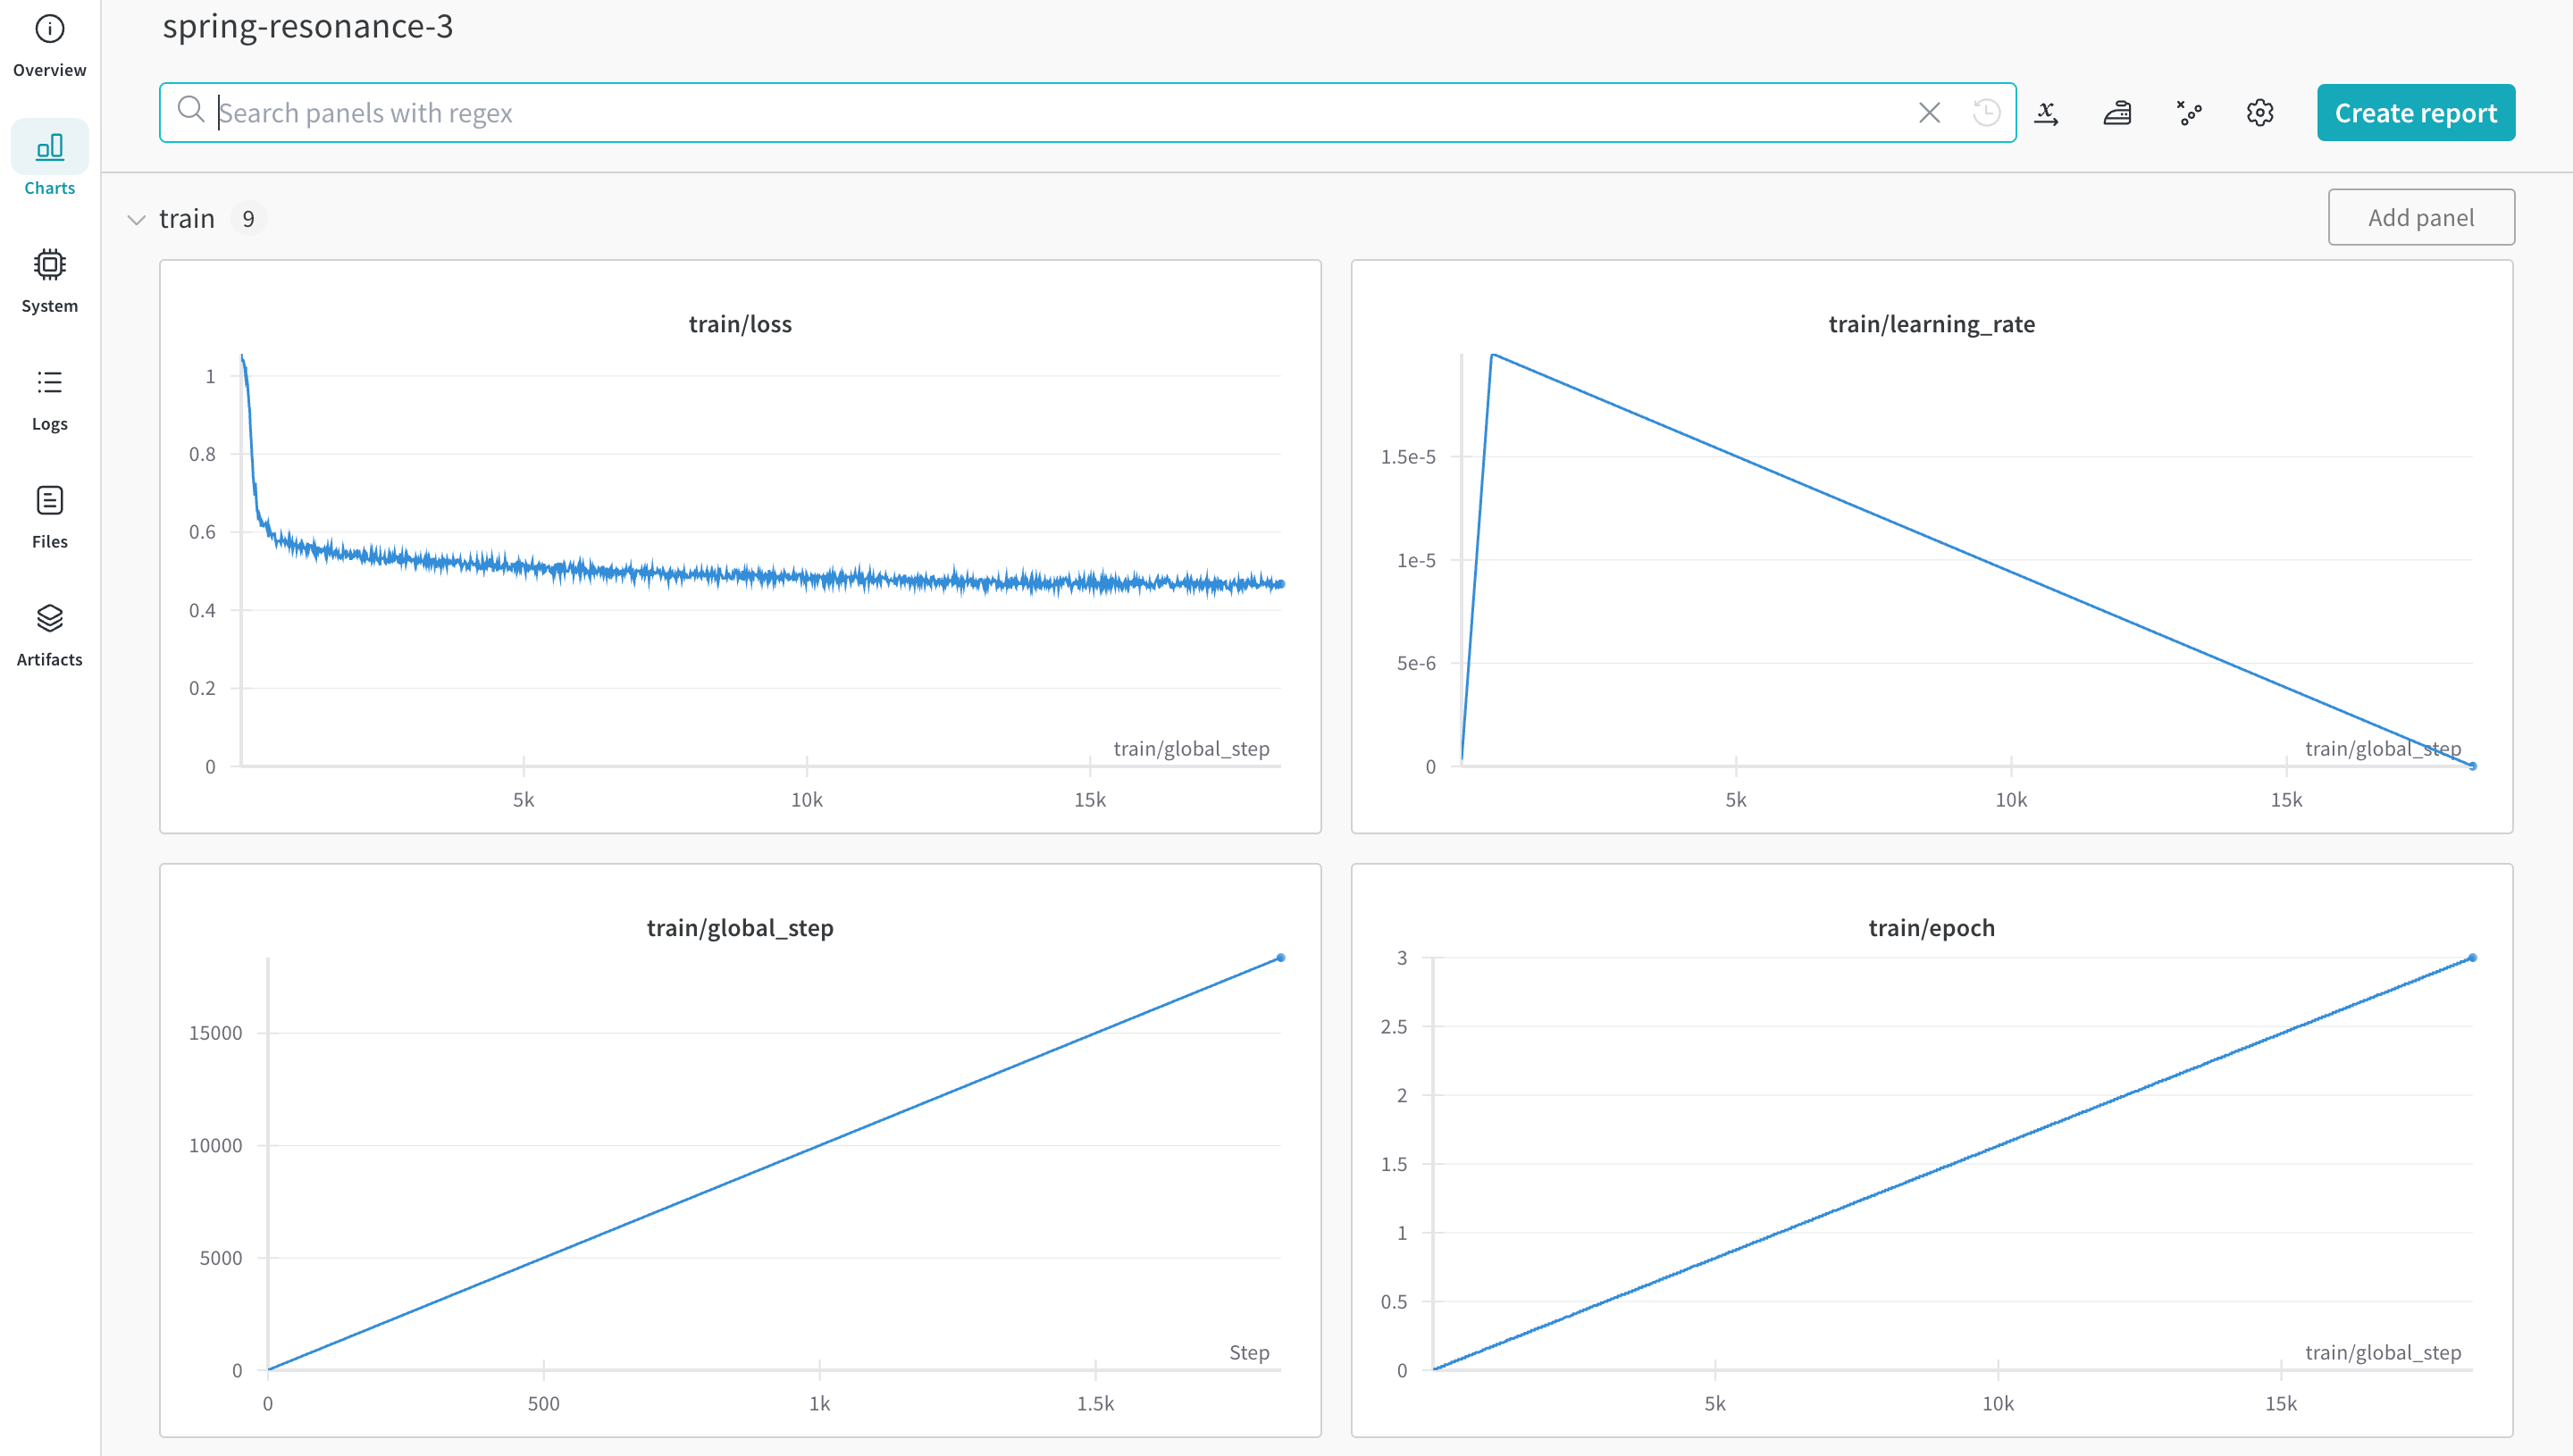
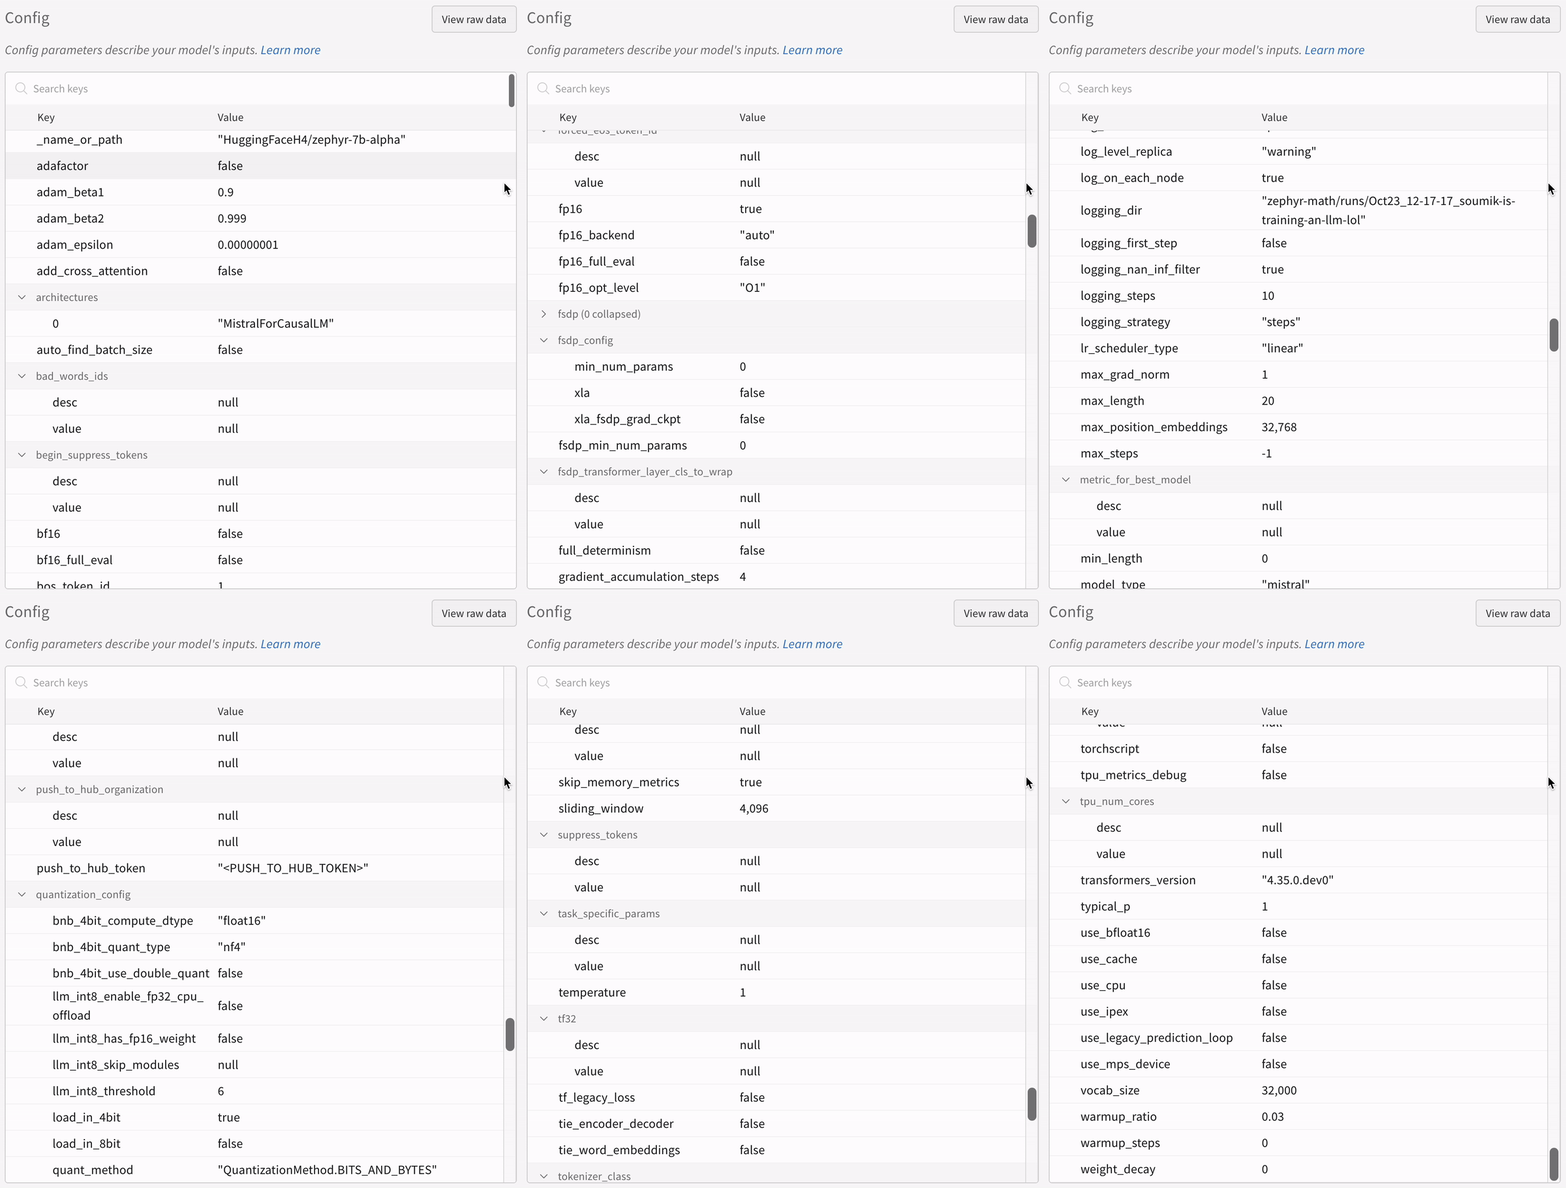 トレーニングが開始されると、AutoTrain は run のメトリクスと設定を W\&B にログします。W\&B では、それらを project 内のほかの Runs とあわせて確認できます。
## 参考資料
* [AutoTrain Advanced で実験管理がサポートされるようになりました](https://huggingface.co/blog/rishiraj/log-autotrain) ([Rishiraj Acharya](https://huggingface.co/rishiraj) 著)
* [Hugging Face AutoTrain ドキュメント](https://huggingface.co/docs/autotrain/index)