> ## Documentation Index
> Fetch the complete documentation index at: https://docs.wandb.ai/llms.txt
> Use this file to discover all available pages before exploring further.
# Hugging Face Hub
> Hugging Face Hub を W&B Weave と統合して、機械学習アプリケーションをトラッキングおよび分析します
このページに掲載されているコードサンプルは、すべて Python で記述されています。
このページでは、[Hugging Face Hub](https://huggingface.co/) を W\&B Weave と統合して、機械学習アプリケーションをトラッキングおよび分析する方法を説明します。モデル推論をログし、関数callを監視し、Weave のトレース機能とバージョン管理機能を使って 実験 を整理する方法を学べます。ここで紹介する例に沿って進めることで、知見を取得し、アプリケーションをデバッグし、異なるモデル設定を比較できます。これらはすべて Weave の Web インターフェース内で行えます。
**Google Colab で Hugging Face Hub と Weave を試す**
面倒な設定なしで Hugging Face Hub と Weave を試してみたいですか? ここで紹介しているコードサンプルは、Google Colab 上の Jupyter Notebook として試せます。

## 概要
Hugging Face Hub は、クリエイターやコラボレーター向けの機械学習プラットフォームで、多様な種類のプロジェクトに利用できる事前トレーニング済みのモデルやデータセットを豊富に提供しています。
`huggingface_hub` Python ライブラリは、Hub でホストされているモデルに対して、複数のサービスをまたいで推論を実行できる統一インターフェースを提供します。これらのモデルは [`InferenceClient`](https://huggingface.co/docs/huggingface_hub/en/package_reference/inference_client) を使用して呼び出せます。
Weave は `InferenceClient` のトレースを自動的に取得します。トラッキングを開始するには、`weave.init()` を呼び出してから、通常どおりライブラリを使用します。
## 事前準備
開始する前に、必要なライブラリをインストールし、Hugging Face Hub へのアクセスを設定するために、次のセットアップ手順を完了してください。
1. Weave で `huggingface_hub` を使用する前に、必要なライブラリをインストールするか、最新バージョンにアップグレードする必要があります。次のコマンドは、`huggingface_hub` と `weave` をインストールし、すでにインストール済みの場合は最新バージョンにアップグレードします。また、インストール時の出力も抑制します。
```python lines theme={null}
pip install -U huggingface_hub weave -qqq
```
2. Hugging Face Hub 上のモデルで 推論 を使用するには、[User Access Token](https://huggingface.co/docs/hub/security-tokens) を設定します。トークンは [Hugging Face Hub の Settings ページ](https://huggingface.co/login?next=%2Fsettings%2Ftokens) で設定することも、プログラムから設定することもできます。次のコード例では、`HUGGINGFACE_TOKEN` の入力を求め、そのトークンを環境変数に設定します。
```python lines theme={null}
import os
import getpass
os.environ["HUGGINGFACE_TOKEN"] = getpass.getpass("Enter your Hugging Face Hub Token: ")
```
## 基本的なトレース
開発時と本番環境では、言語モデルアプリケーションのトレースを一元的に保存することが重要です。これらのトレースはデバッグに役立つだけでなく、アプリケーションを改善するためのデータセットにもなります。
Weave は `InferenceClient` のトレースを自動的に取得します。トラッキングを開始するには、`weave.init()` を呼び出して Weave を初期化し、その後は通常どおりライブラリを使用します。
次の例では、Weave を使用して Hugging Face Hub への推論 Call をログする方法を示します。
```python lines theme={null}
import weave
from huggingface_hub import InferenceClient
# Weave を初期化する
weave.init(project_name="quickstart-huggingface")
# Hugging Face Inference Client を初期化する
huggingface_client = InferenceClient(
api_key=os.environ.get("HUGGINGFACE_TOKEN")
)
# Llama-3.2-11B-Vision-Instruct モデルを使用して Hugging Face Hub に Chat Completion 推論 Call を行う
image_url = "https://cdn.britannica.com/61/93061-050-99147DCE/Statue-of-Liberty-Island-New-York-Bay.jpg"
response = huggingface_client.chat_completion(
model="meta-llama/Llama-3.2-11B-Vision-Instruct",
messages=[
{
"role": "user",
"content": [
{"type": "image_url", "image_url": {"url": image_url}},
{"type": "text", "text": "Describe this image in one sentence."},
],
}
],
max_tokens=500,
seed=42,
)
```
前のコードを実行すると、Weave は Hugging Face Inference Client で行われたすべての LLM Call をトラッキングしてログします。これらのトレースは Weave のウェブインターフェースで確認できます。
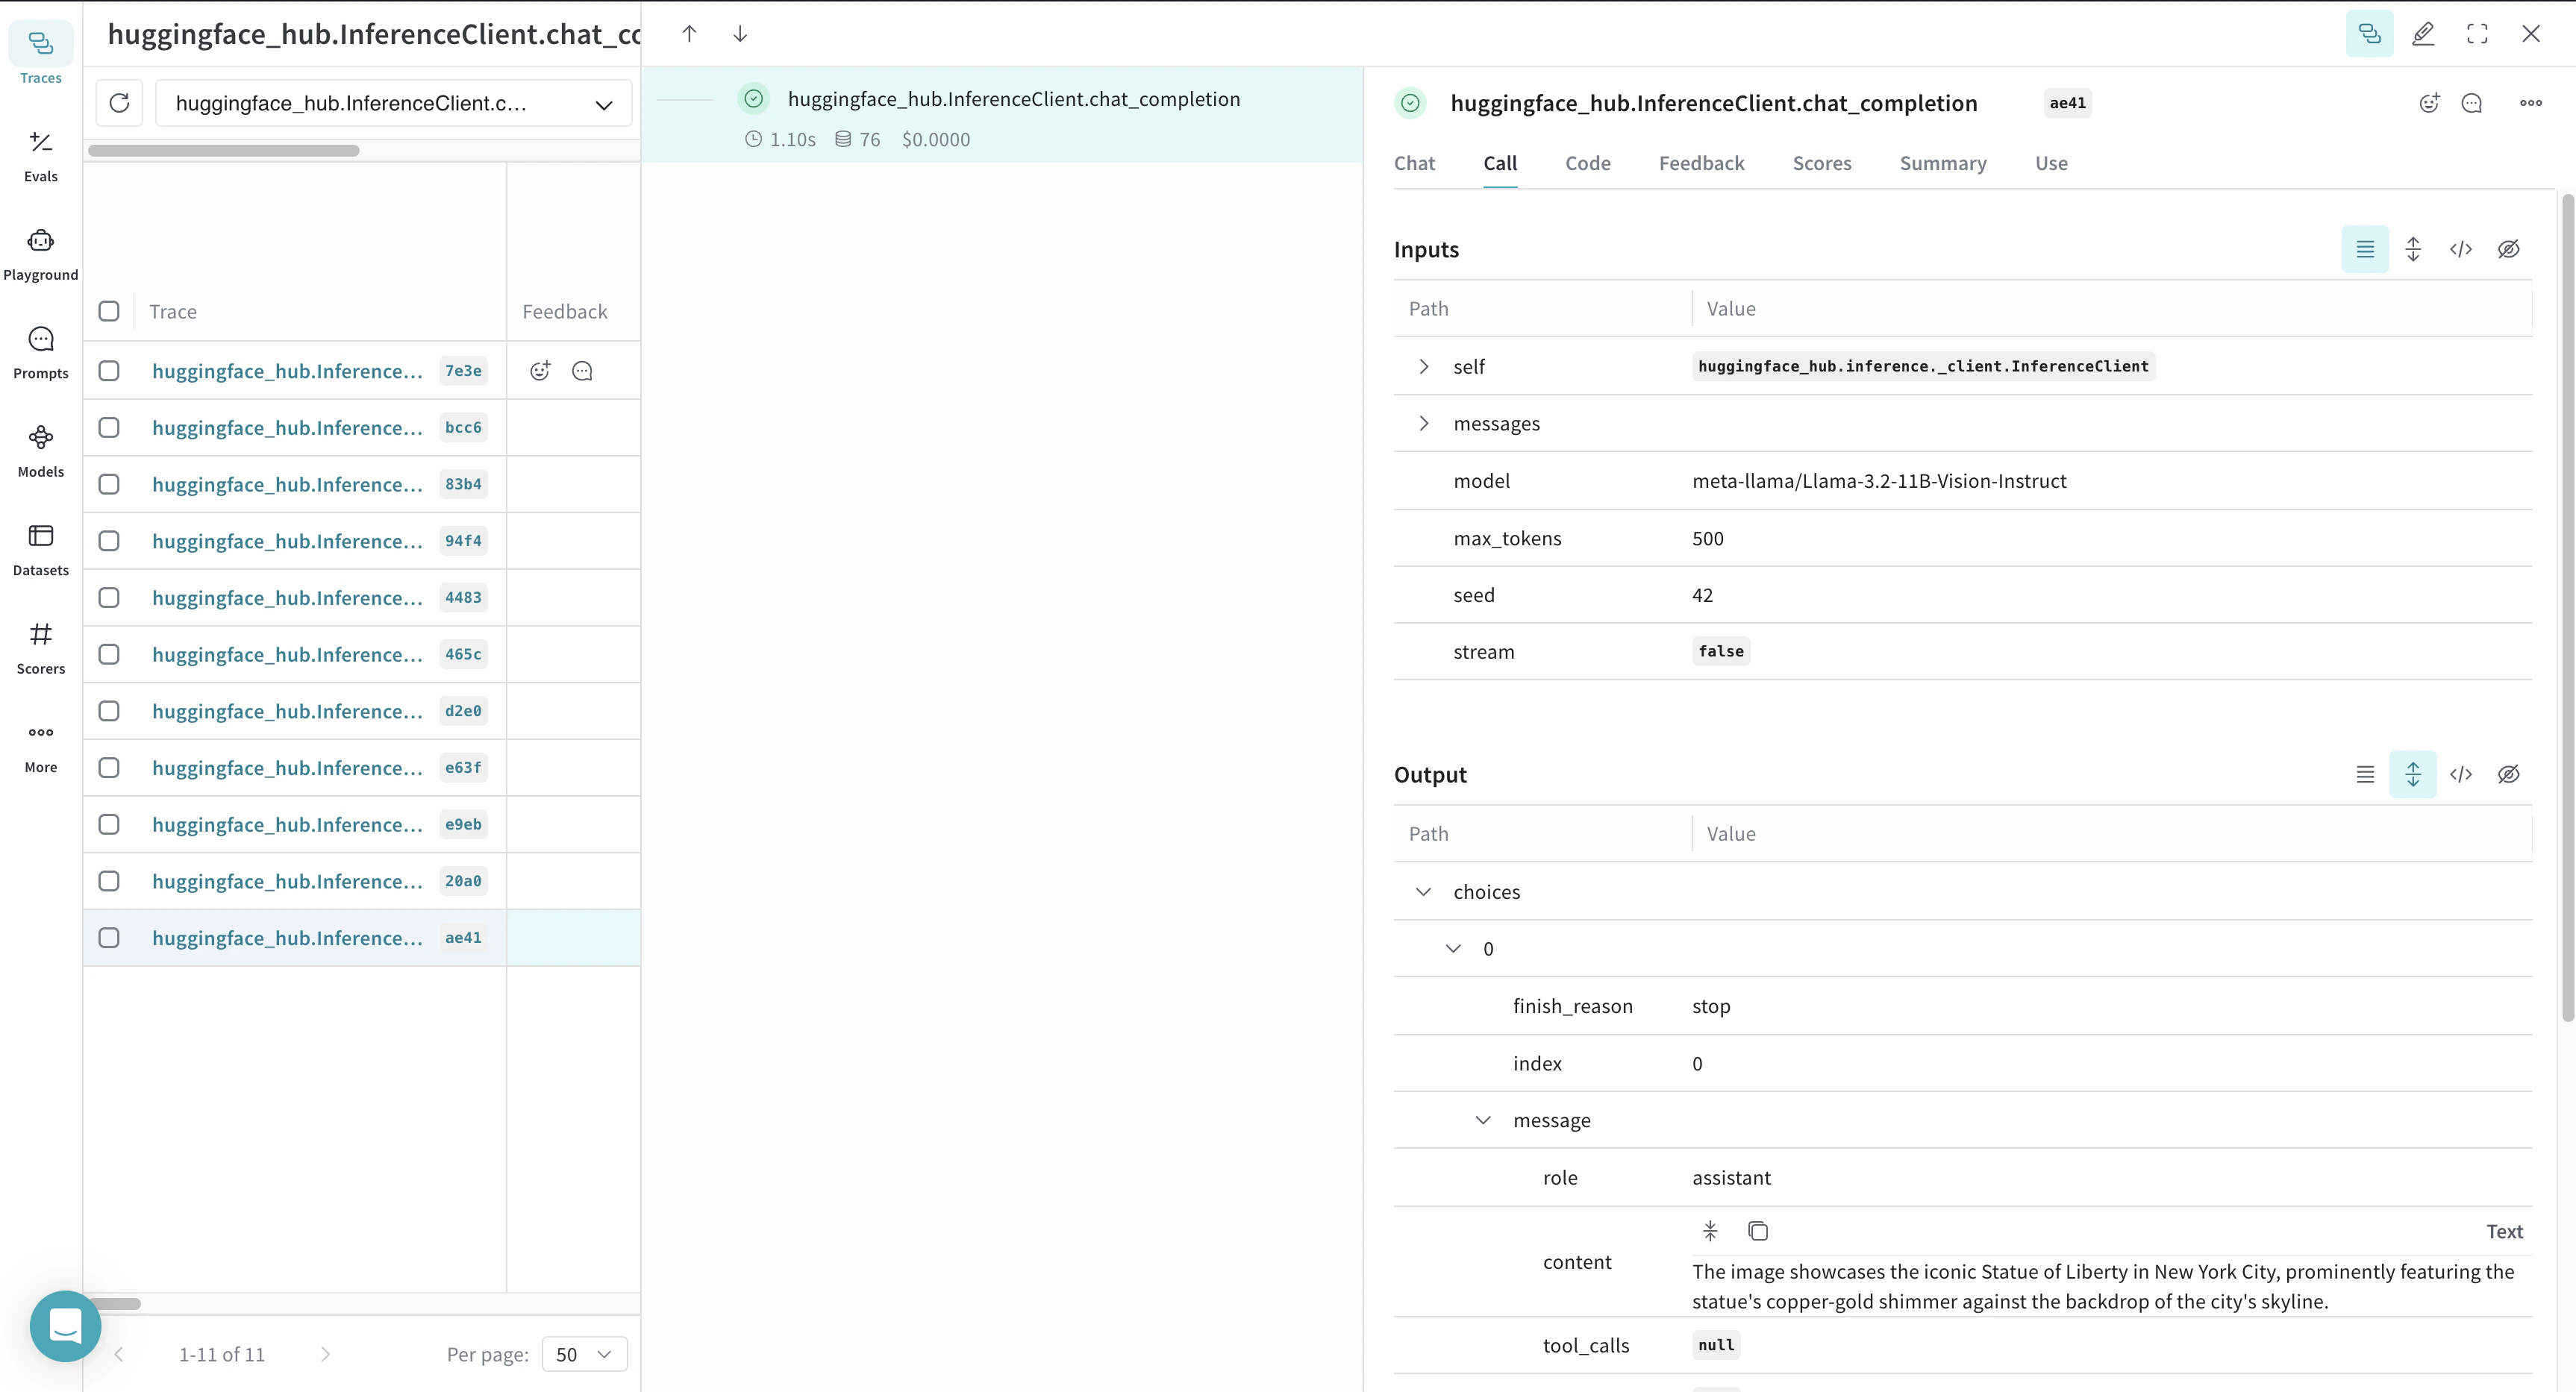 Weave は各推論 Call をログし、inputs、outputs、metadata の詳細を表示します。
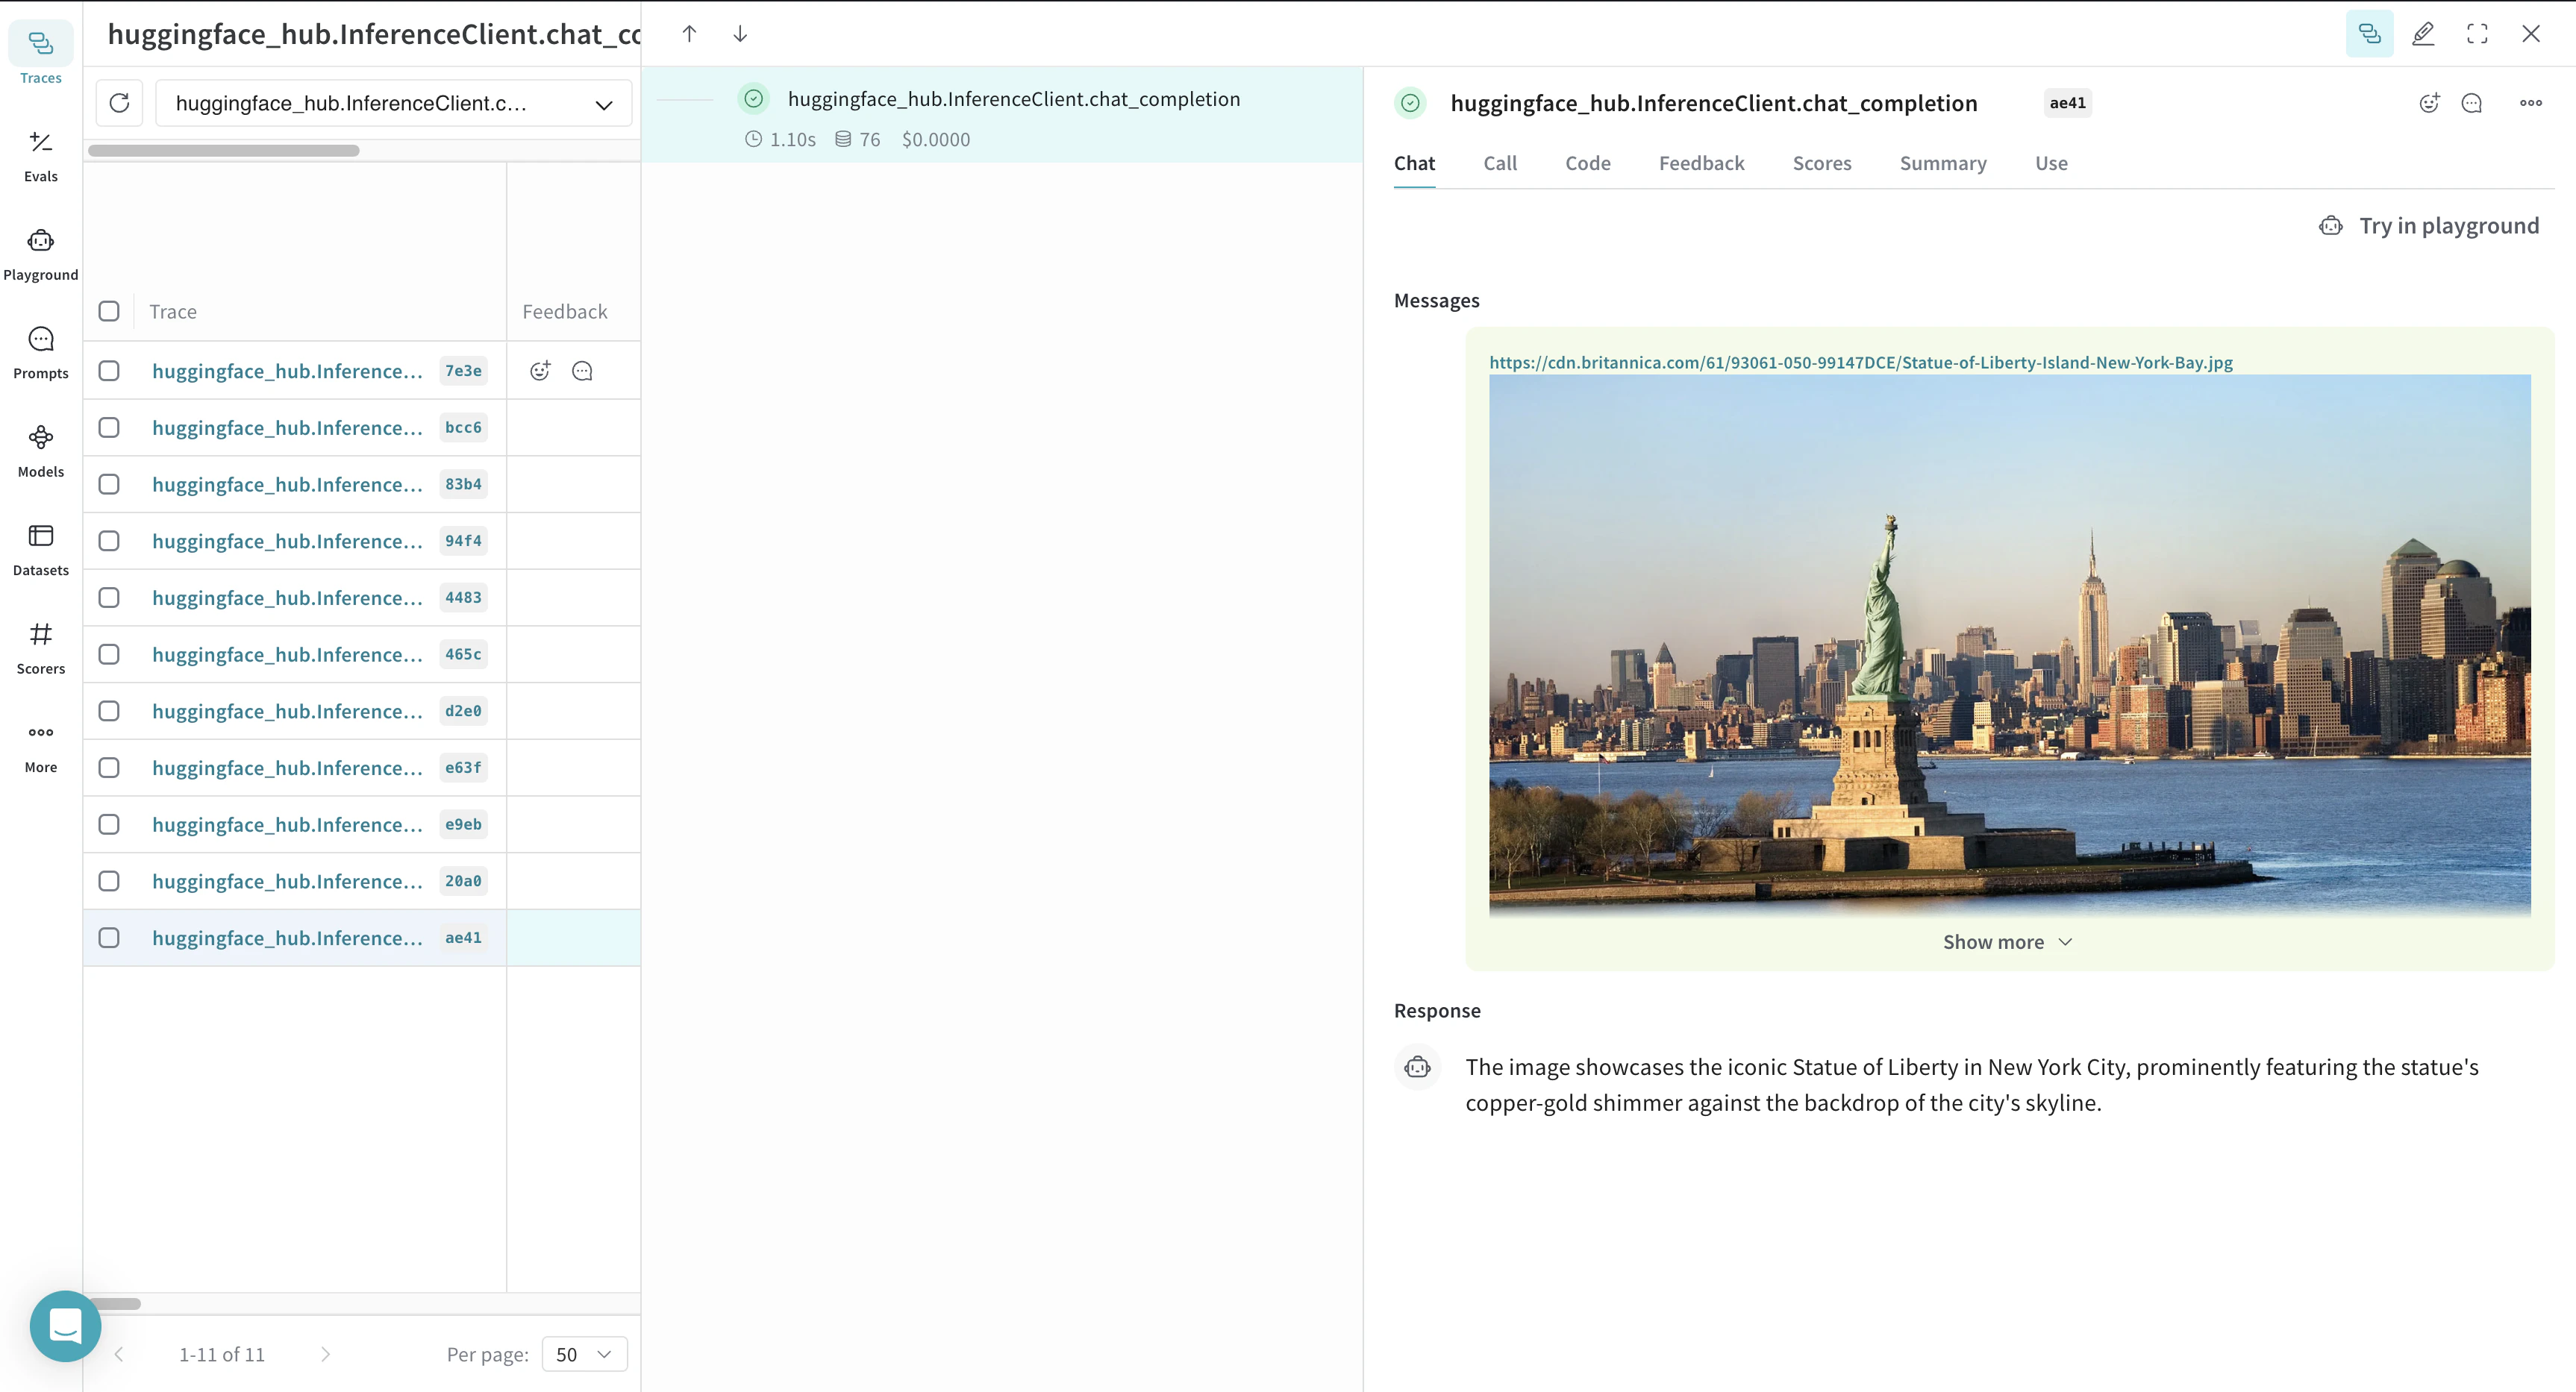 Weave はその Call を UI上でチャットビューとして表示し、モデルとのチャット履歴全体を確認できます。
## 関数をトレースする
アプリケーション内でデータがどのように流れるかをより深く把握するには、`@weave.op` を使用して関数のcallをトラッキングできます。これにより、入力、出力、実行ロジックが記録され、デバッグやパフォーマンス分析に役立ちます。
複数の op をネストすると、トラッキングされた関数の構造化されたツリーを構築できます。Weave はコードも自動的にバージョン管理するため、Git に変更をコミットする前であっても、実験中の中間状態が保持されます。
トラッキングを開始するには、トラッキングしたい関数に `@weave.op` デコレータを付けます。
次の例では、Weave は `generate_image`、`check_image_correctness`、`generate_image_and_check_correctness` の 3 つの関数をトラッキングします。これらの関数は画像を生成し、それが指定されたプロンプトに一致するかどうかを検証します。
```python lines theme={null}
import base64
from PIL import Image
def encode_image(pil_image):
import io
buffer = io.BytesIO()
pil_image.save(buffer, format="JPEG")
buffer.seek(0)
encoded_image = base64.b64encode(buffer.read()).decode("utf-8")
return f"data:image/jpeg;base64,{encoded_image}"
@weave.op
def generate_image(prompt: str):
return huggingface_client.text_to_image(
prompt=prompt,
model="black-forest-labs/FLUX.1-schnell",
num_inference_steps=4,
)
@weave.op
def check_image_correctness(image: Image.Image, image_generation_prompt: str):
return huggingface_client.chat_completion(
model="meta-llama/Llama-3.2-11B-Vision-Instruct",
messages=[
{
"role": "user",
"content": [
{"type": "image_url", "image_url": {"url": encode_image(image)}},
{
"type": "text",
"text": f"Is this image correct for the prompt: {image_generation_prompt}? Answer with only one word: yes or no",
},
],
}
],
max_tokens=500,
seed=42,
).choices[0].message.content
@weave.op
def generate_image_and_check_correctness(prompt: str):
image = generate_image(prompt)
return {
"image": image,
"is_correct": check_image_correctness(image, prompt),
}
response = generate_image_and_check_correctness("A cute puppy")
```
Weave では、`@weave.op` でラップされたすべての関数callがログされるため、Weave UI で実行の詳細を分析できます。
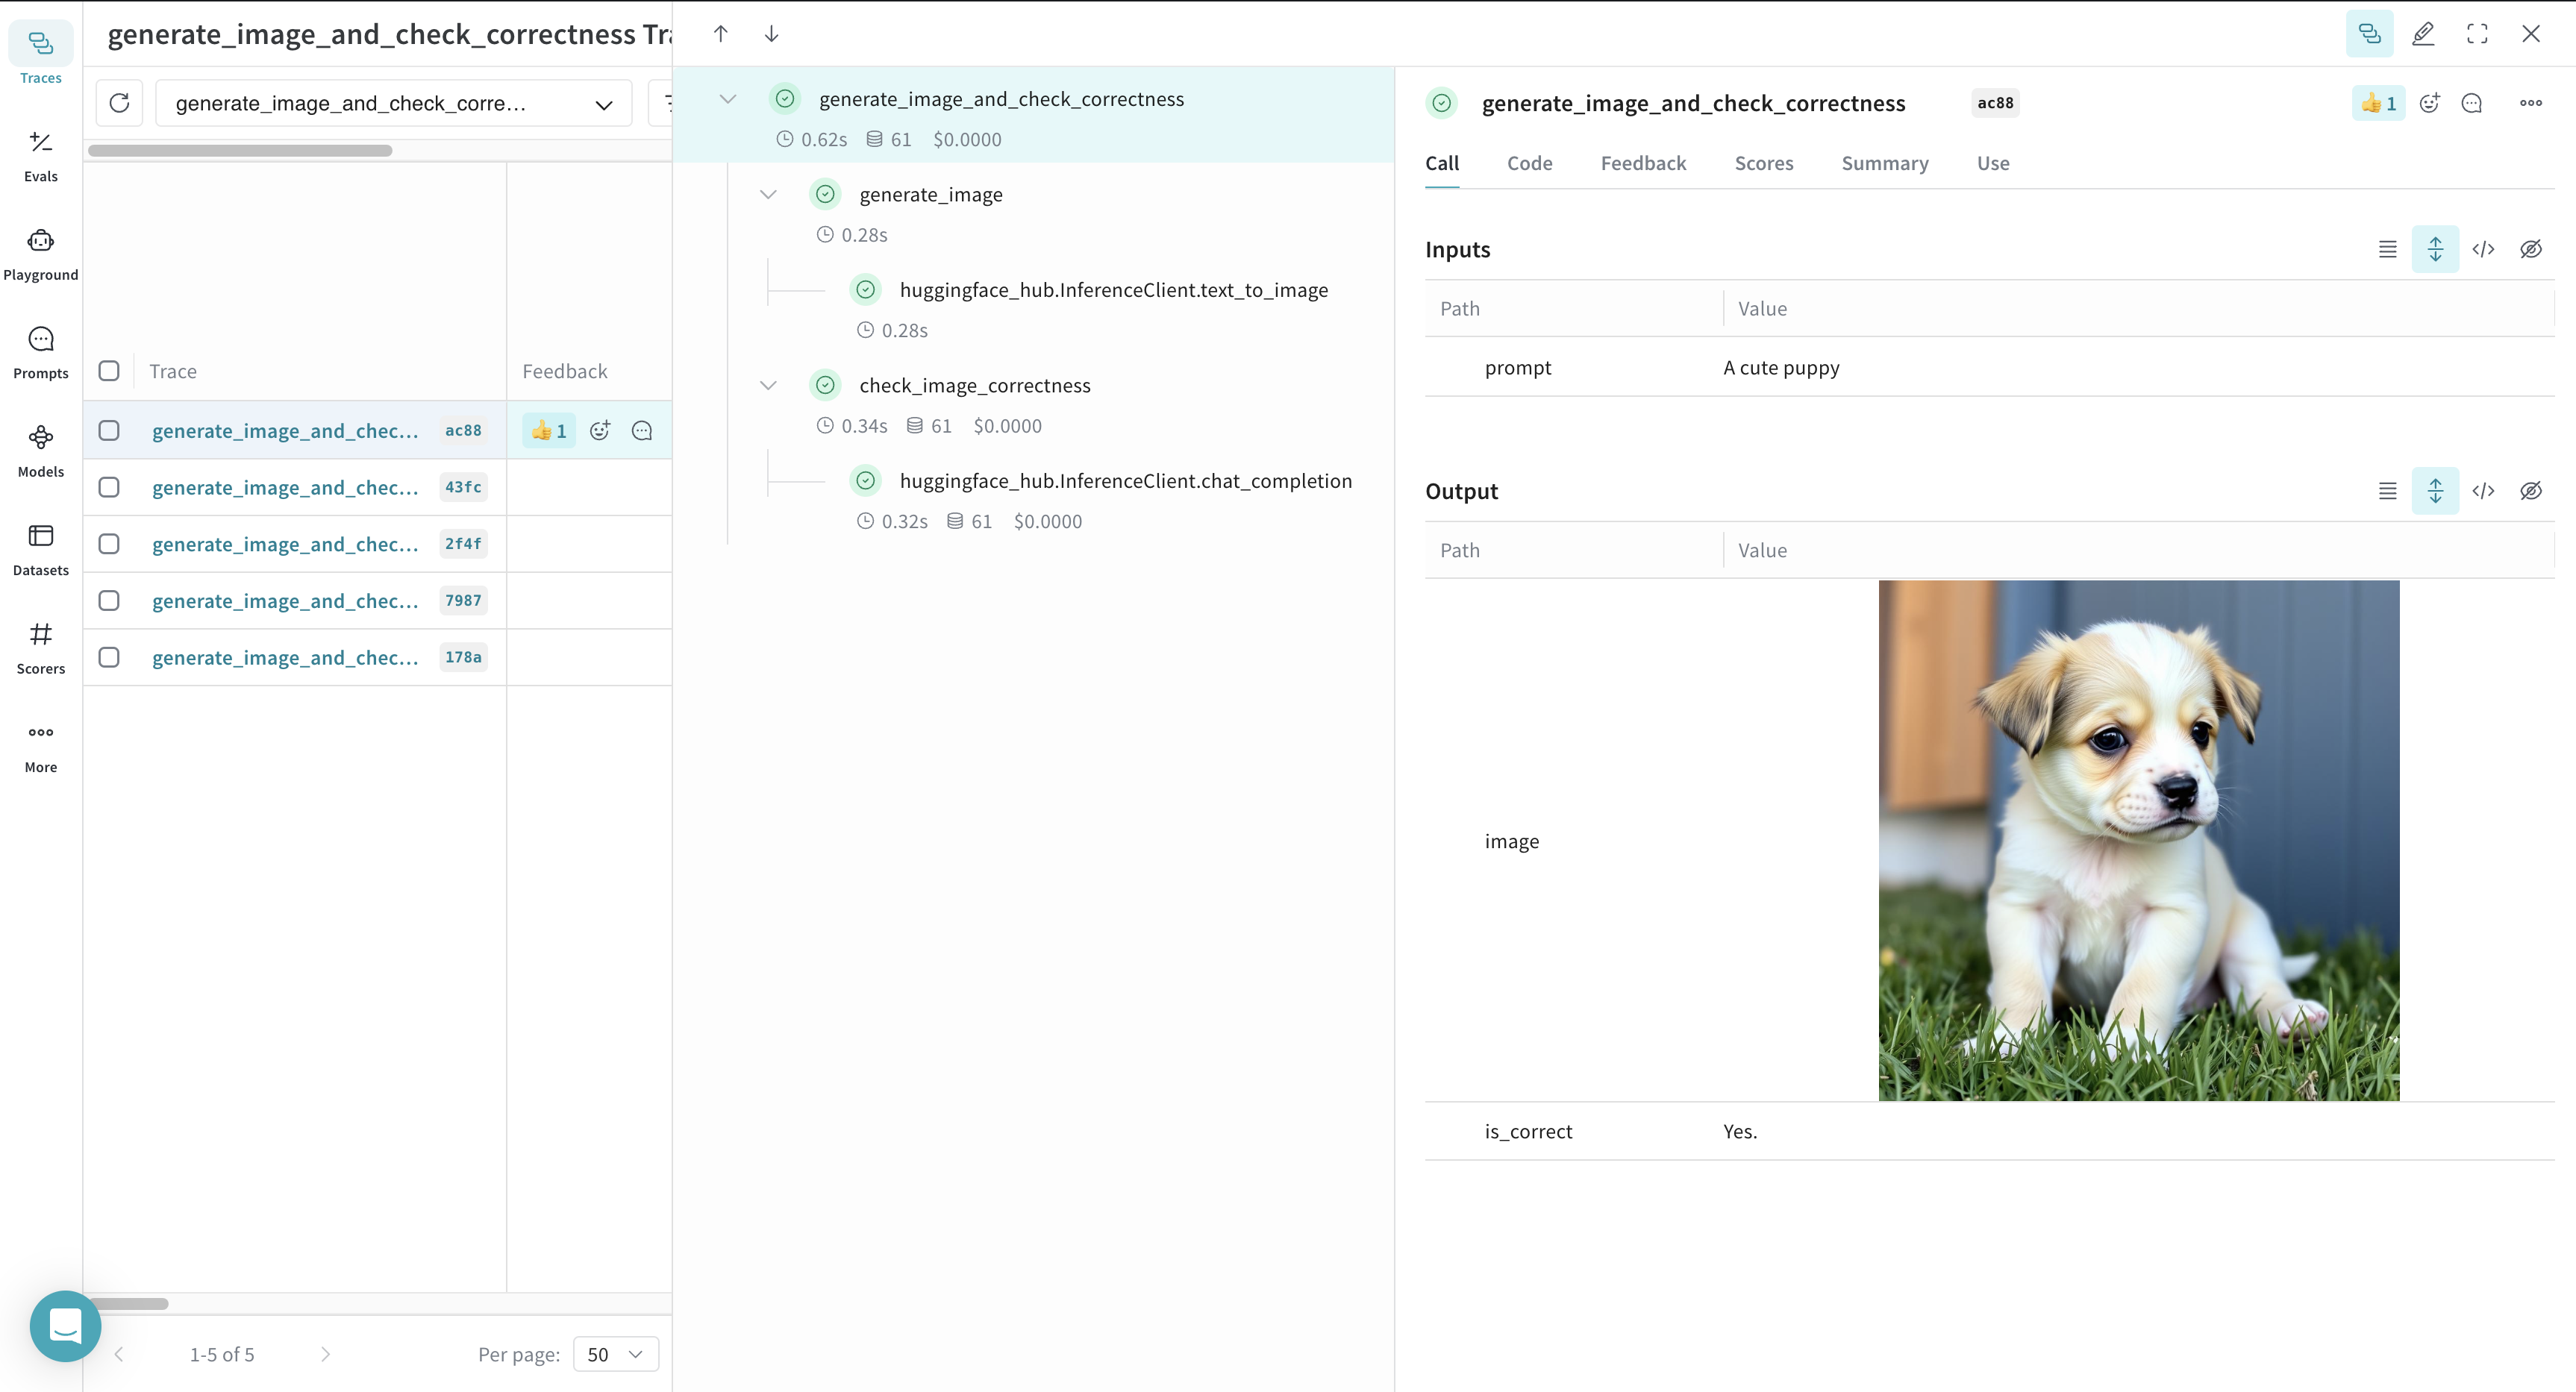 Weave は関数の実行も記録して可視化するため、アプリケーション内のデータフローやロジックを把握しやすくなります。
## 実験には `Model` を使用する
複数のコンポーネントが関わる場合、LLM の実験管理は難しくなりがちです。Weave の [`Model`](../core-types/models) クラスを使うと、system prompt やモデル設定などの実験の詳細を記録して整理でき、異なるイテレーションを比較できます。
コードのバージョン管理や入力と出力の記録に加えて、`Model` にはアプリケーションの動作を制御する構造化されたパラメーターも保存されます。これにより、どの設定が最良の結果をもたらしたかをトラッキングできます。さらに詳しく分析するために、Weave `Model` を Weave [Serve](../tools/serve) や [Evaluations](../evaluation/scorers) と統合することもできます。
次の例では、旅行のおすすめ用の `CityVisitRecommender` モデルを定義します。パラメーターを変更するたびに新しいバージョンが生成されるため、反復的な実験を進められます。
```python lines theme={null}
import rich
class CityVisitRecommender(weave.Model):
model: str
temperature: float = 0.7
max_tokens: int = 500
seed: int = 42
@weave.op()
def predict(self, city: str) -> str:
return huggingface_client.chat_completion(
model=self.model,
messages=[
{
"role": "system",
"content": "You are a helpful assistant meant to suggest places to visit in a city",
},
{"role": "user", "content": city},
],
max_tokens=self.max_tokens,
temperature=self.temperature,
seed=self.seed,
).choices[0].message.content
city_visit_recommender = CityVisitRecommender(
model="meta-llama/Llama-3.2-11B-Vision-Instruct",
temperature=0.7,
max_tokens=500,
seed=42,
)
rich.print(city_visit_recommender.predict("New York City"))
rich.print(city_visit_recommender.predict("Paris"))
```
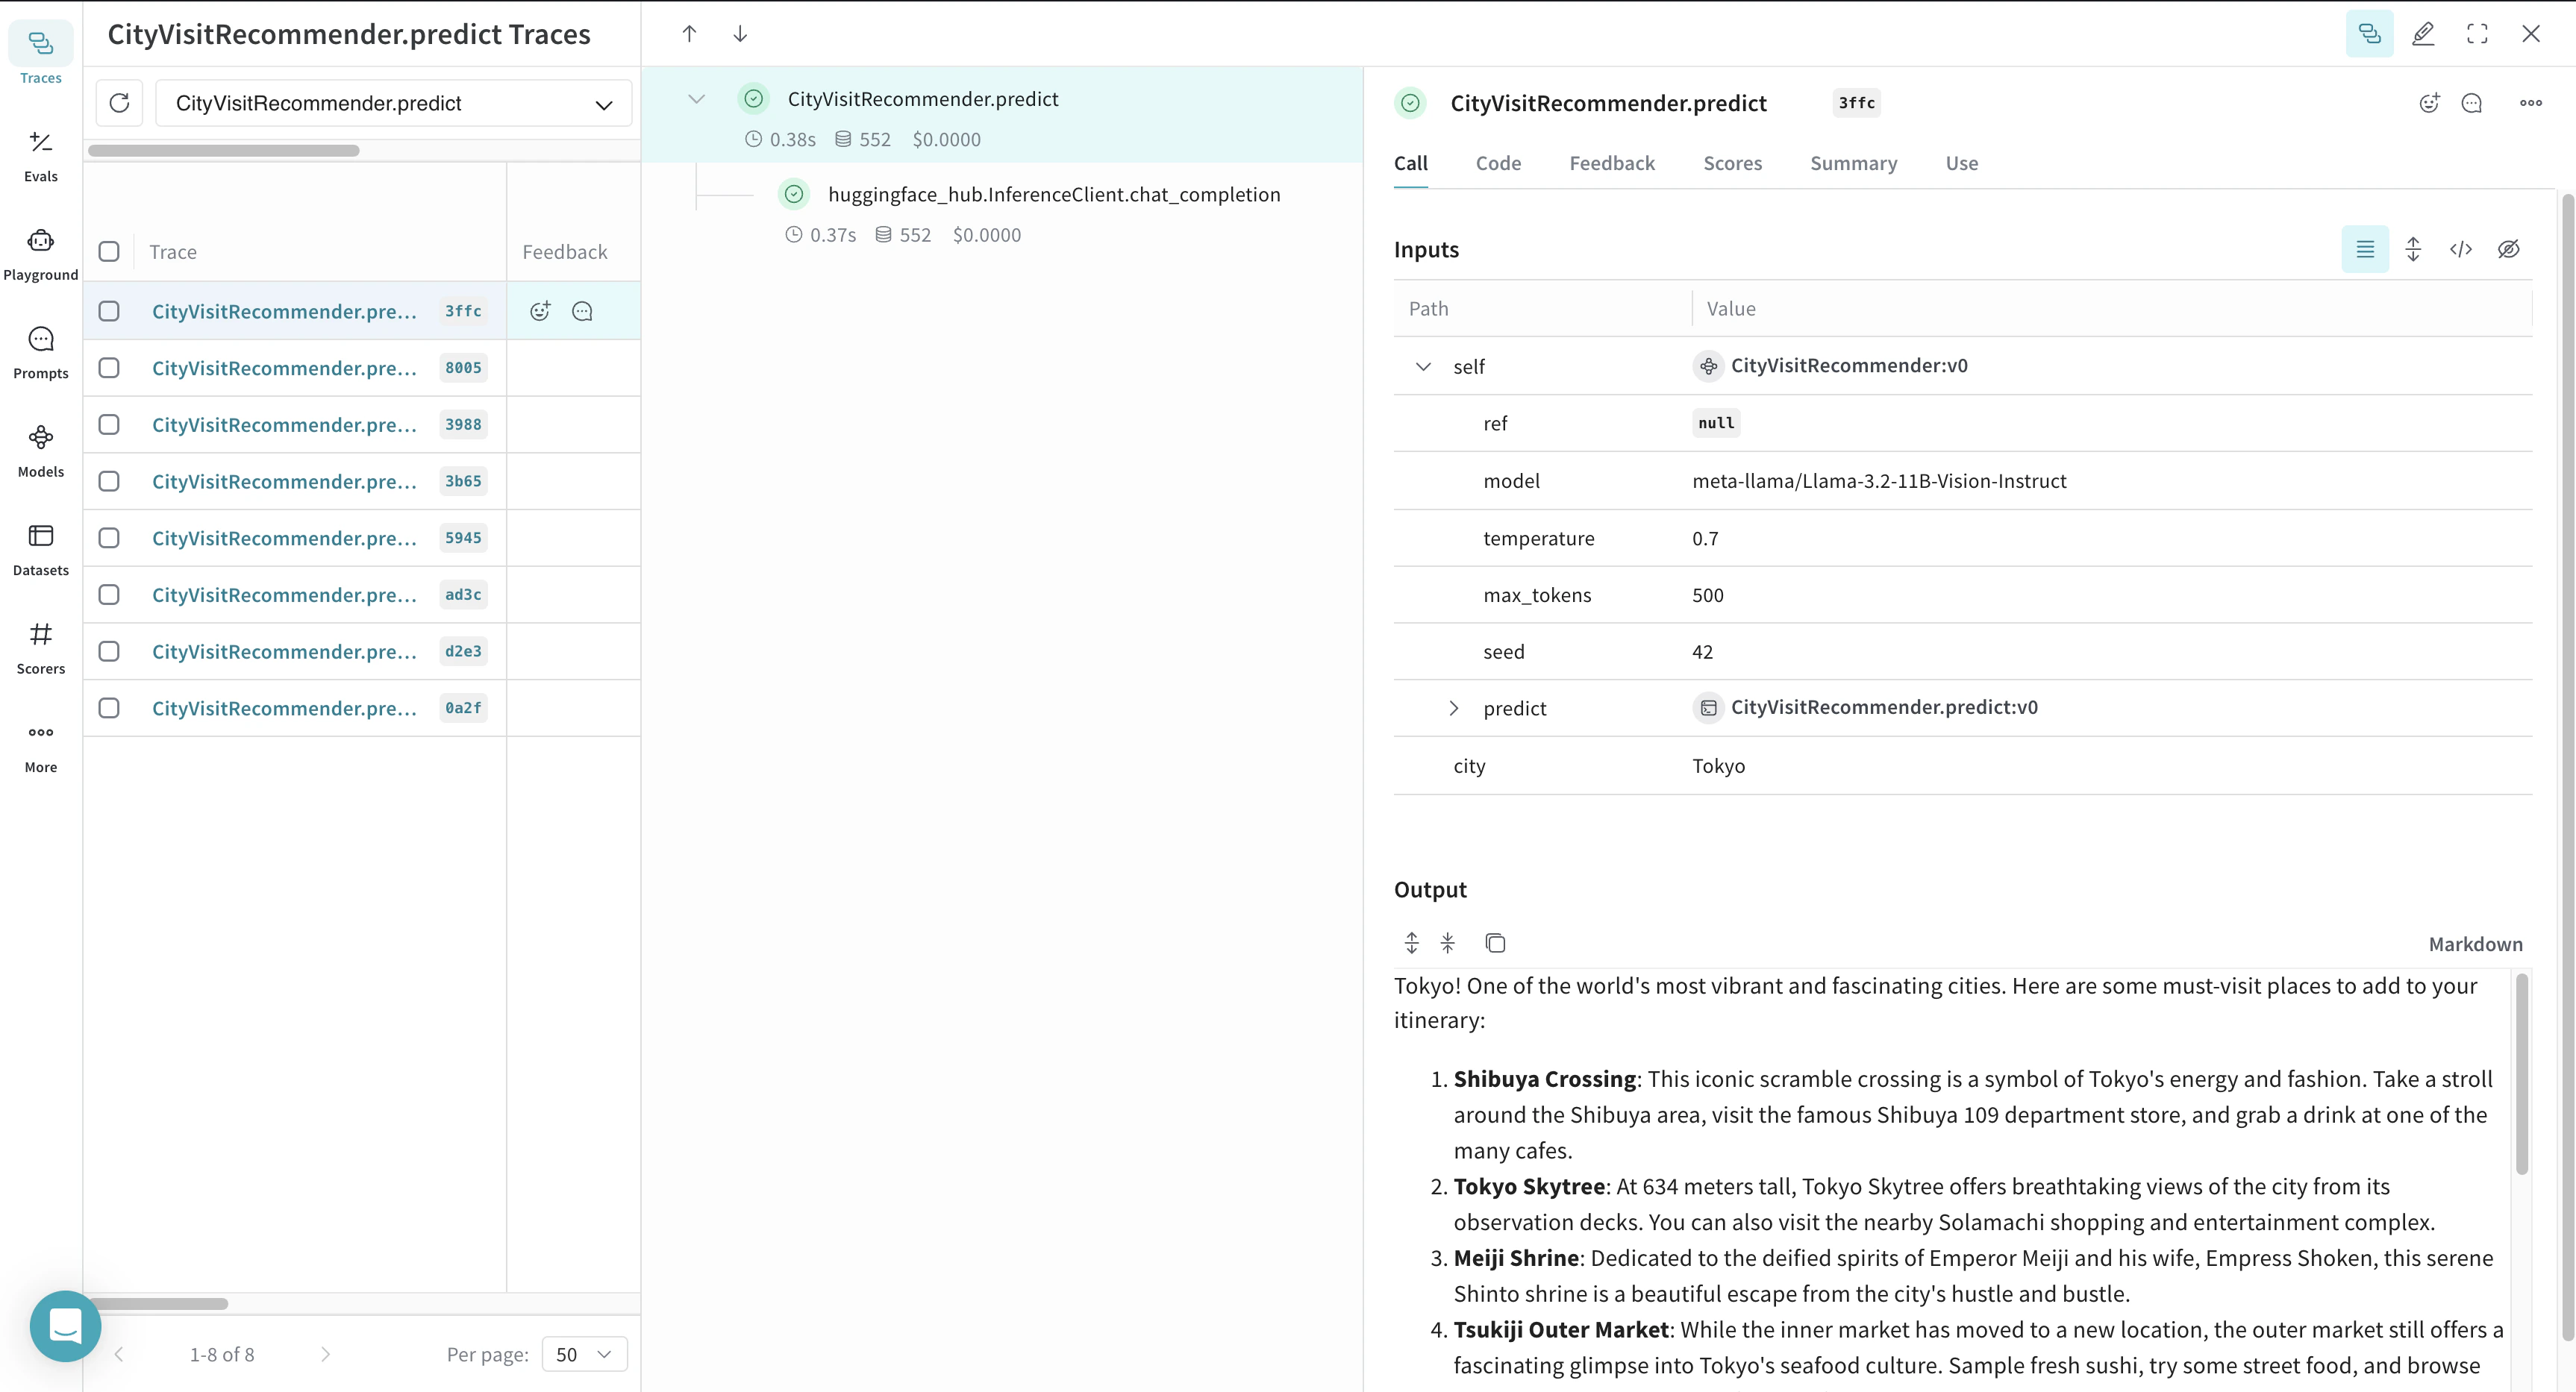
Weave はモデルを自動的にログし、各バージョンをトラッキングするため、パフォーマンスや実験履歴を分析できます。