> ## Documentation Index
> Fetch the complete documentation index at: https://docs.wandb.ai/llms.txt
> Use this file to discover all available pages before exploring further.
# Create a registry
> Create a W&B Registry with configurable visibility and accepted artifact types using the App UI or Python SDK.
A registry offers flexibility and control over the artifact types that you can use, allows you to restrict the registry's visibility, and more.
## Create a registry
Create a registry either programmatically using the W\&B Registry UI or the W\&B Python SDK.
1. Navigate to the W\&B Registry at [https://wandb.ai/registry/](https://wandb.ai/registry/).
2. Click on the **Create registry** button.
3. Provide a name for the registry in the **Name** field.
4. Optionally provide a description about the registry.
5. Select who can view the registry from the **Registry visibility** dropdown. See [Registry visibility types](./configure_registry#registry-visibility-types) for more information on registry visibility options.
6. Select either **All types** or **Specify types** from the **Accepted artifacts type** dropdown.
7. (If you select **Specify types**) Add one or more artifact types that your registry accepts.
8. Click on the **Create registry** button.
Use the [`wandb.Api().create_registry()`](/models/ref/python/#method-apicreate_registry) method to create a registry programmatically. Provide a name and [visibility](#visibility-types) for the registry for the `name` and `visibility` parameters, respectively.
Copy and paste the code block below. Replace the values enclosed in `<>` with your own:
```python theme={null}
import wandb
registry = wandb.Api().create_registry(
name="",
visibility="< 'restricted' | 'organization' >",
)
```
See the [`wandb.Api().create_registry()`](/models/ref/python/#method-apicreate_registry) method reference for a full list of parameters that you can provide when you create a registry.
An artifact type cannot be removed from a registry once it is saved in the registry's settings.
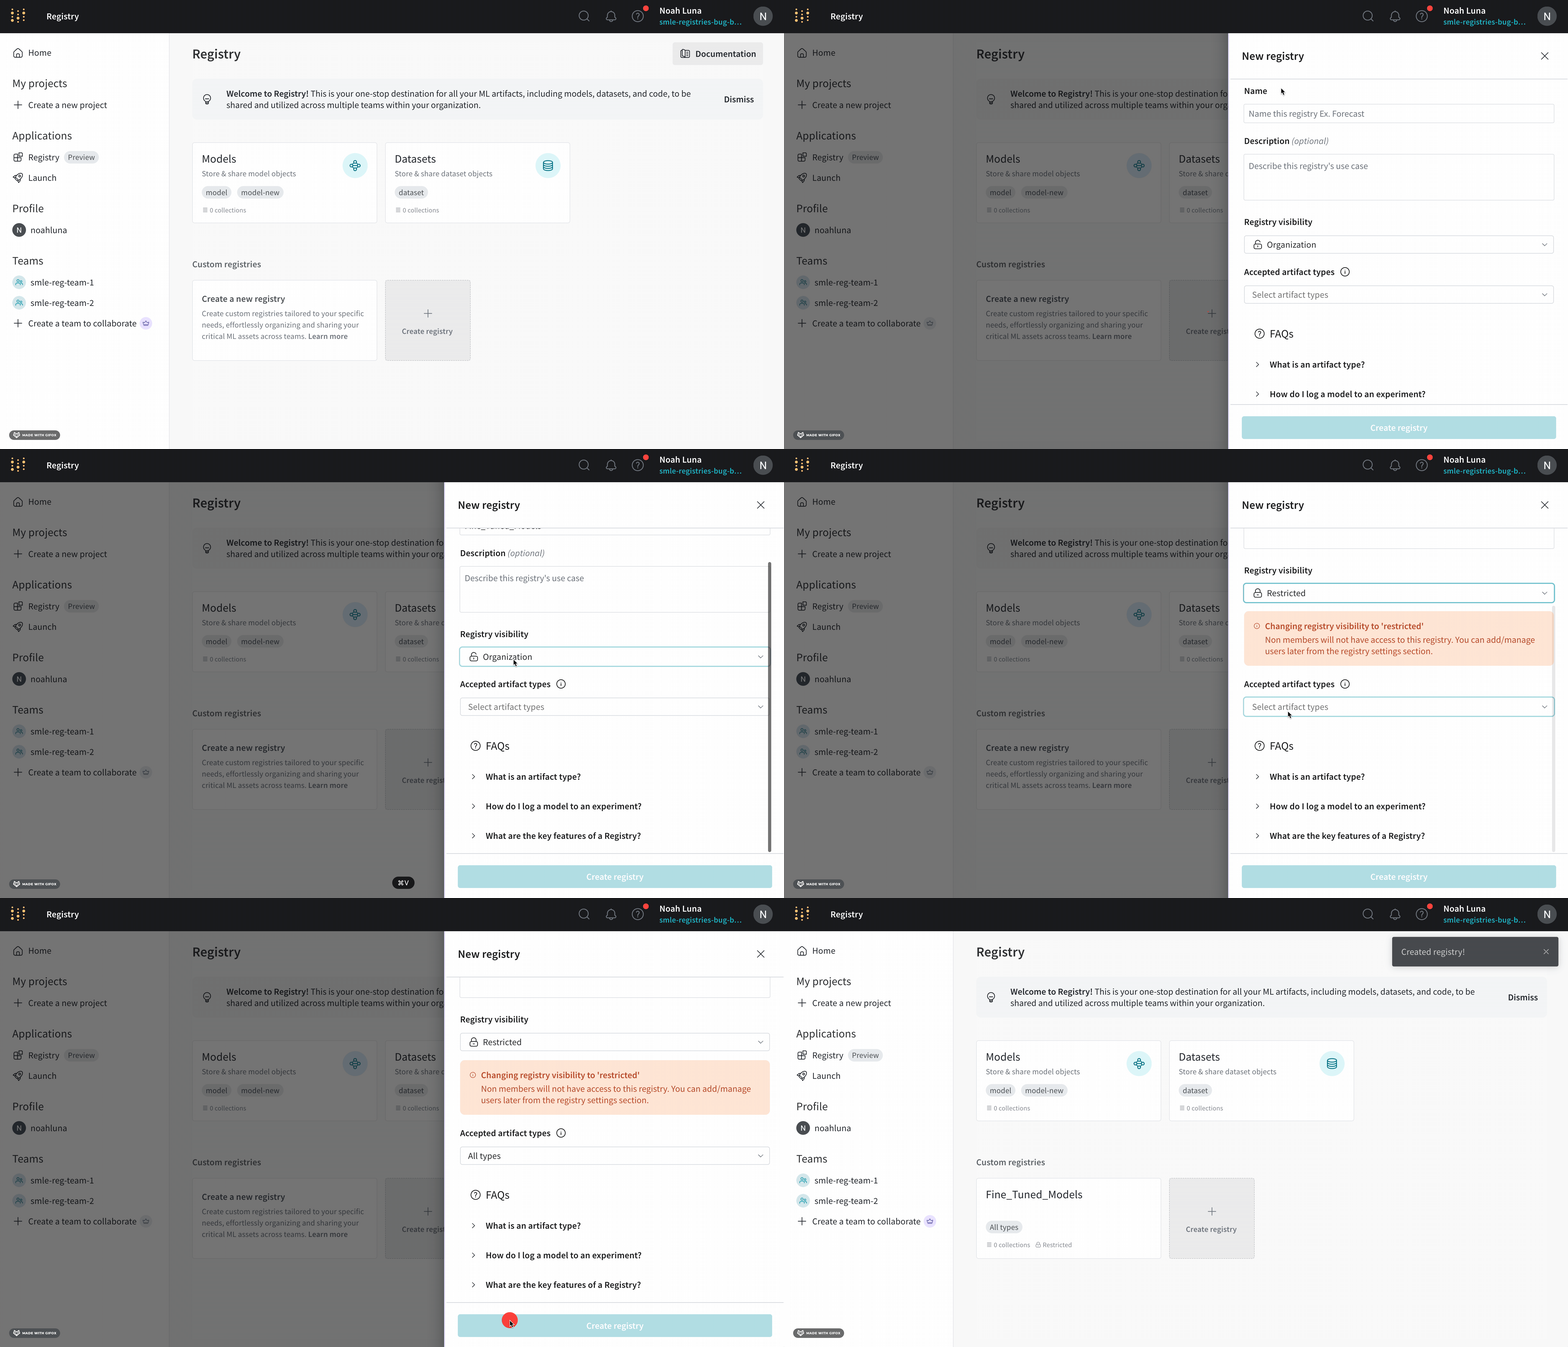
For example, the following image shows a registry called `Fine_Tuned_Models` that a user is about to create. The registry is **Restricted** to only members that are manually added to the registry.
 ## Visibility types
The *visibility* of a registry determines who can access that registry. Restricting the visibility of a registry helps ensure that only specified members can access that registry.
There are two type registry visibility options for a registry:
| Visibility | Description |
| ------------ | ---------------------------------------------------------- |
| Restricted | Only invited organization members can access the registry. |
| Organization | Everyone in the org can access the registry. |
A team admin or registry admin can set the visibility of a registry.
The user who creates a registry with Restricted visibility is added to the registry automatically as its registry admin.
## Configure the visibility of a registry
A team admin or registry admin can assign the visibility of a registry during or after the creation of a registry.
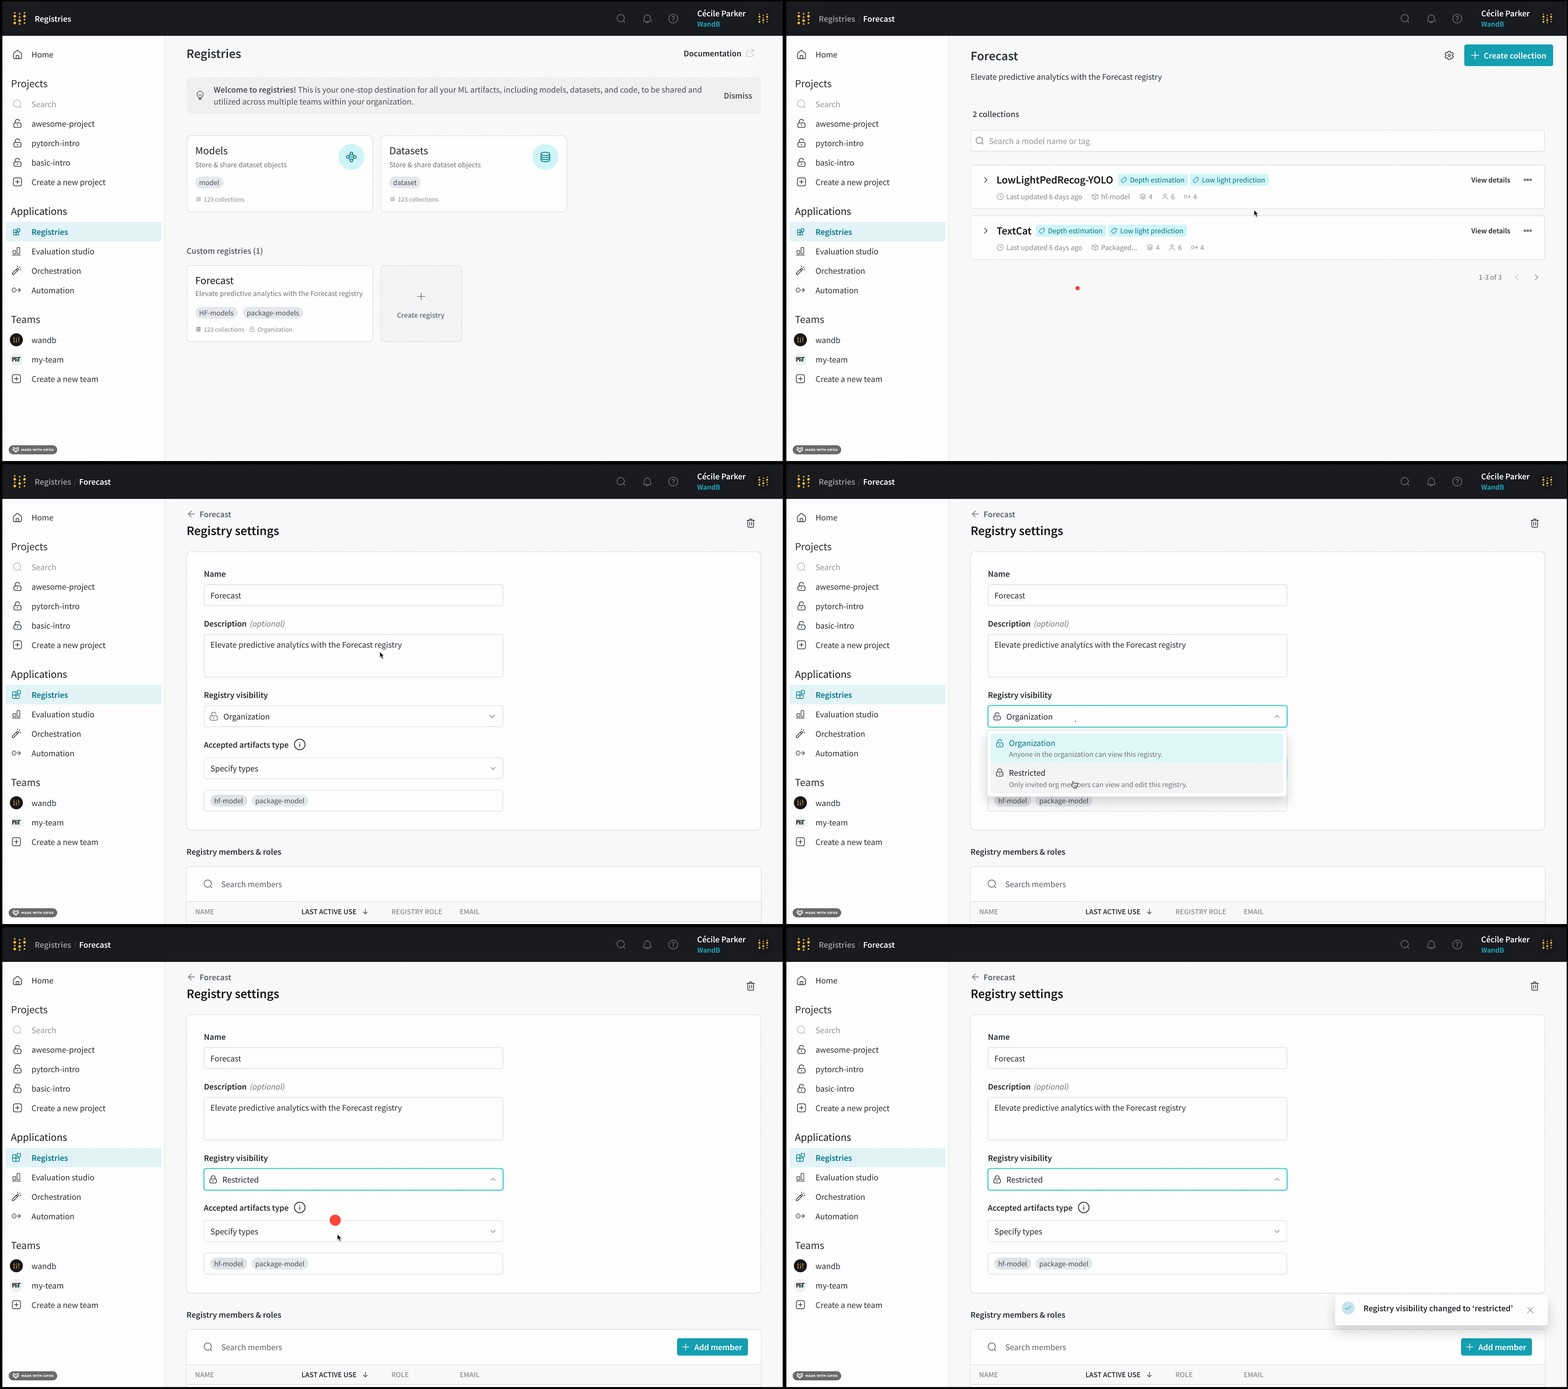
To restrict the visibility of an existing registry:
1. Navigate to the W\&B Registry at [https://wandb.ai/registry/](https://wandb.ai/registry/).
2. Select a registry.
3. Click on the gear icon on the upper right hand corner.
4. From the **Registry visibility** dropdown, select the desired registry visibility.
5. If you select **Restricted visibility**:
1. Add members of your organization that you want to have access to this registry. Scroll to the **Registry members and roles** section and click on the **Add member** button.
2. Within the **Member** field, add the email or username of the member you want to add.
3. Click **Add new member**.
## Visibility types
The *visibility* of a registry determines who can access that registry. Restricting the visibility of a registry helps ensure that only specified members can access that registry.
There are two type registry visibility options for a registry:
| Visibility | Description |
| ------------ | ---------------------------------------------------------- |
| Restricted | Only invited organization members can access the registry. |
| Organization | Everyone in the org can access the registry. |
A team admin or registry admin can set the visibility of a registry.
The user who creates a registry with Restricted visibility is added to the registry automatically as its registry admin.
## Configure the visibility of a registry
A team admin or registry admin can assign the visibility of a registry during or after the creation of a registry.
To restrict the visibility of an existing registry:
1. Navigate to the W\&B Registry at [https://wandb.ai/registry/](https://wandb.ai/registry/).
2. Select a registry.
3. Click on the gear icon on the upper right hand corner.
4. From the **Registry visibility** dropdown, select the desired registry visibility.
5. If you select **Restricted visibility**:
1. Add members of your organization that you want to have access to this registry. Scroll to the **Registry members and roles** section and click on the **Add member** button.
2. Within the **Member** field, add the email or username of the member you want to add.
3. Click **Add new member**.
 See [Create a registry](./create_registry#create-a-custom-registry) for more information on how assign the visibility of a registry when a team admin creates it.