> ## Documentation Index
> Fetch the complete documentation index at: https://docs.wandb.ai/llms.txt
> Use this file to discover all available pages before exploring further.
> Create a W&B Experiment using the Python SDK to track run initialization, hyperparameters, and metric logging.
# Create an experiment
Use the W\&B Python SDK to track machine learning experiments. You can then review the results in an interactive dashboard or export your data to Python for programmatic access with the [W\&B Public API](/models/ref/python/public-api/).
This guide describes how to use W\&B building blocks to create a W\&B Experiment.
## How to create a W\&B Experiment
Create a W\&B Experiment in four steps:
1. [Initialize a W\&B Run](#initialize-a-wb-run)
2. [Capture a dictionary of hyperparameters](#capture-a-dictionary-of-hyperparameters)
3. [Log metrics inside your training loop](#log-metrics-inside-your-training-loop)
4. [Log an artifact to W\&B](#log-an-artifact-to-wb)
### Initialize a W\&B run
Use [`wandb.init()`](/models/ref/python/functions/init) to create a W\&B Run.
The following snippet creates a run in a W\&B project named `“cat-classification”` with the description `“My first experiment”` to help identify this run. Tags `“baseline”` and `“paper1”` are included to remind us that this run is a baseline experiment intended for a future paper publication.
```python theme={null}
import wandb
with wandb.init(
project="cat-classification",
notes="My first experiment",
tags=["baseline", "paper1"],
) as run:
...
```
`wandb.init()` returns a [Run](/models/ref/python/experiments/run) object.
Note: Runs are added to pre-existing projects if that project already exists when you call `wandb.init()`. For example, if you already have a project called `“cat-classification”`, that project will continue to exist and not be deleted. Instead, a new run is added to that project.
### Capture a dictionary of hyperparameters
Save a dictionary of hyperparameters such as learning rate or model type. The model settings you capture in config are useful later to organize and query your results.
```python theme={null}
with wandb.init(
...,
config={"epochs": 100, "learning_rate": 0.001, "batch_size": 128},
) as run:
...
```
For more information on how to configure an experiment, see [Configure Experiments](./config).
### Log metrics inside your training loop
Call [`run.log()`](/models/ref/python/experiments/run/#method-runlog) to log metrics about each training step such as accuracy and loss.
```python theme={null}
model, dataloader = get_model(), get_data()
for epoch in range(run.config.epochs):
for batch in dataloader:
loss, accuracy = model.training_step()
run.log({"accuracy": accuracy, "loss": loss})
```
For more information on different data types you can log with W\&B, see [Log Data During Experiments](/models/track/log/).
### Log an artifact to W\&B
Optionally log a W\&B Artifact. Artifacts make it easy to version datasets and models.
```python theme={null}
# You can save any file or even a directory. In this example, we pretend
# the model has a save() method that outputs an ONNX file.
model.save("path_to_model.onnx")
run.log_artifact("path_to_model.onnx", name="trained-model", type="model")
```
Learn more about [Artifacts](/models/artifacts/) or about versioning models in [Registry](/models/registry/).
### Putting it all together
The full script with the preceding code snippets is found below:
```python theme={null}
import wandb
with wandb.init(
project="cat-classification",
notes="",
tags=["baseline", "paper1"],
# Record the run's hyperparameters.
config={"epochs": 100, "learning_rate": 0.001, "batch_size": 128},
) as run:
# Set up model and data.
model, dataloader = get_model(), get_data()
# Run your training while logging metrics to visualize model performance.
for epoch in range(run.config["epochs"]):
for batch in dataloader:
loss, accuracy = model.training_step()
run.log({"accuracy": accuracy, "loss": loss})
# Upload the trained model as an artifact.
model.save("path_to_model.onnx")
run.log_artifact("path_to_model.onnx", name="trained-model", type="model")
```
## Next steps: Visualize your experiment
Use the W\&B Dashboard as a central place to organize and visualize results from your machine learning models. With just a few clicks, construct rich, interactive charts like [parallel coordinates plots](/models/app/features/panels/parallel-coordinates/), [parameter importance analyses](/models/app/features/panels/parameter-importance/), and [additional chart types](/models/app/features/panels/).
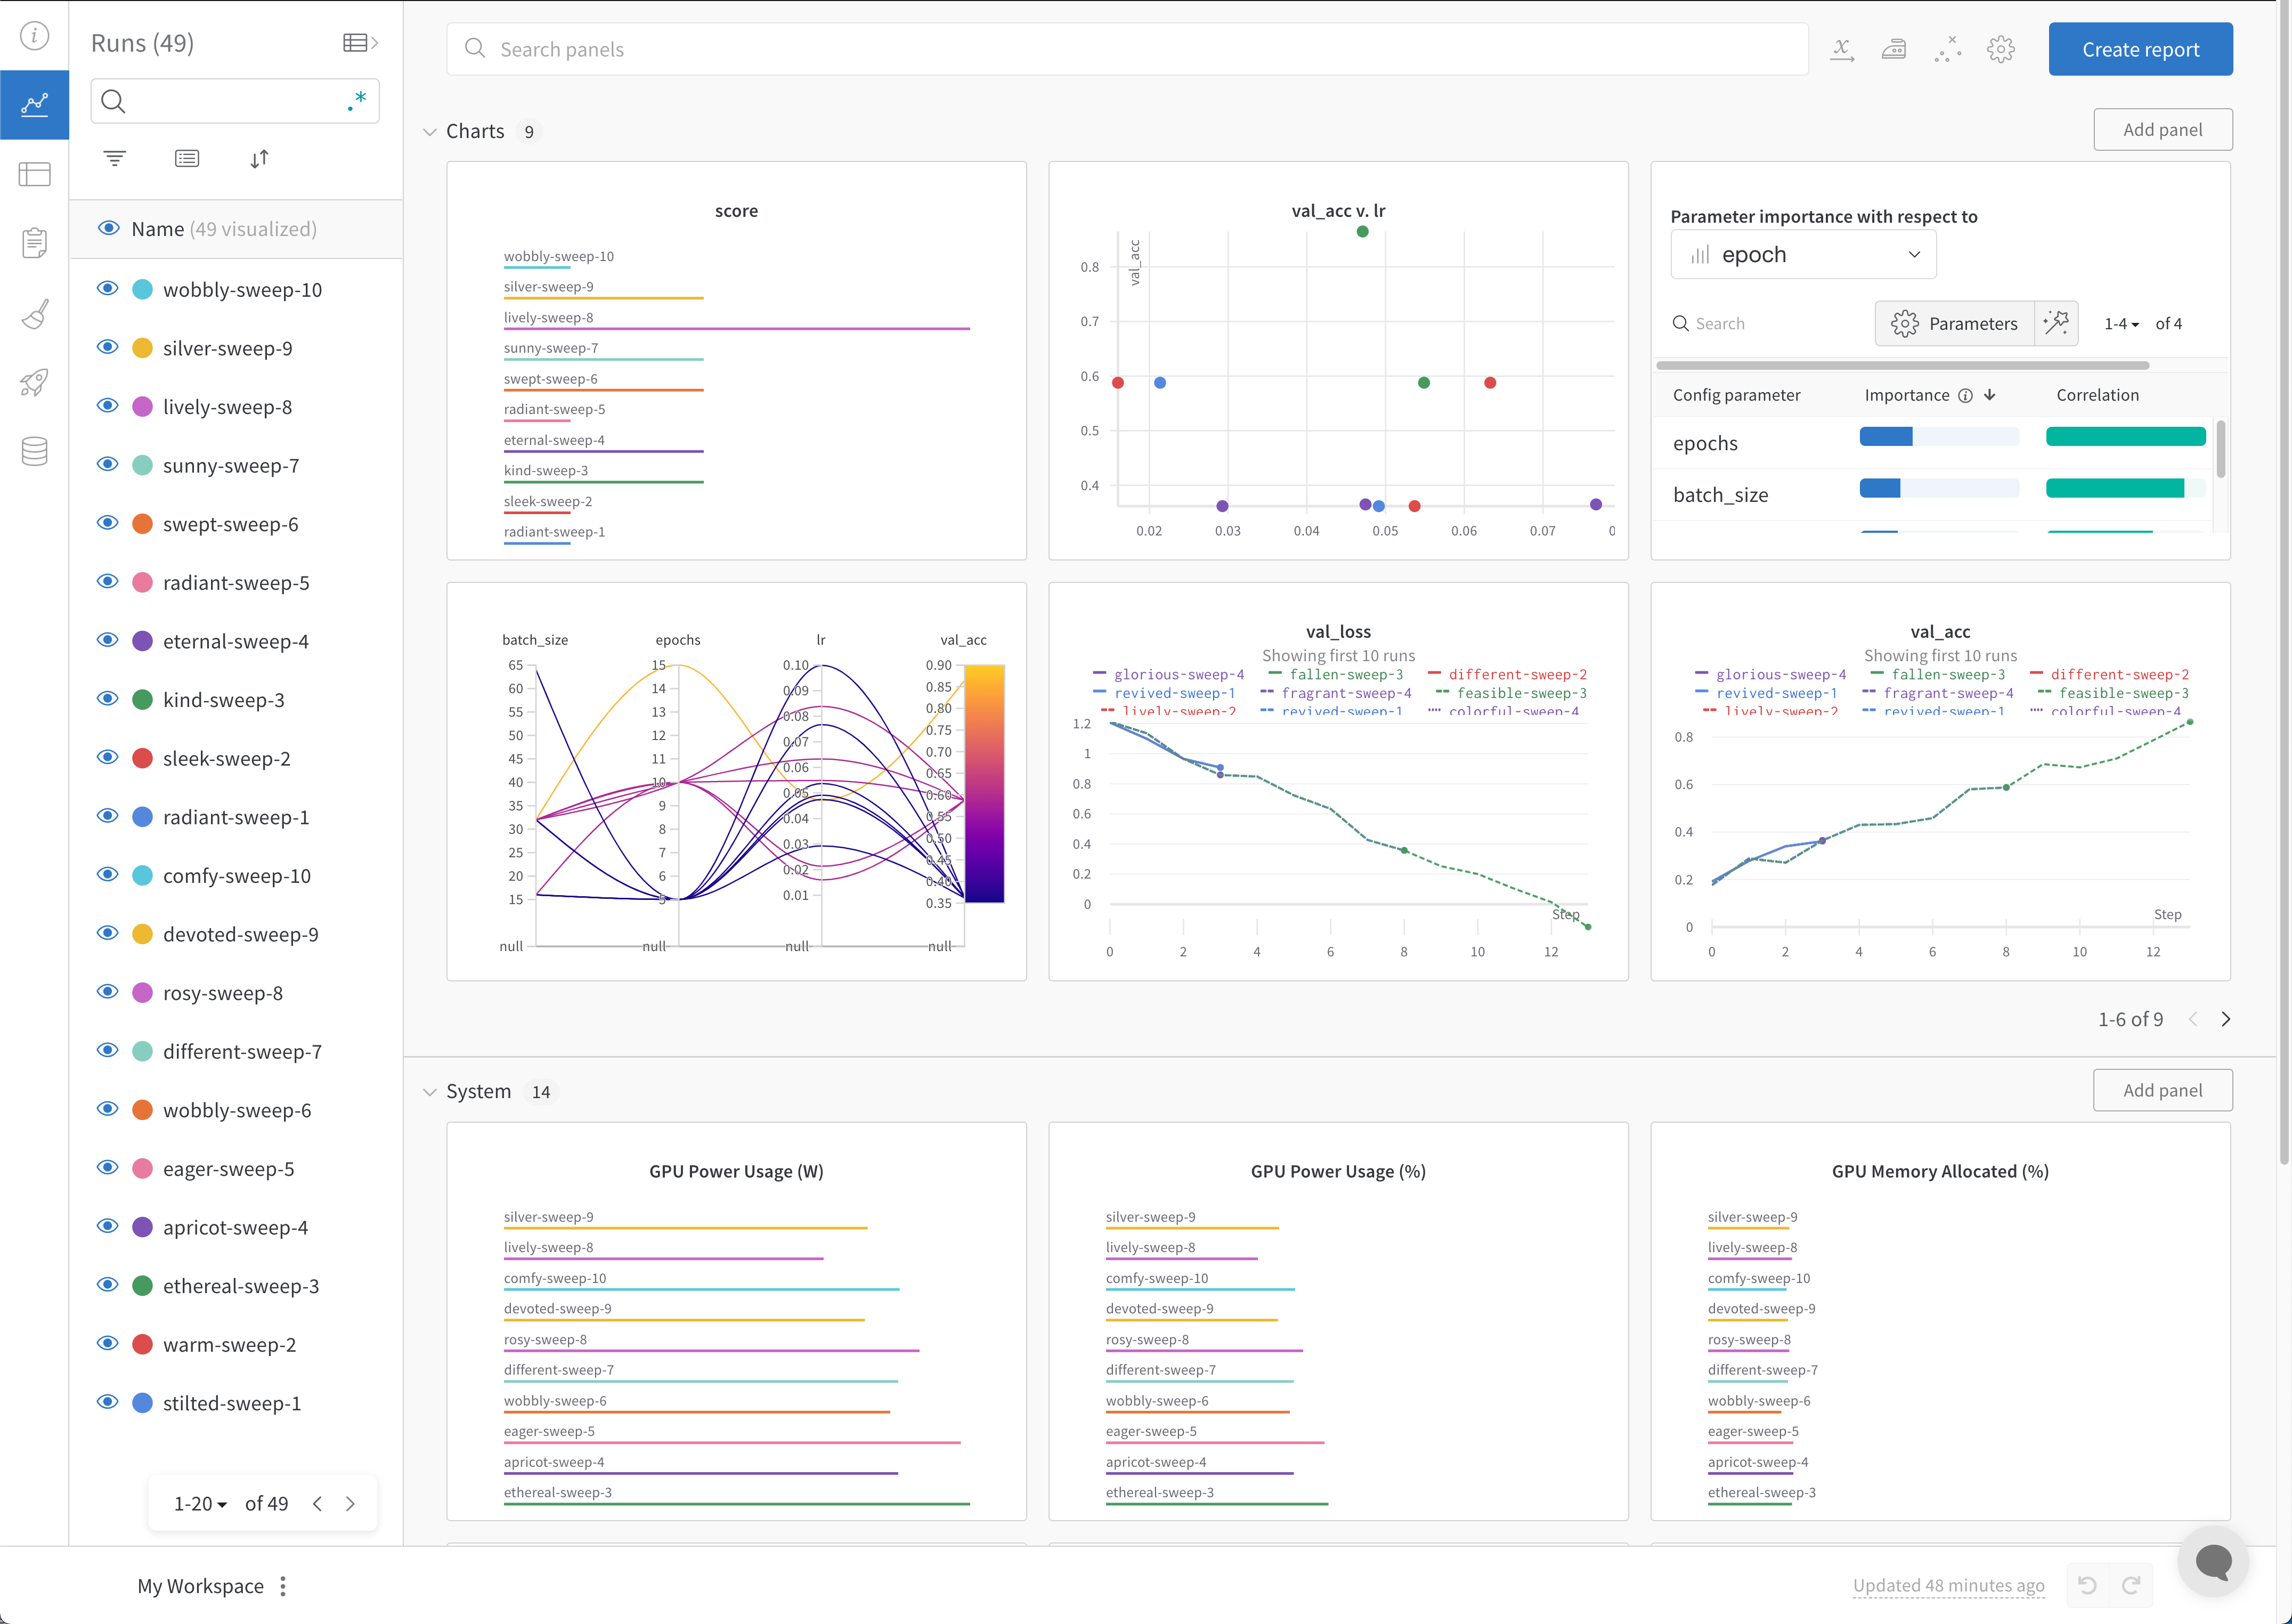 For more information on how to view experiments and specific runs, see [Visualize results from experiments](/models/track/workspaces/).
## Best practices
The following are some suggested guidelines to consider when you create experiments:
1. **Finish your runs**: Use `wandb.init()` in a `with` statement to automatically mark the run as finished when the code completes or raises an exception.
* In Jupyter notebooks, it may be more convenient to manage the Run object yourself. In this case, you can explicitly call `finish()` on the Run object to mark it complete:
```python theme={null}
# In a notebook cell:
run = wandb.init()
# In a different cell:
run.finish()
```
2. **Config**: Track hyperparameters, architecture, dataset, and anything else you'd like to use to reproduce your model. These will show up in columns— use config columns to group, sort, and filter runs dynamically in the app.
3. **Project**: A project is a set of experiments you can compare together. Each project gets a dedicated dashboard page, and you can easily turn on and off different groups of runs to compare different model versions.
4. **Notes**: Set a quick commit message directly from your script. Edit and access notes in the Overview section of a run in the W\&B App.
5. **Tags**: Identify baseline runs and favorite runs. You can filter runs using tags. You can edit tags at a later time on the Overview section of your project's dashboard on the W\&B App.
6. **Create multiple run sets to compare experiments**: When comparing experiments, create multiple run sets to make metrics easy to compare. You can toggle run sets on or off on the same chart or group of charts.
The following code snippet demonstrates how to define a W\&B Experiment using the best practices listed above:
```python theme={null}
import wandb
config = {
"learning_rate": 0.01,
"momentum": 0.2,
"architecture": "CNN",
"dataset_id": "cats-0192",
}
with wandb.init(
project="detect-cats",
notes="tweak baseline",
tags=["baseline", "paper1"],
config=config,
) as run:
...
```
For more information about available parameters when defining a W\&B Experiment, see the [`wandb.init()`](/models/ref/python/functions/init) API docs in the [API Reference Guide](/models/ref/python/).
For more information on how to view experiments and specific runs, see [Visualize results from experiments](/models/track/workspaces/).
## Best practices
The following are some suggested guidelines to consider when you create experiments:
1. **Finish your runs**: Use `wandb.init()` in a `with` statement to automatically mark the run as finished when the code completes or raises an exception.
* In Jupyter notebooks, it may be more convenient to manage the Run object yourself. In this case, you can explicitly call `finish()` on the Run object to mark it complete:
```python theme={null}
# In a notebook cell:
run = wandb.init()
# In a different cell:
run.finish()
```
2. **Config**: Track hyperparameters, architecture, dataset, and anything else you'd like to use to reproduce your model. These will show up in columns— use config columns to group, sort, and filter runs dynamically in the app.
3. **Project**: A project is a set of experiments you can compare together. Each project gets a dedicated dashboard page, and you can easily turn on and off different groups of runs to compare different model versions.
4. **Notes**: Set a quick commit message directly from your script. Edit and access notes in the Overview section of a run in the W\&B App.
5. **Tags**: Identify baseline runs and favorite runs. You can filter runs using tags. You can edit tags at a later time on the Overview section of your project's dashboard on the W\&B App.
6. **Create multiple run sets to compare experiments**: When comparing experiments, create multiple run sets to make metrics easy to compare. You can toggle run sets on or off on the same chart or group of charts.
The following code snippet demonstrates how to define a W\&B Experiment using the best practices listed above:
```python theme={null}
import wandb
config = {
"learning_rate": 0.01,
"momentum": 0.2,
"architecture": "CNN",
"dataset_id": "cats-0192",
}
with wandb.init(
project="detect-cats",
notes="tweak baseline",
tags=["baseline", "paper1"],
config=config,
) as run:
...
```
For more information about available parameters when defining a W\&B Experiment, see the [`wandb.init()`](/models/ref/python/functions/init) API docs in the [API Reference Guide](/models/ref/python/).