Add job to queue
3 minute read
The following page describes how to add launch jobs to a launch queue.
Add jobs to your queue
Add jobs to your queue interactively with the W&B App or programmatically with the W&B CLI.
Add a job to your queue programmatically with the W&B App.
- Navigate to your W&B Project Page.
- Select the Jobs icon on the left panel:

- The Jobs page displays a list of W&B launch jobs that were created from previously executed W&B runs.
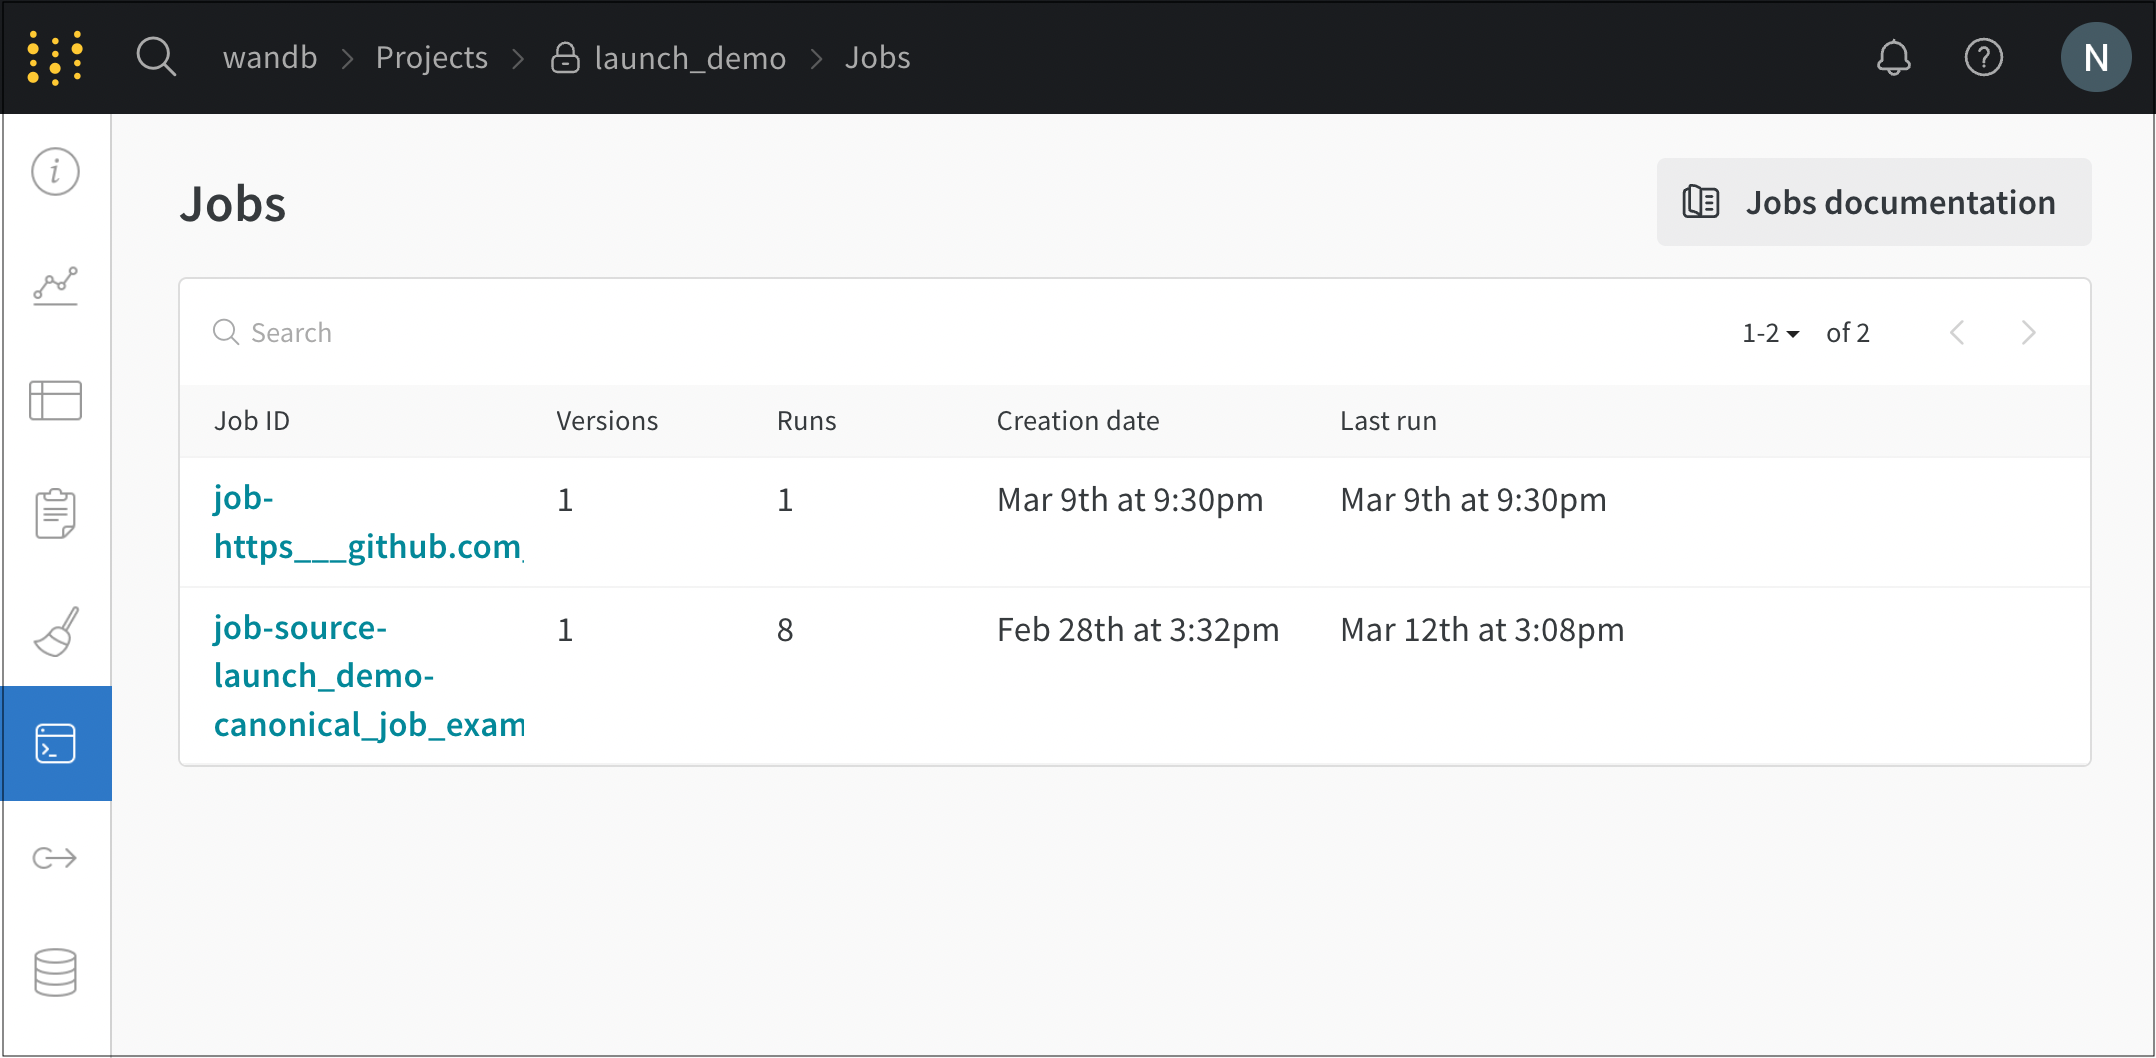
- Select the Launch button next to the name of the Job name. A modal will appear on the right side of the page.
- From the Job version dropdown, select the version of hte launch job you want to use. Launch jobs are versioned like any other W&B Artifact. Different versions of the same launch job will be created if you make modifications to the software dependencies or source code used to run the job.
- Within the Overrides section, provide new values for any inputs that are configured for your launch job. Common overrides include a new entrypoint command, arguments, or values in the
wandb.configof your new W&B run.
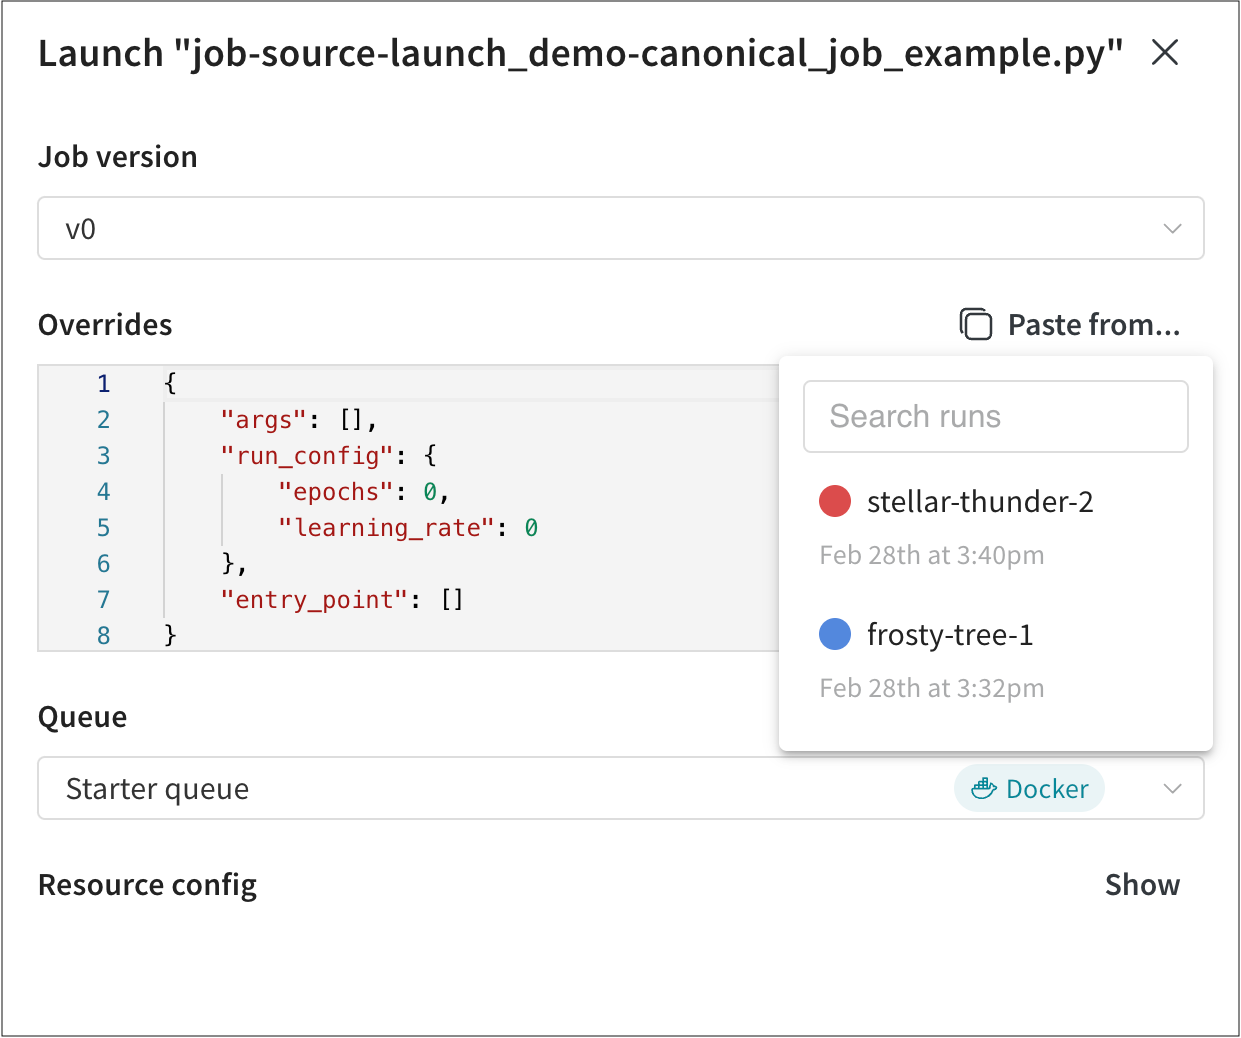 You can copy and paste values from other W&B runs that used your launch job by clicking on the Paste from… button.
 - From the Queue dropdown, select the name of the launch queue you want to add your launch job to.
- Use the Job Priority dropdown to specify the priority of your launch job. A launch job’s priority is set to “Medium” if the launch queue does not support prioritization.
- (Optional) Follow this step only if a queue config template was created by your team admin
Within the Queue Configurations field, provide values for configuration options that were created by the admin of your team.
For example, in the following example, the team admin configured AWS instance types that can be used by the team. In this case, team members can pick either theml.m4.xlargeorml.p3.xlargecompute instance type to train their model.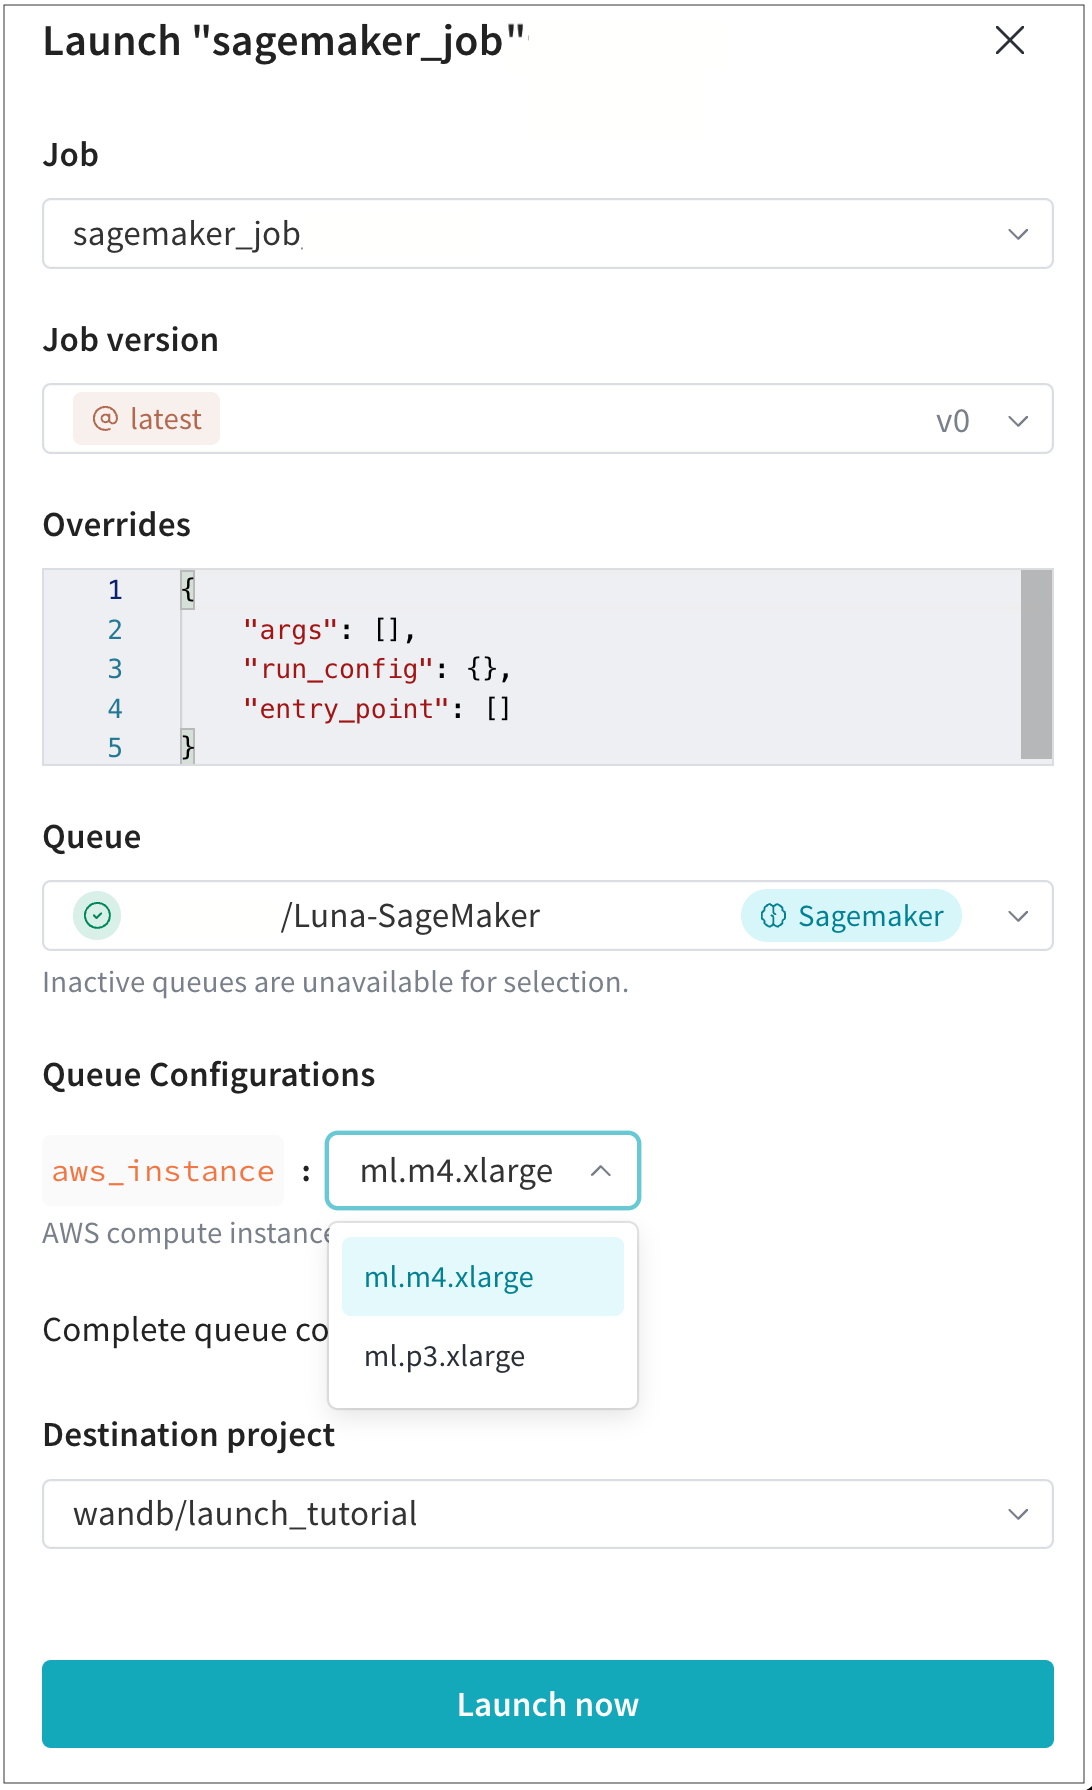
- Select the Destination project, where the resulting run will appear. This project needs to belong to the same entity as the queue.
- Select the Launch now button.
Use the wandb launch command to add jobs to a queue. Create a JSON configuration with hyperparameter overrides. For example, using the script from the Quickstart guide, we create a JSON file with the following overrides:
{
  "overrides": {
      "args": [],
      "run_config": {
          "learning_rate": 0,
          "epochs": 0
      },
      "entry_point": []
  }
}
If you want to override the queue configuration, or if your launch queue does not have a configuration resource defined, you can specify the resource_args key in your config.json file. For example, following continuing the example above, your config.json file might look similar to the following:
{
  "overrides": {
      "args": [],
      "run_config": {
          "learning_rate": 0,
          "epochs": 0
      },
      "entry_point": []
  },
  "resource_args": {
        "<resource-type>" : {
            "<key>": "<value>"
        }
  }
}
Replace values within the <> with your own values.
Provide the name of the queue for the queue(-q) flag, the name of the job for the job(-j) flag, and the path to the configuration file for the config(-c) flag.
wandb launch -j <job> -q <queue-name> \
-e <entity-name> -c path/to/config.json
If you work within a W&B Team, we suggest you specify the entity flag (-e) to indicate which entity the queue will use.
Feedback
Was this page helpful?
Glad to hear it! If you have further feedback, please let us know.
Sorry to hear that. Please tell us how we can improve.