wandb==0.12.11부터 지원되며 kfp<2.0.0이 필요합니다.
가입하고 API 키 만들기
더 간편하게 하려면 User Settings로 이동해 API 키를 생성하세요. API 키는 즉시 복사해 비밀번호 관리자와 같은 안전한 위치에 저장하세요.
- 오른쪽 상단에 있는 사용자 프로필 아이콘을 클릭합니다.
- User Settings를 선택한 다음 API Keys 섹션까지 스크롤합니다.
wandb 라이브러리 설치 및 로그인
wandb 라이브러리를 설치하고 로그인하려면 다음 단계를 따르세요.
- 명령줄
- Python
- Python notebook
-
WANDB_API_KEY환경 변수를 API 키로 설정합니다.<>로 묶인 값은 자신의 값으로 바꾸세요. -
wandb라이브러리를 설치하고 로그인합니다.
컴포넌트에 데코레이터 적용하기
wandb 라이브러리가 설치되어 있으면 이제 개별 파이프라인 컴포넌트에서 W&B tracking을 활성화할 수 있습니다. @wandb_log 데코레이터를 추가하고 평소처럼 컴포넌트를 만드세요. 그러면 파이프라인을 실행할 때마다 입력 및 출력 파라미터와 아티팩트가 자동으로 W&B에 로깅됩니다.
컨테이너에 환경 변수 전달하기
WANDB_KUBEFLOW_URL 환경 변수도 Kubeflow Pipelines 인스턴스의 기본 URL로 설정해야 합니다. 예를 들면 https://kubeflow.mysite.com입니다.
프로그래밍 방식으로 데이터에 액세스하기
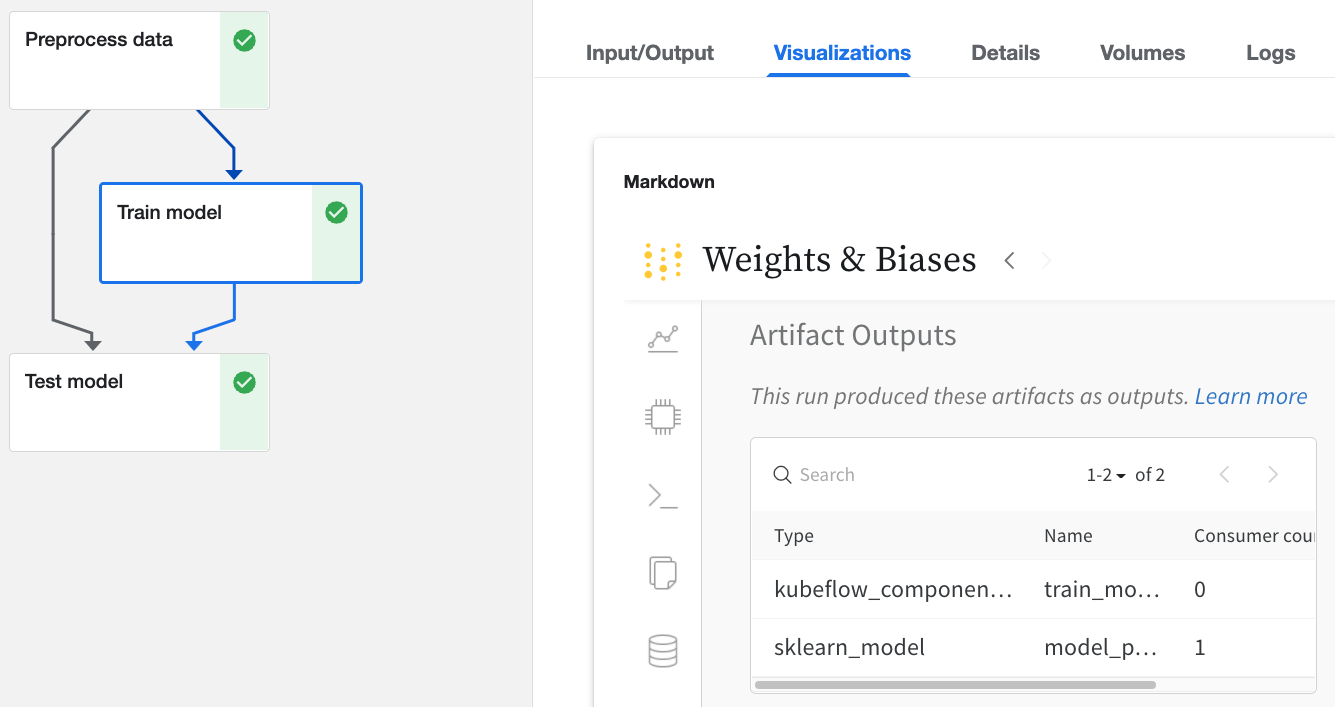
Kubeflow Pipelines UI
- Input/Output 및 ML Metadata 탭에서 입력과 출력에 대한 세부 정보를 확인하세요.
- Visualizations 탭에서 W&B 웹 앱을 확인하세요.
W&B 웹 앱 UI
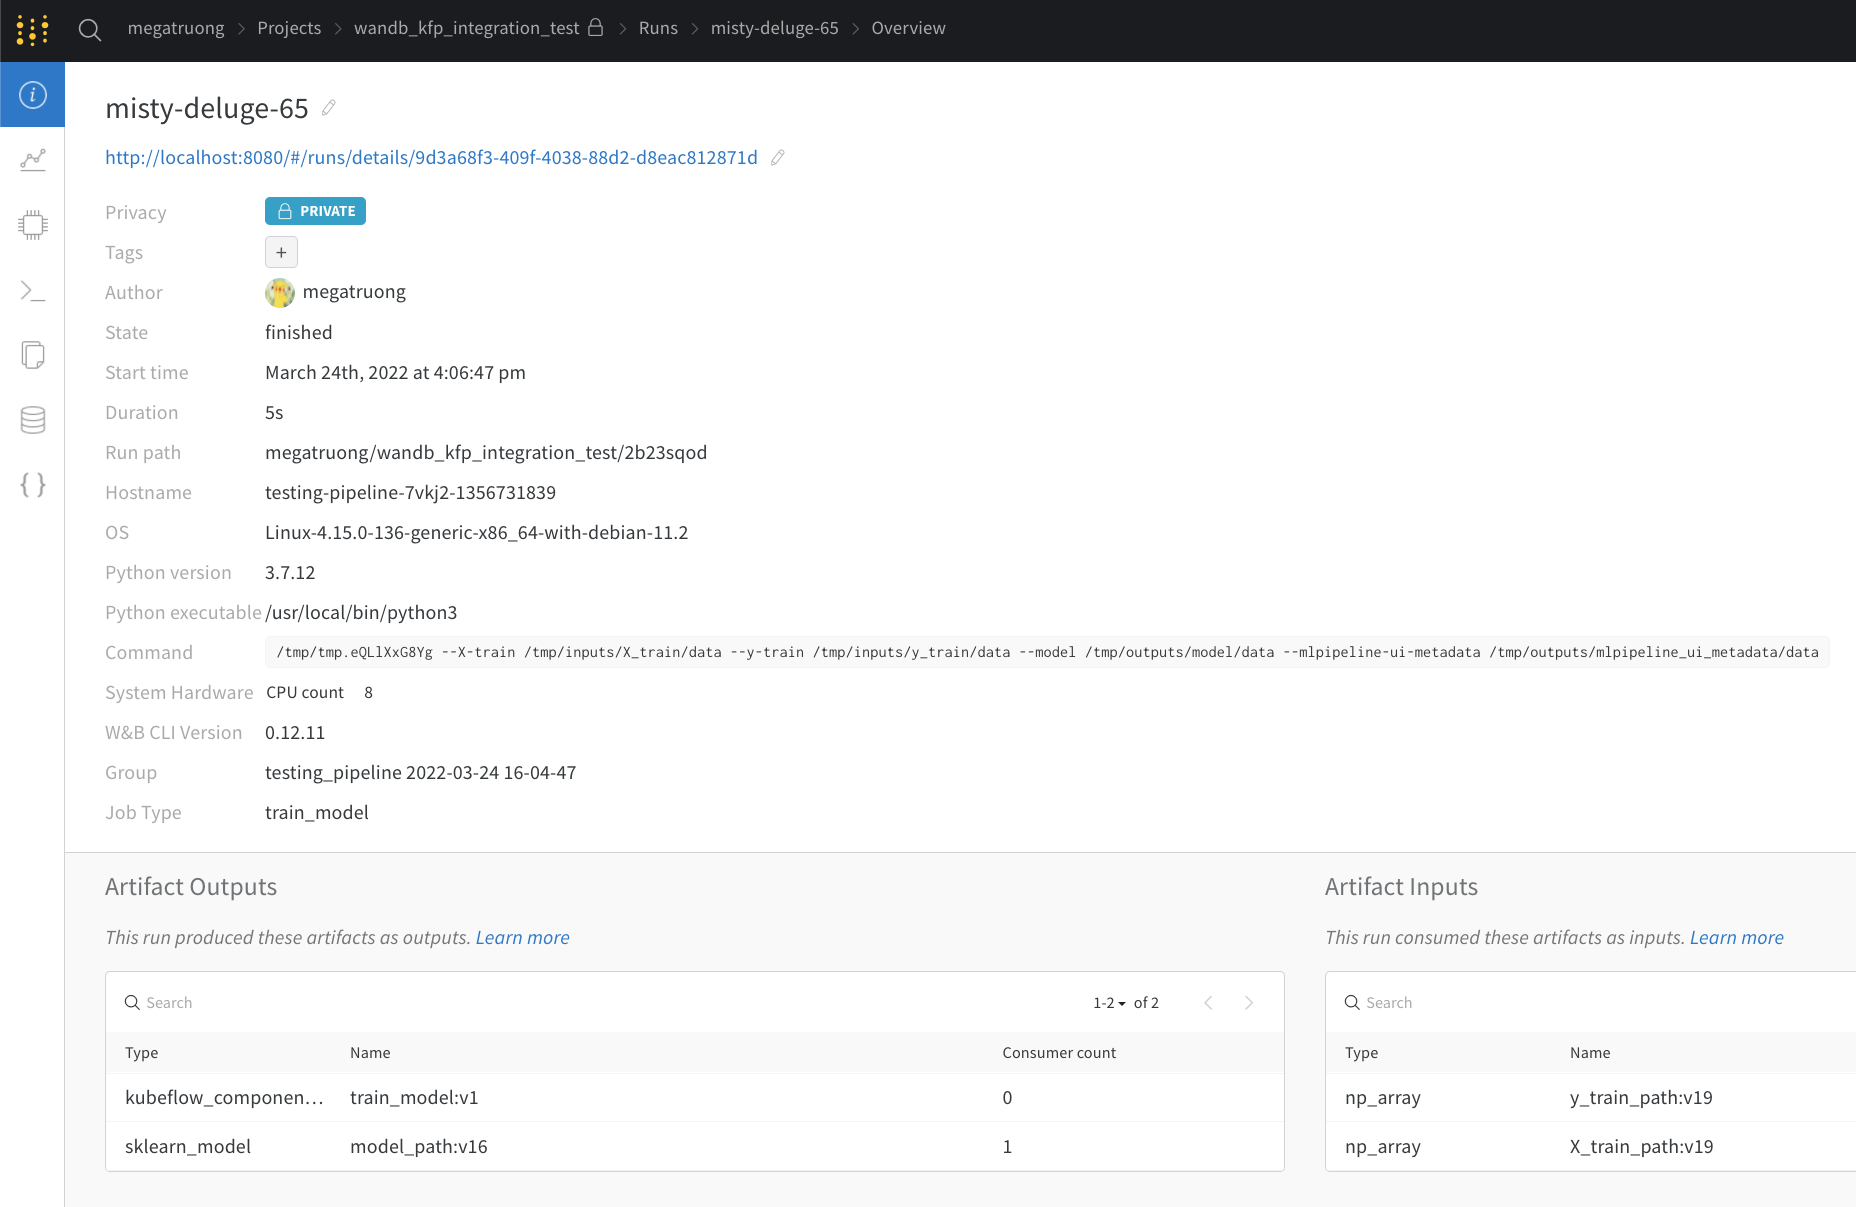
Public API
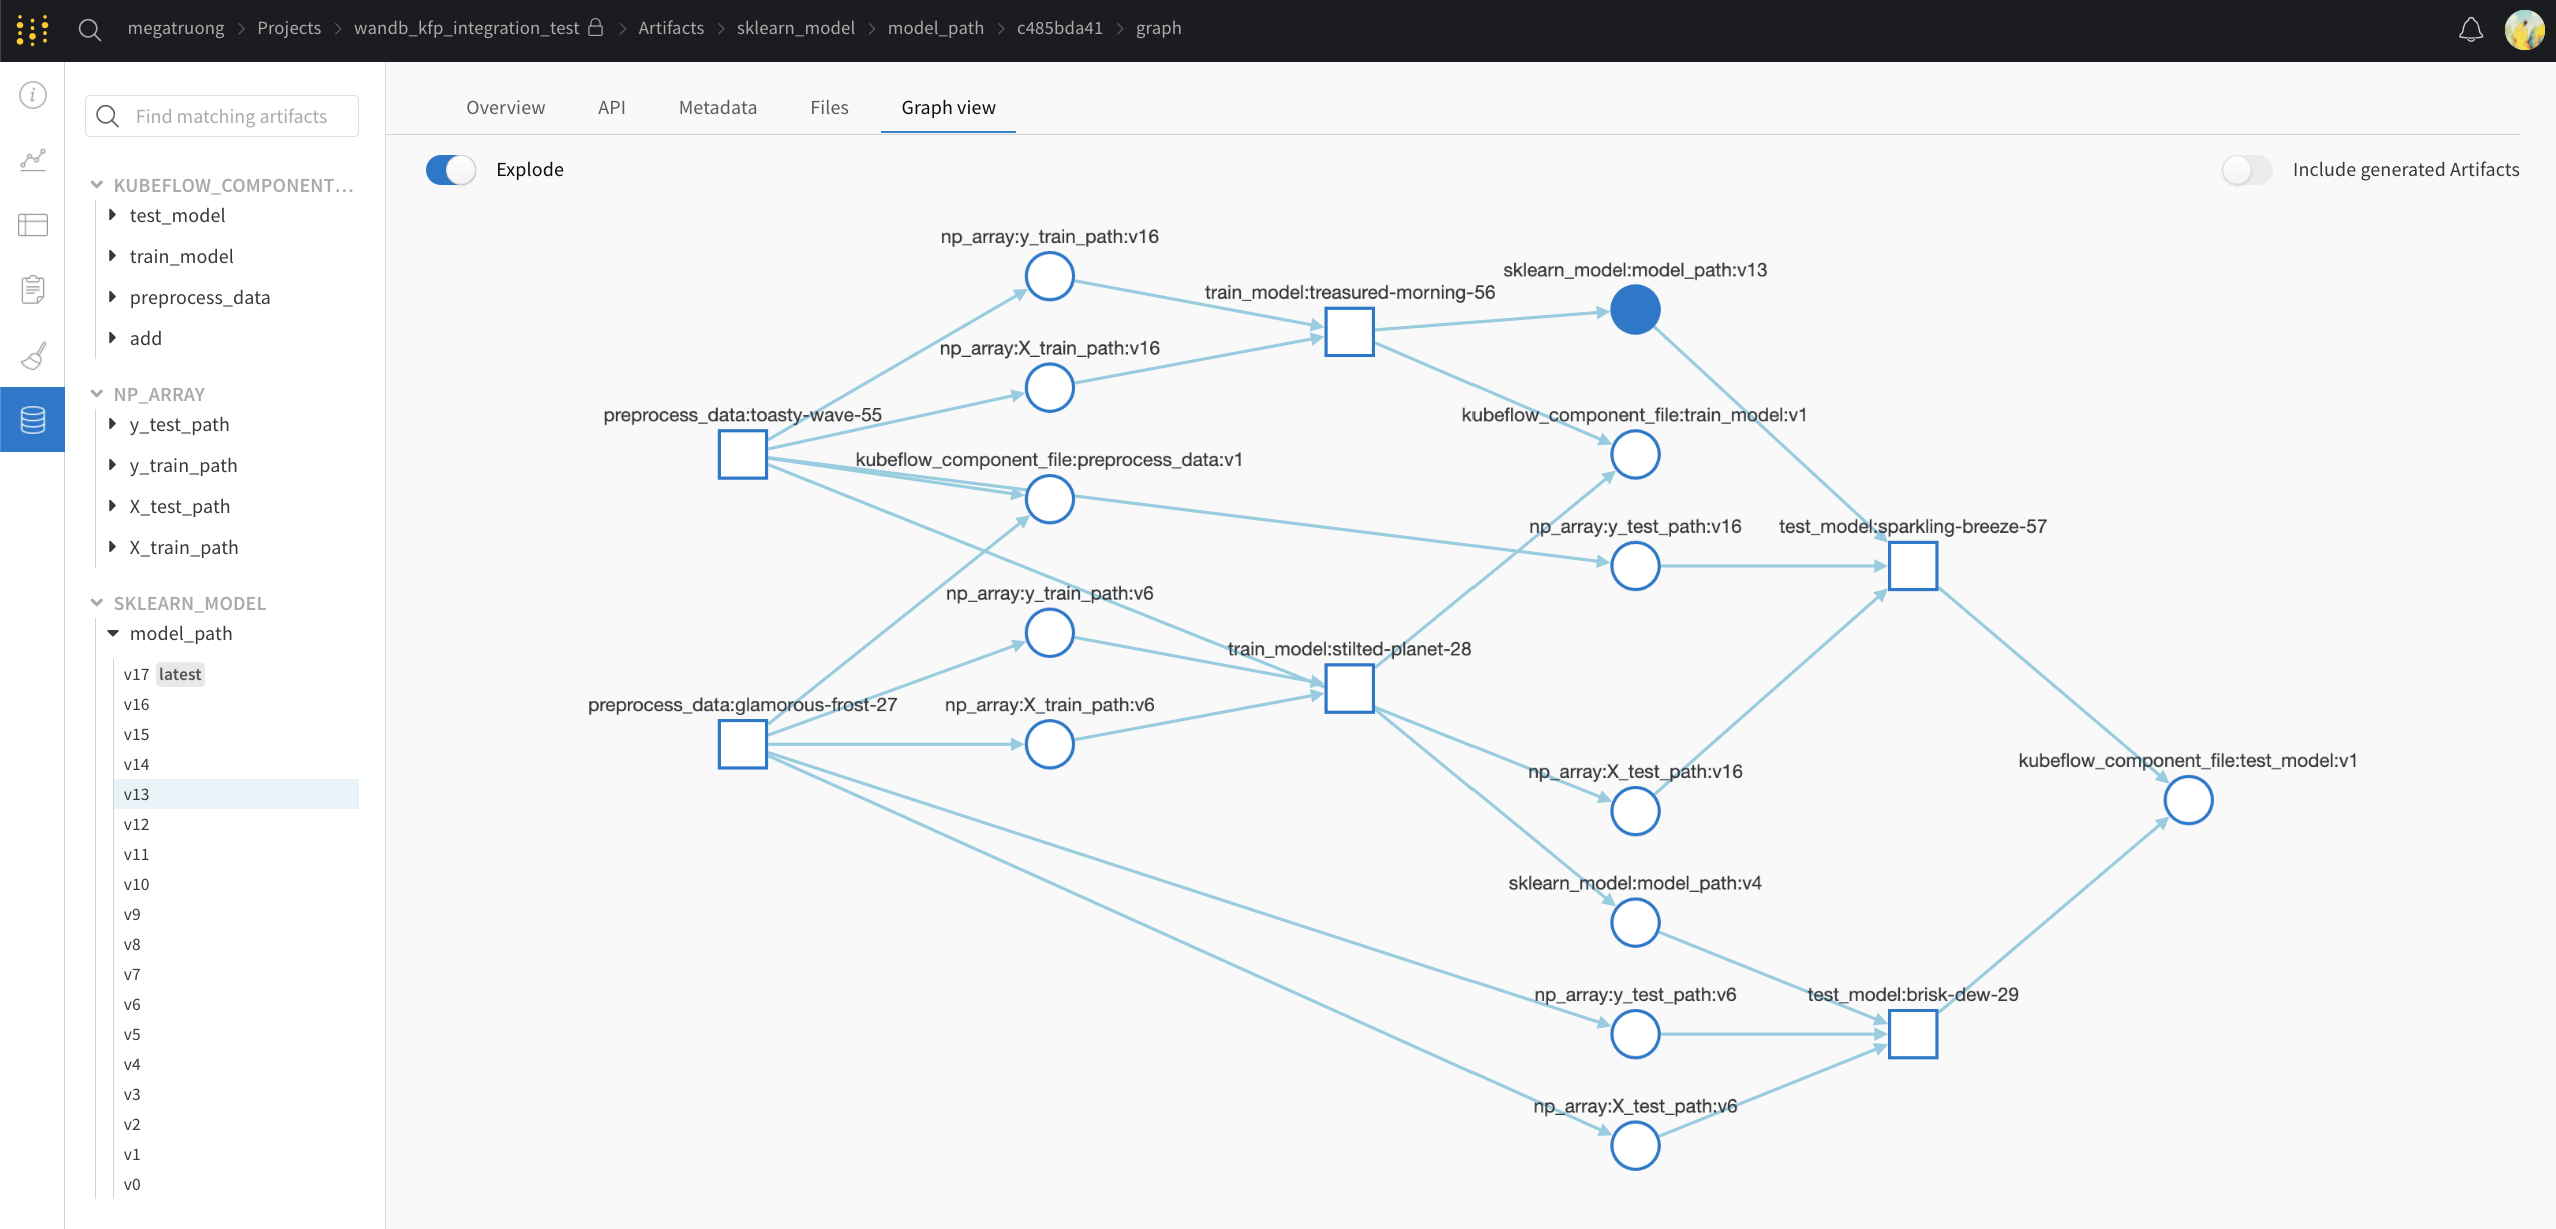
Kubeflow Pipelines에서 W&B로의 개념 매핑
세밀한 로깅
@wandb_log 데코레이터는 입력과 출력을 자동으로 처리하지만, 각 에포크의 트레이닝 메트릭과 같은 중간 값은 캡처하지 않습니다. 로깅을 더 세밀하게 제어하려면 컴포넌트 곳곳에 wandb.log() 및 wandb.log_artifact() Call을 추가할 수 있습니다.
명시적인 wandb.log_artifact() Call 사용
@wandb_log 데코레이터는 관련 입력과 출력을 자동으로 추적합니다. 트레이닝 과정을 로깅하려면 다음과 같이 해당 로깅을 명시적으로 추가할 수 있습니다: