これはインタラクティブなノートブックです。ローカルで実行することも、以下のリンクを使用することもできます。
事前準備
Weave でプロンプトを作成して改善する
データセットを取得する
base64 エンコードされているため、LLM は前処理なしでこのデータを使用できます。
NER パイプラインを構築する
- データセット内の PIL 画像を受け取り、VLM に渡せる画像の
base64エンコード済み string 表現を返すencode_image関数。 - 画像とシステムプロンプトを受け取り、システムプロンプトの記述に従って、その画像から抽出した固有表現を返す
extract_named_entities_from_image関数。
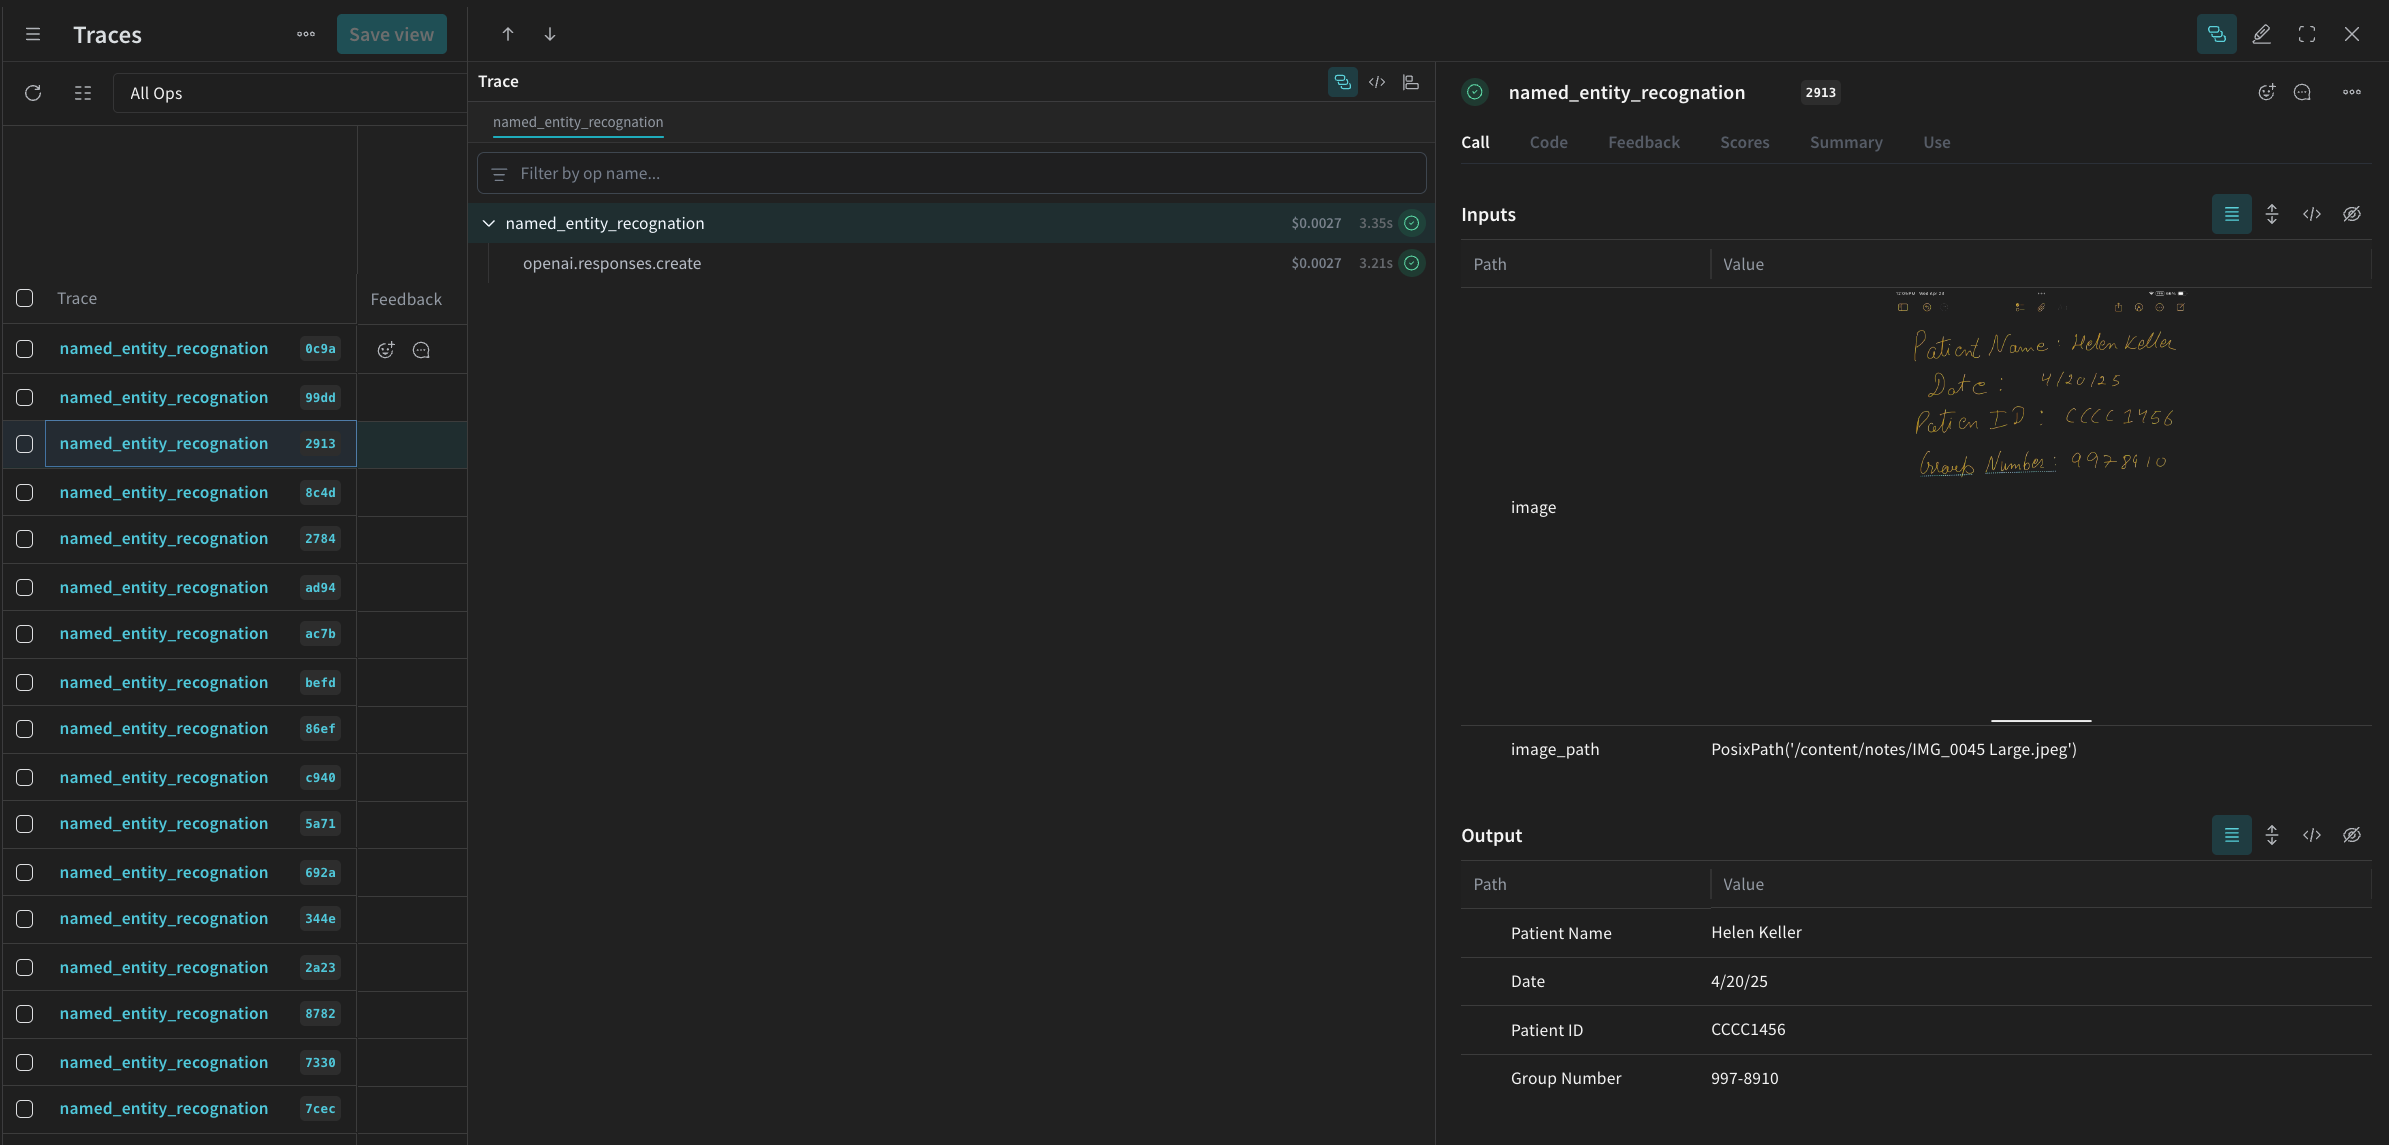
named_entity_recognation という関数を作成します。この関数は次の処理を行います。
- 画像データを NER パイプラインに渡します。
- 結果を正しい形式の JSON で返します。
@weave.op() デコレータ を使用します。
named_entity_recognation が実行されるたびに、完全なトレース結果が Weave UI に表示されます。トレースを表示するには、Weave プロジェクトの Traces タブにアクセスします。
processing_results.json に保存します。結果は Weave UI でも確認できます。
Weave を使ってパイプラインを評価する
- プログラムによる scorer。
- LLM-as-a-judge scorer。
プログラムによる Scorer
check_for_missing_fields_programatically は、モデルの出力 (named_entity_recognition 関数の出力) を受け取り、結果内で欠落している、または空の keys を特定します。
このチェックは、モデルがいずれのフィールドも抽出できなかったサンプルを特定するのに役立ちます。
LLM-as-a-judge scorer
output の両方を提供します。参照されるのはモデルの出力だけでなく、画像の内容そのものです。
このステップで使用する scorer check_for_missing_fields_with_llm は、LLM (具体的には OpenAI の gpt-4o) を使用してスコアリングを行います。eval_prompt の内容で指定されているとおり、check_for_missing_fields_with_llm は Boolean 値を出力します。すべてのフィールドが画像内の情報と一致し、形式も正しい場合、scorer は true を返します。いずれかのフィールドが欠落している、空である、不正確である、または一致していない場合、結果は false となり、scorer は問題を説明するメッセージも返します。
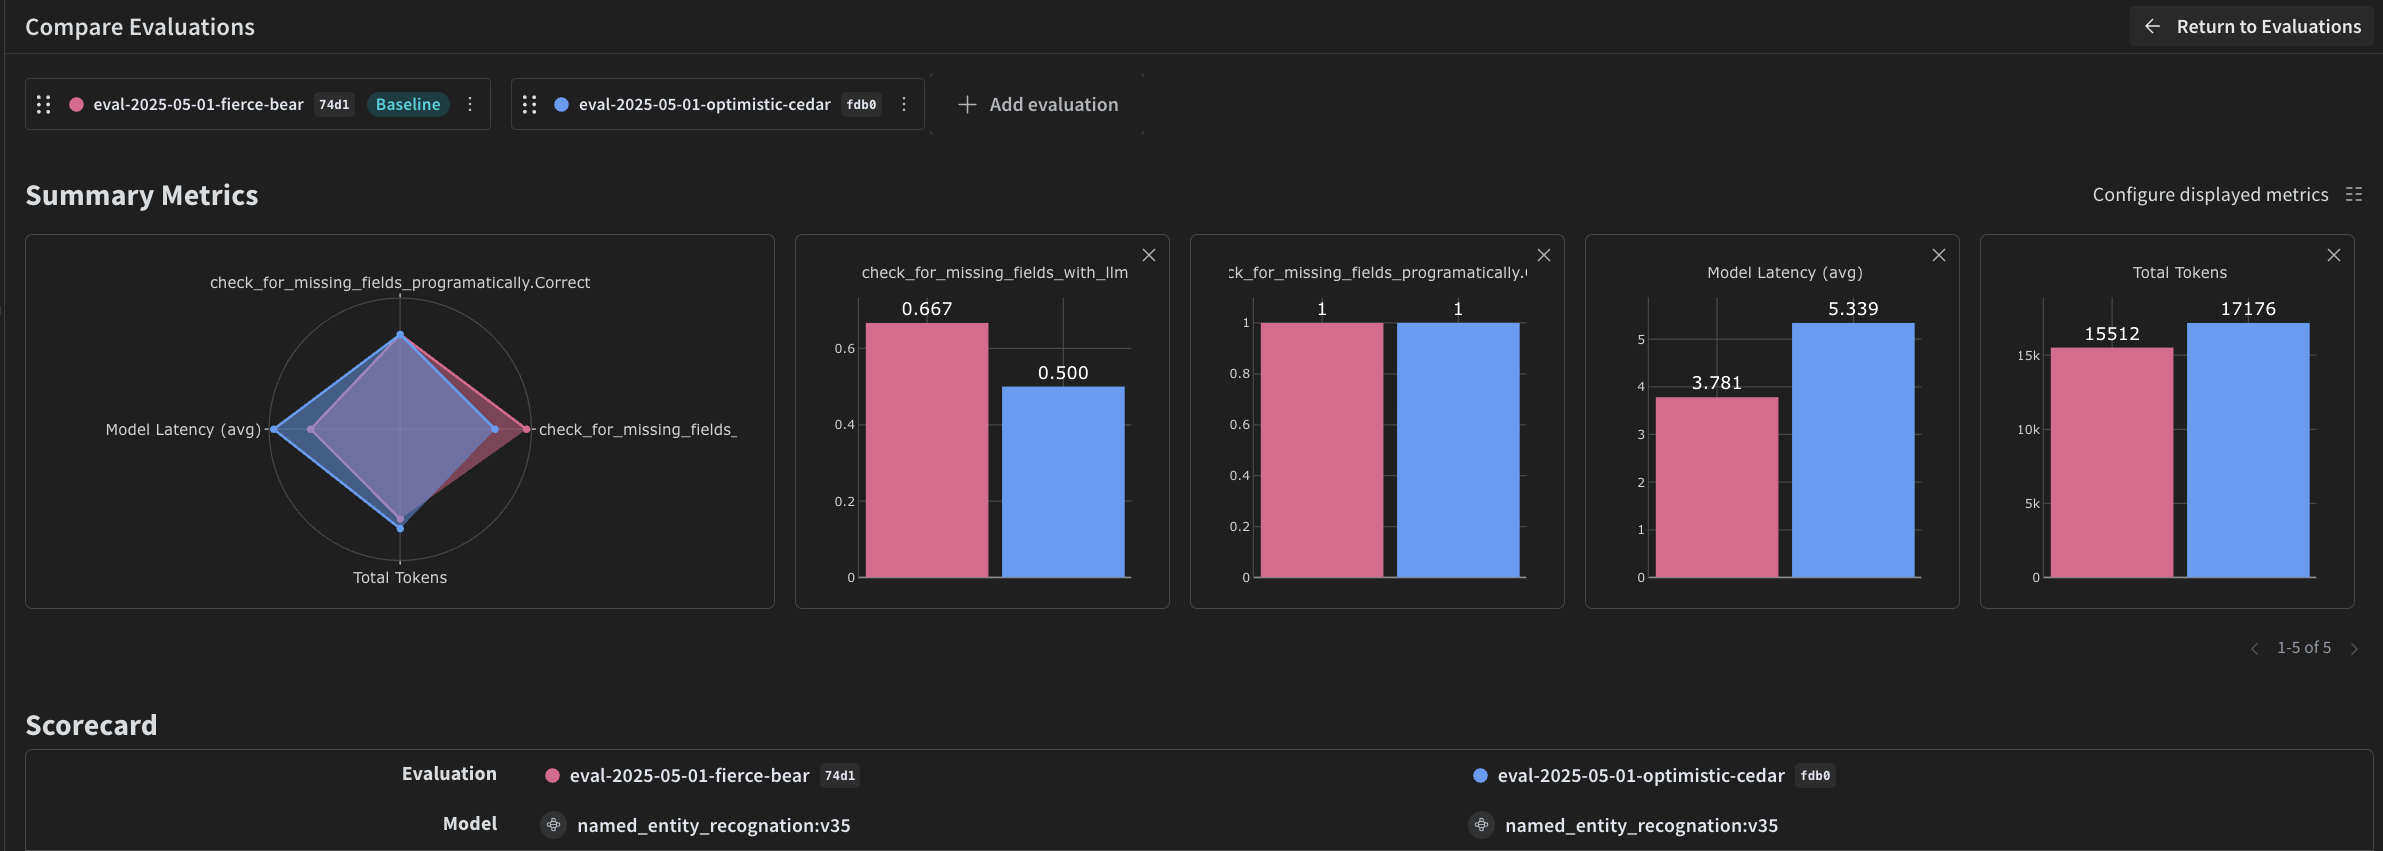
評価を実行する
dataset を自動的に反復処理し、結果をまとめて Weave UI にログする評価 call を定義します。
次のコードは評価を開始し、NER パイプラインの各出力に 2 つの Scorers を適用します。結果は Weave UI の Evals タブで確認できます。