Overview
- Python
- TypeScript
이 가이드의 예제에서는 어노테이션을 사용합니다. 어노테이션은 미디어 로깅을 시작하는 가장 직접적인 방법이므로 사용을 권장합니다. 더 고급 설정은 Content API 섹션을 참조하세요.미디어를 Weave에 로깅하려면
Annotated[bytes, Content] 또는 Annotated[str, Content] 같은 타입 어노테이션을 op의 입력 또는 반환 유형에 추가하세요. 경로 인수를 Annotated[str, Content]로 어노테이션하면 Weave가 트레이스 내에서 미디어를 자동으로 열고, 감지하고, 표시합니다.이미지 로깅
- Python
- TypeScript
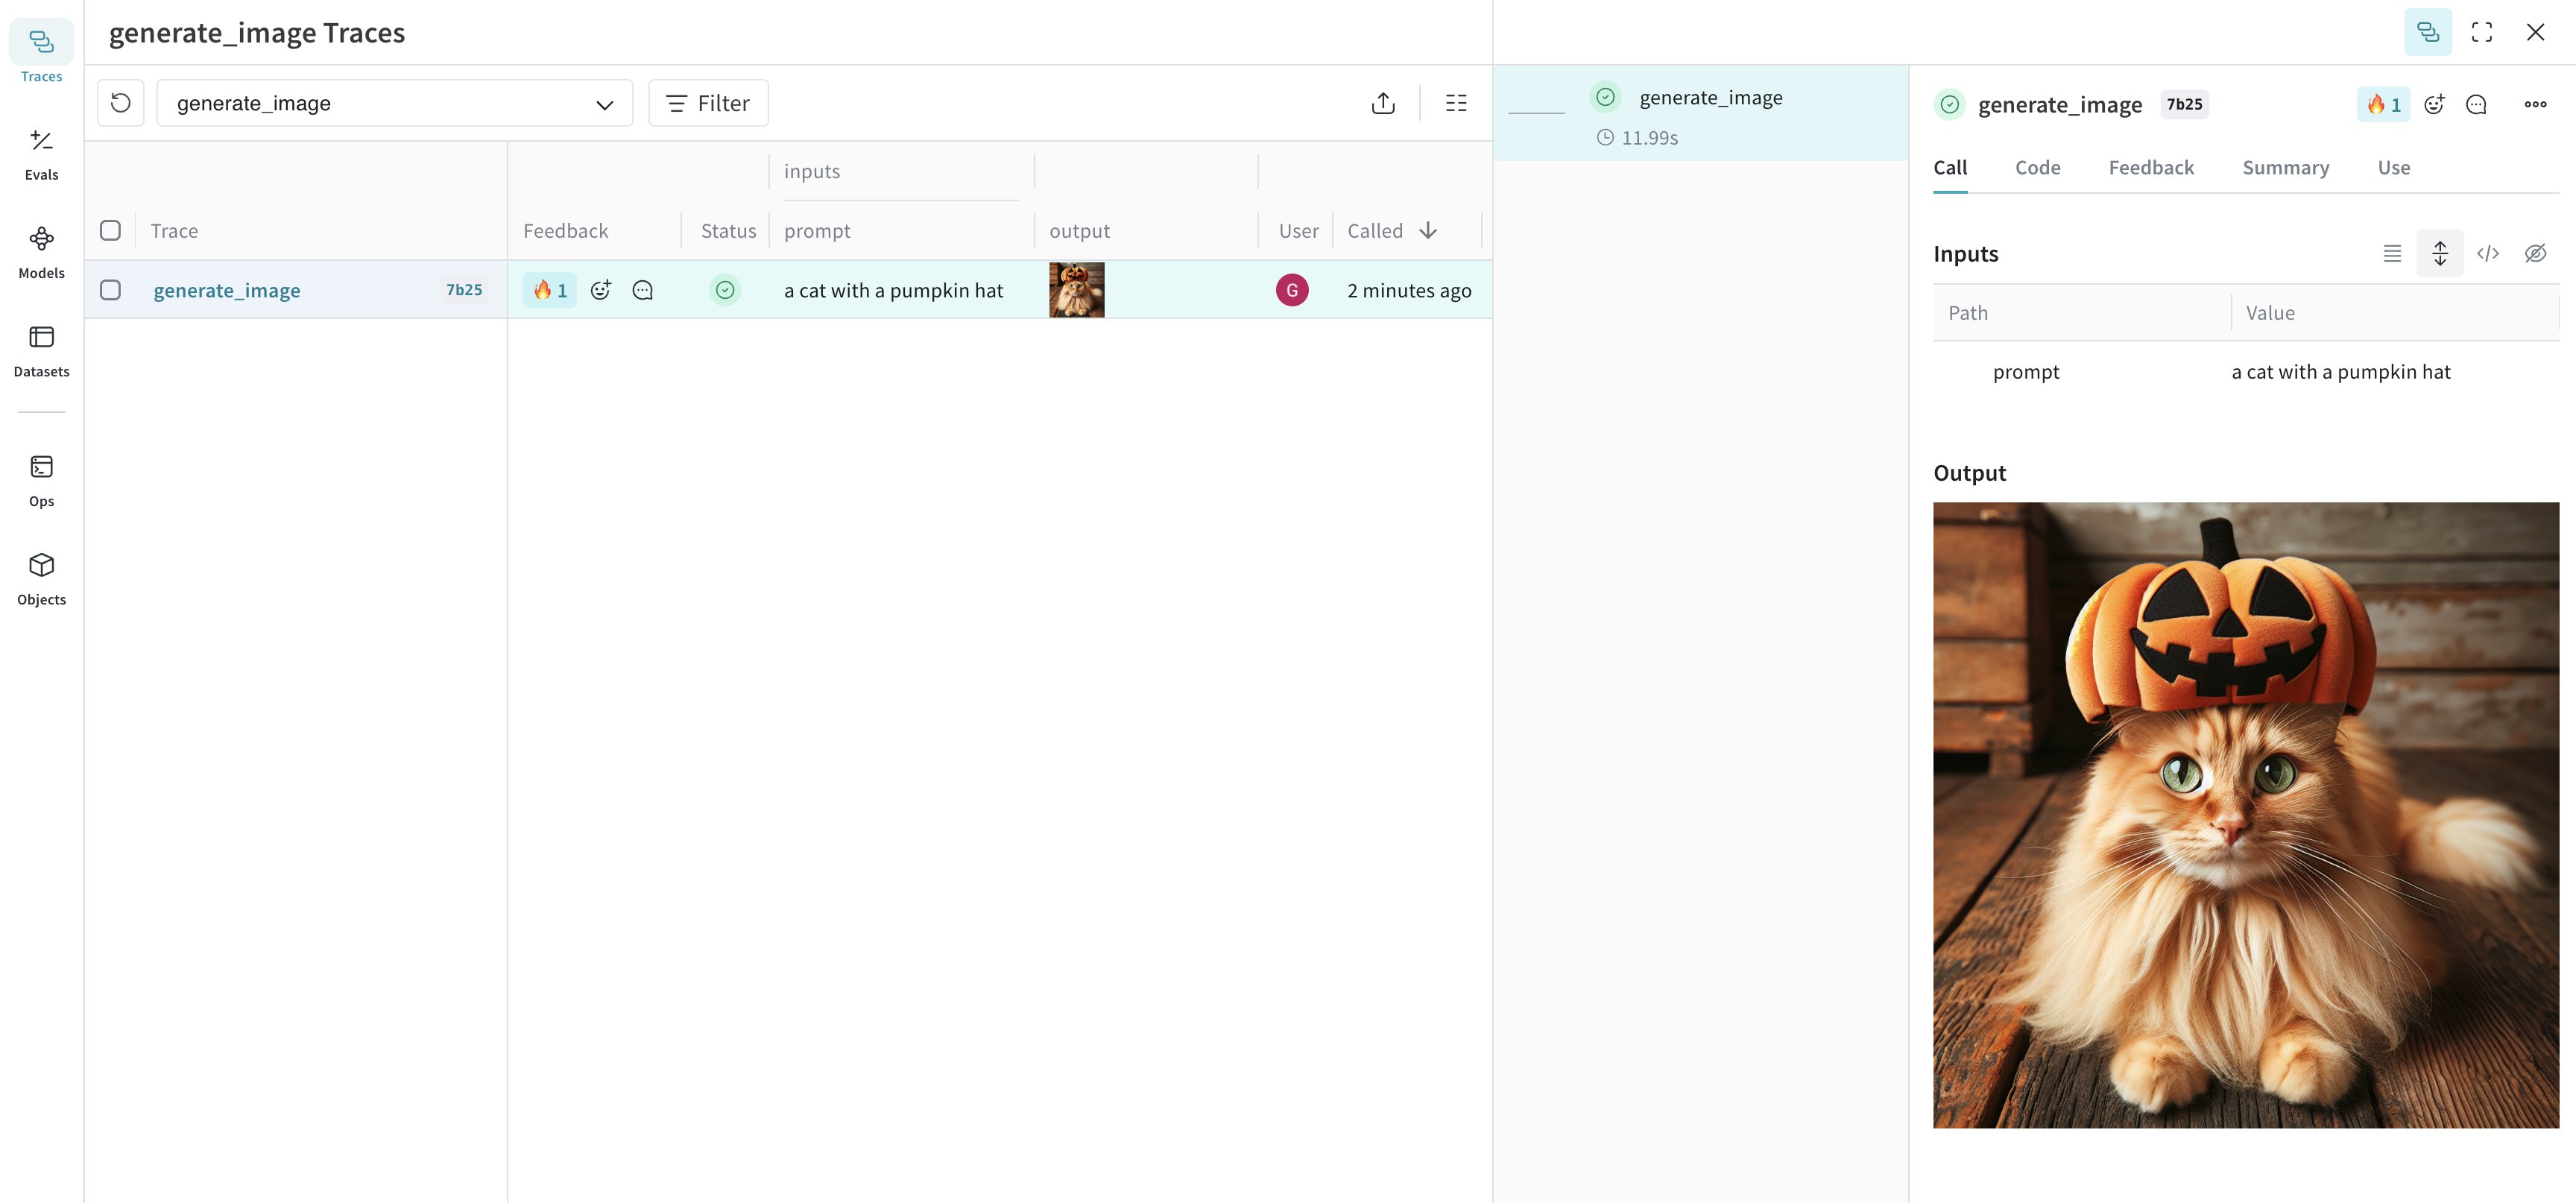
함수에는 Weave는 이미지를 로깅하고, 해당 이미지를 볼 수 있는 트레이스 링크를 반환합니다.Weave는 크기가 조정된 이미지를 로깅하고, 이미지를 볼 수 있는 트레이스로 연결되는 링크를 반환합니다.
Annotated[bytes, Content] 유형을, 파일 경로에는 Annotated[str, Content]를 어노테이션하여 이미지를 로깅합니다.다음 예제에서는 간단한 이미지를 그린 다음 Content 어노테이션을 사용해 Weave에 로깅합니다:고급 예제: DALL-E로 이미지를 생성하고 Weave에 로깅하기
다음 예제는 고양이 이미지를 생성해 Weave에 로깅합니다:고급 예시: 로깅하기 전에 큰 이미지 크기 조정하기
UI 렌더링 비용과 저장소 사용량에 미치는 영향을 줄이기 위해 로깅 전에 이미지 크기를 조정하세요.@weave.op에서 postprocess_output을 사용해 이미지 크기를 조정하세요.비디오 로깅
- Python
- TypeScript
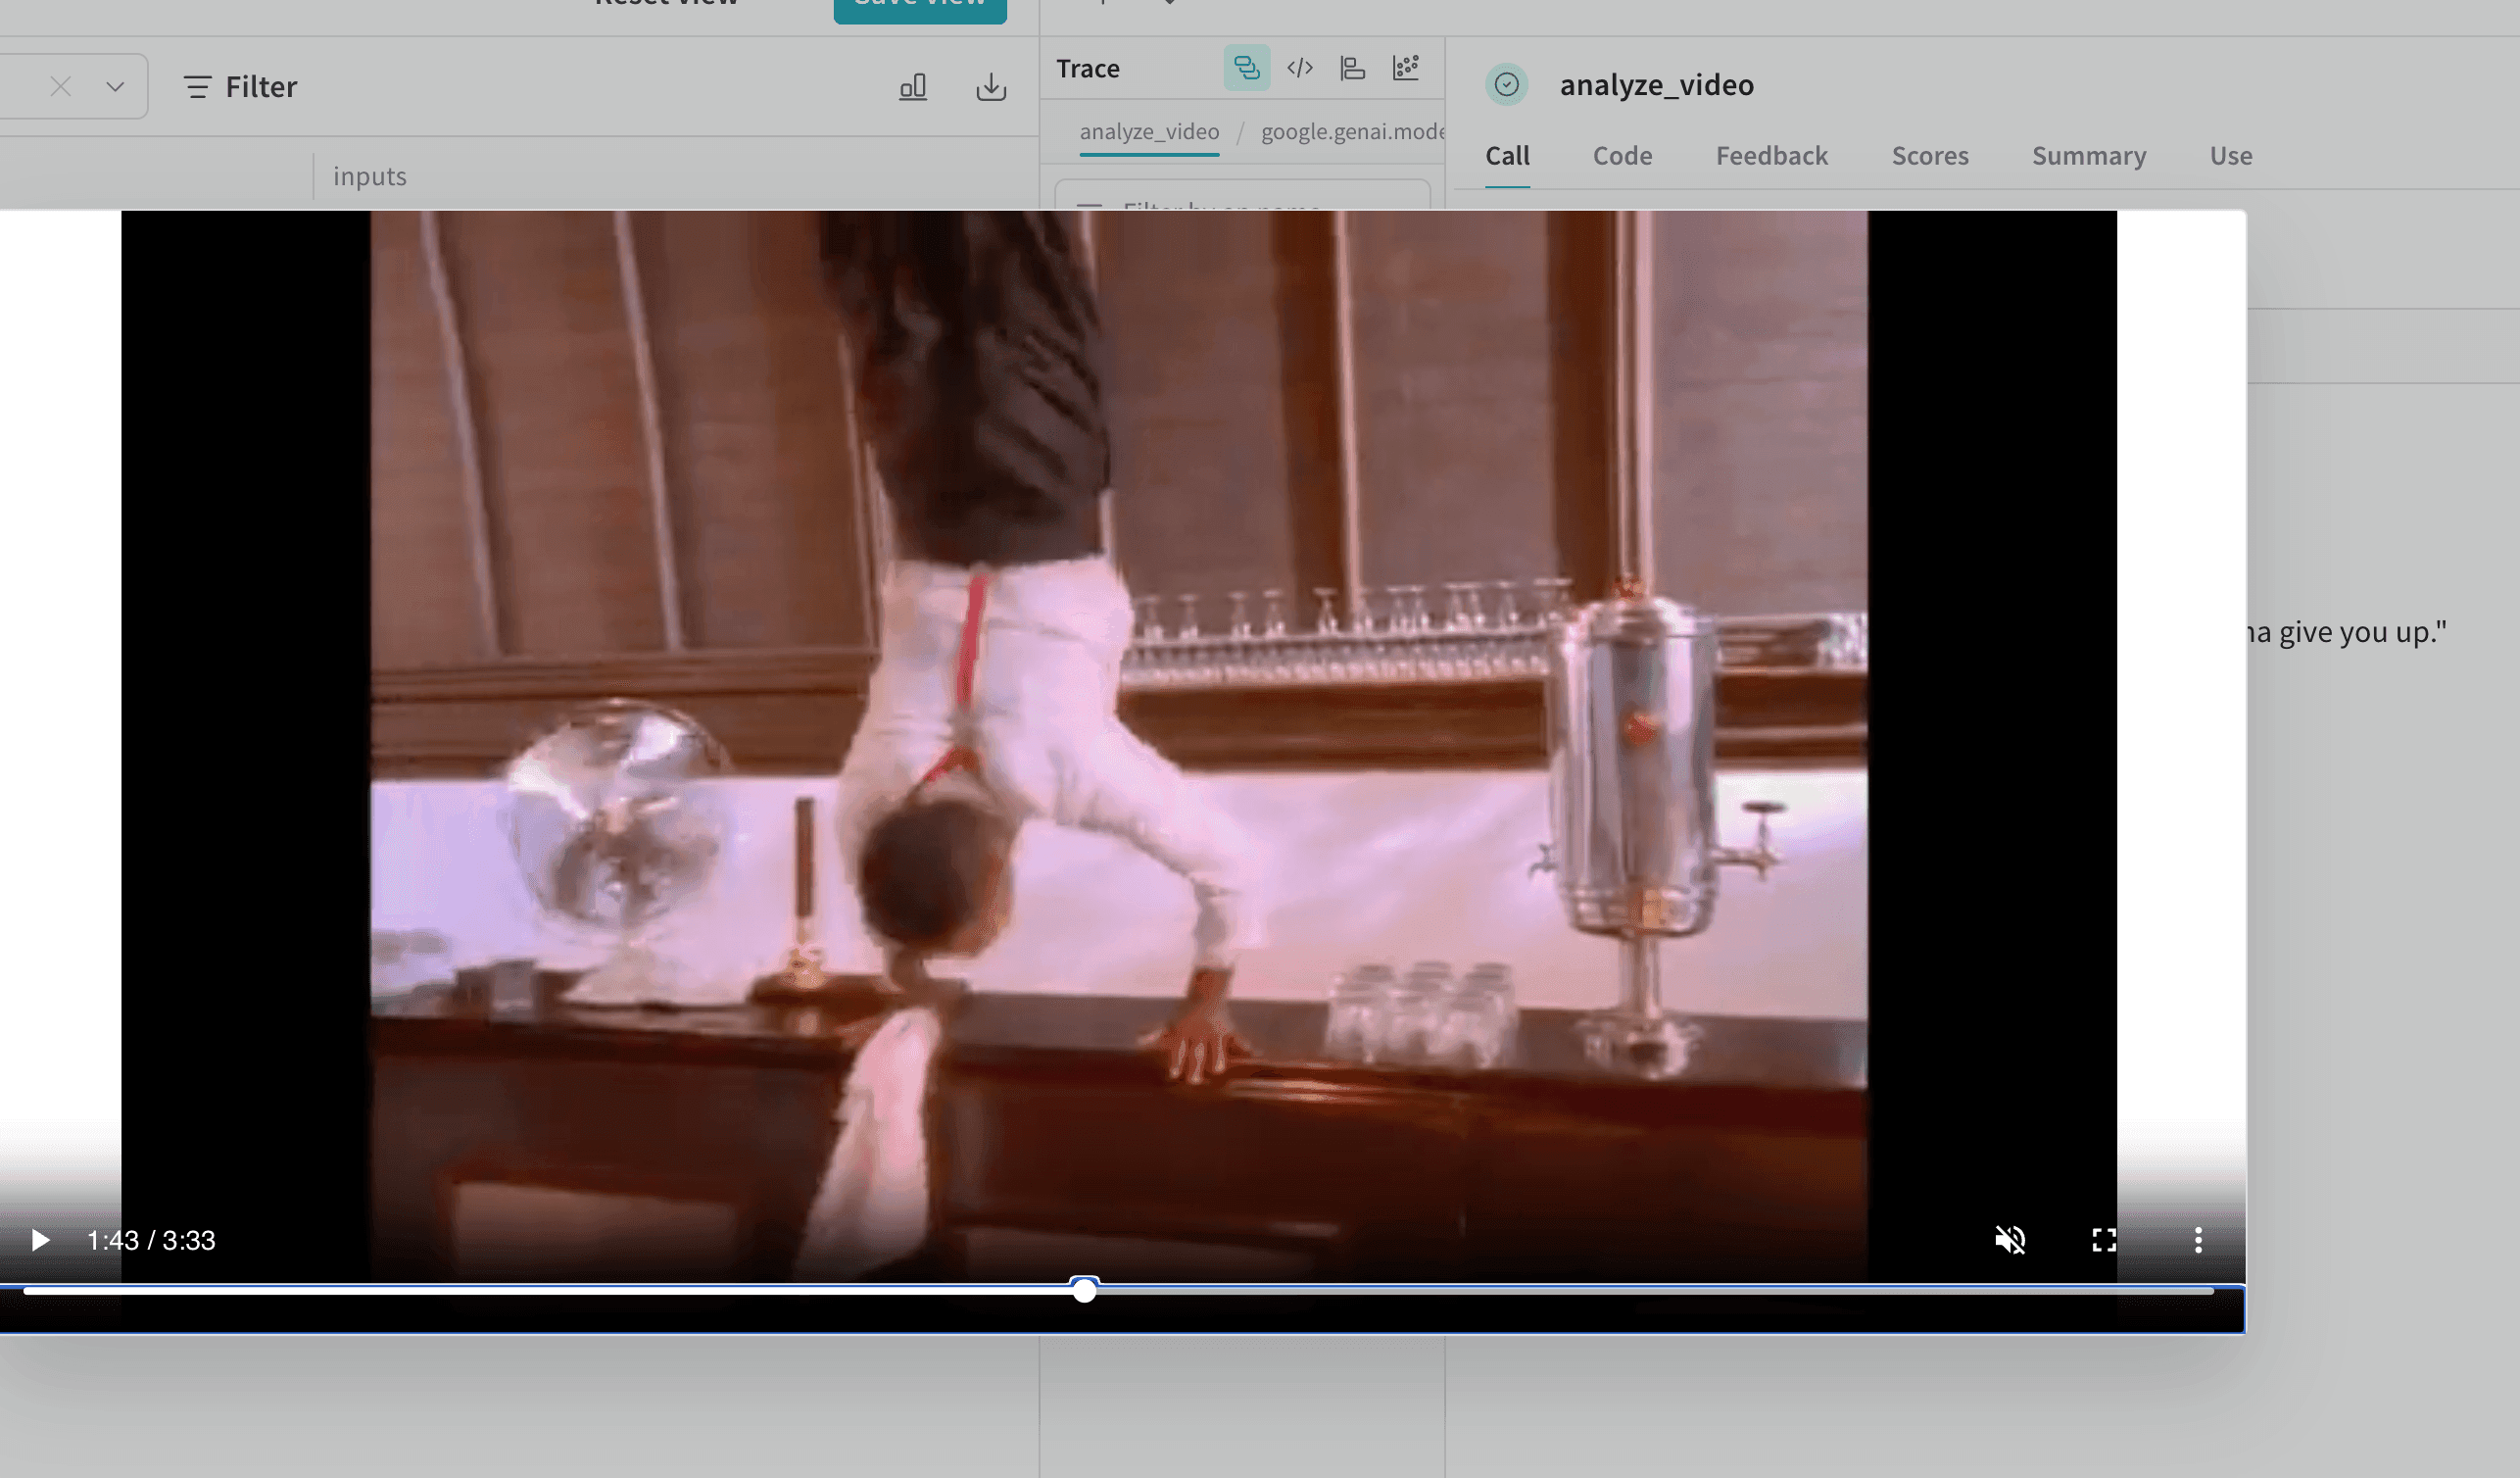
함수에 Weave는 비디오를 로깅하고, 비디오를 볼 수 있는 트레이스로 연결되는 링크를 반환합니다.Weave는 입력 비디오와 모델의 분석을 모두 로깅하므로, 트레이스에서 함께 검토할 수 있습니다.
Annotated[bytes, Content] 타입으로 어노테이션하여 비디오를 로깅하세요. Weave는 mp4 비디오를 자동으로 처리합니다. 다음은 최소 예시입니다:고급 예시: 비디오 분석 프로젝트 내에서 비디오 로깅
다음 예시에서는 비디오 이해 프로젝트 내에서 비디오를 로깅하는 방법을 보여줍니다:문서 로깅

- Python
- TypeScript
함수에 Weave는 원본 PDF와 생성된 답변을 모두 로깅하므로, 각 응답을 생성한 문서를 감사할 수 있습니다.
Annotated[bytes, Content] 유형으로 어노테이션을 추가하거나, Annotated[str, Content[Literal['text']]]로 문서 유형을 지정해 문서를 로깅할 수 있습니다.Weave는 pdf, csv, md, text, json, xml 파일 유형을 자동으로 처리합니다. Annotated[str, Content]를 사용해 파일 경로로도 로깅할 수 있습니다.다음 예시는 입력 PDF 및 CSV 파일의 복사본을 저장한 다음, 함수가 반환한 파일 내용도 저장하는 방법을 보여줍니다:고급 예시: RAG 시스템 내 문서 로깅
이 예시는 Retrieval-Augmented Generation(RAG) 시스템 내에서 문서를 로깅하는 방법을 보여줍니다:오디오 로깅
- Python
- TypeScript
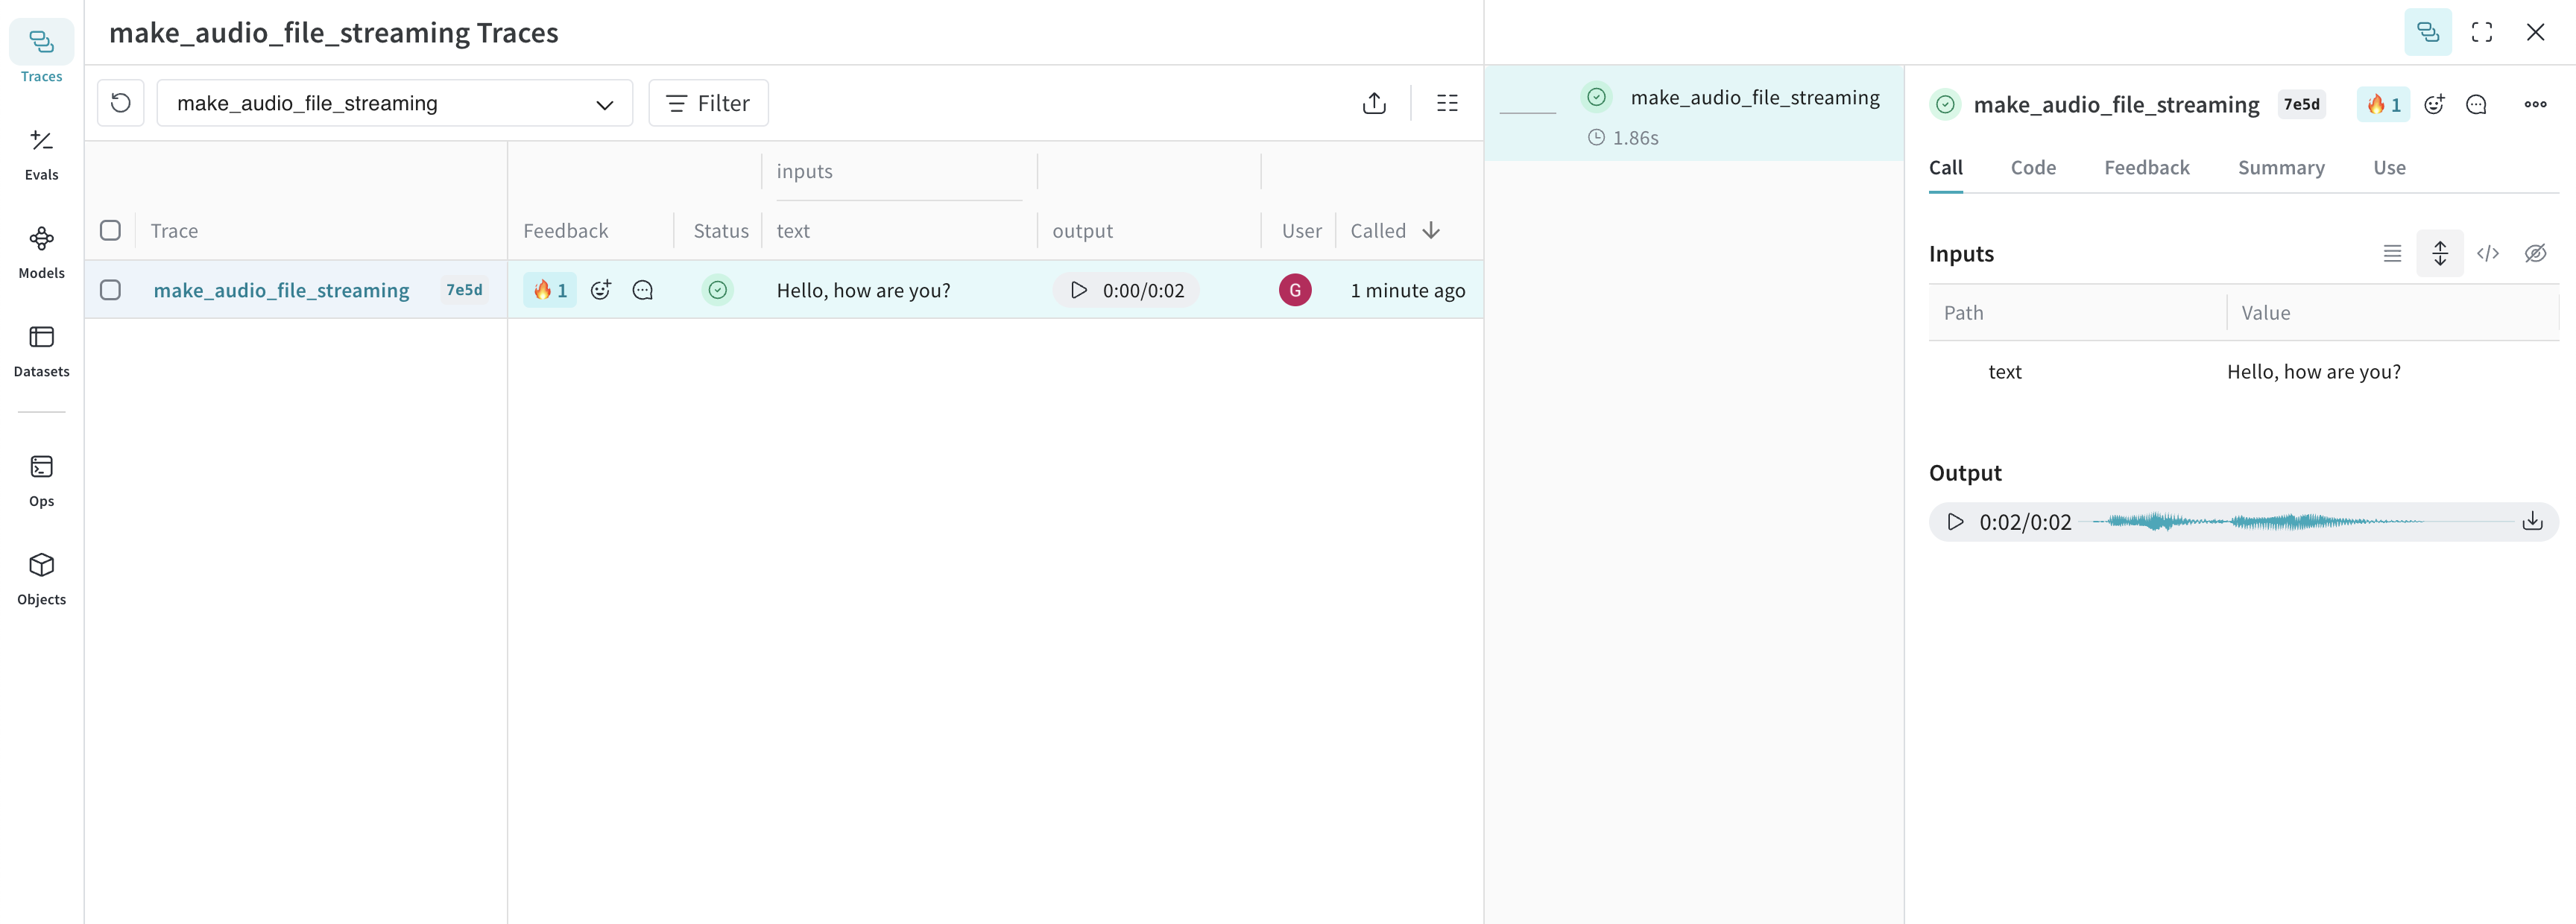
함수에 이 오디오는 Weave에 로깅되며, 오디오 플레이어와 함께 UI에 자동으로 표시됩니다. 오디오 플레이어에서는 원본 오디오 파형을 확인하고 다운로드할 수 있습니다.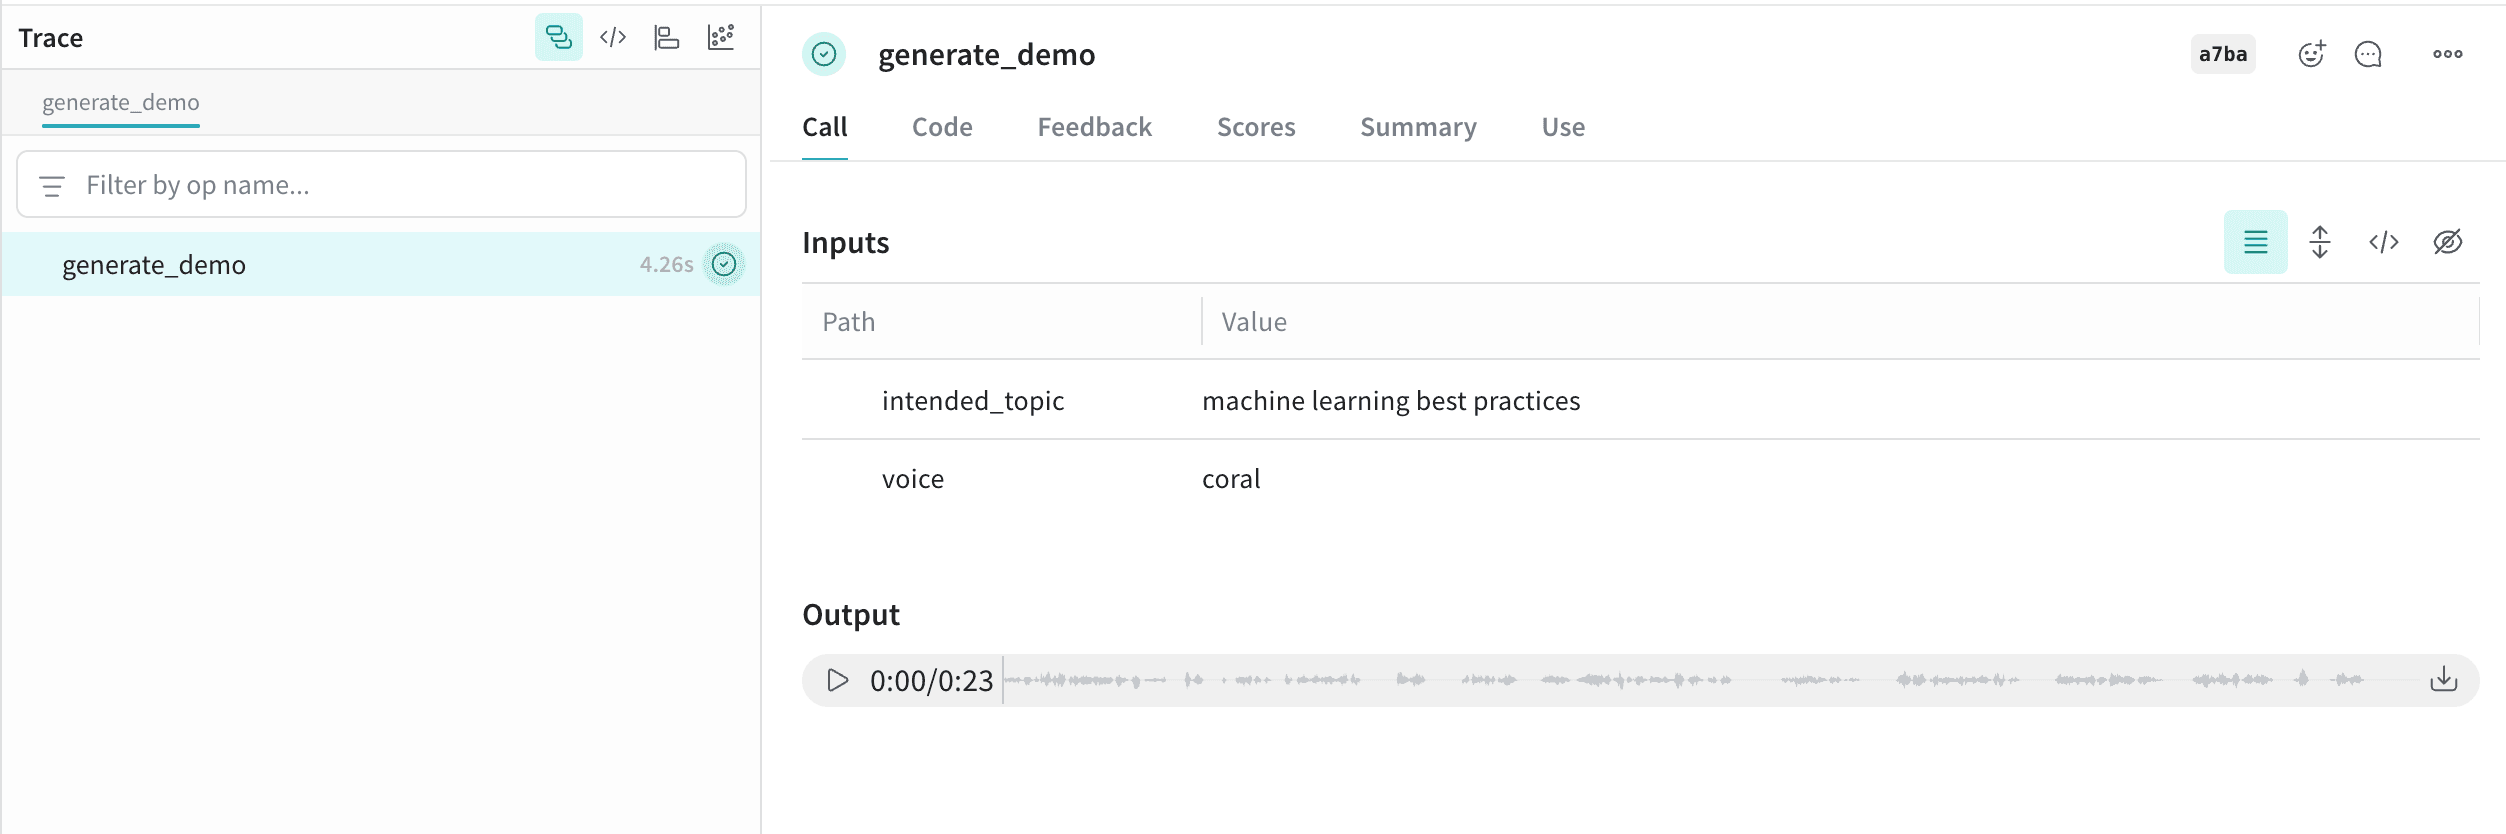
Annotated[bytes, Content] 유형으로 어노테이션을 지정하거나 Annotated[str, Content[Literal['mp3']]]로 오디오 유형을 지정해 오디오를 Weave에 로깅할 수 있습니다.Weave는 mp3, wav, flac, ogg, m4a 파일 유형을 자동으로 처리합니다. Annotated[str, Content]를 사용해 파일 경로로 로깅할 수도 있습니다.다음 코드 스니펫은 사인파를 생성하고 녹음한 뒤, 오디오를 Weave에 로깅합니다:고급 예제: AI가 생성한 오디오를 만들고 로깅하기
이 예제에서는Content 어노테이션을 사용해 AI가 생성한 오디오를 만들고 로깅합니다:HTML 로깅
- Python
- TypeScript
함수에
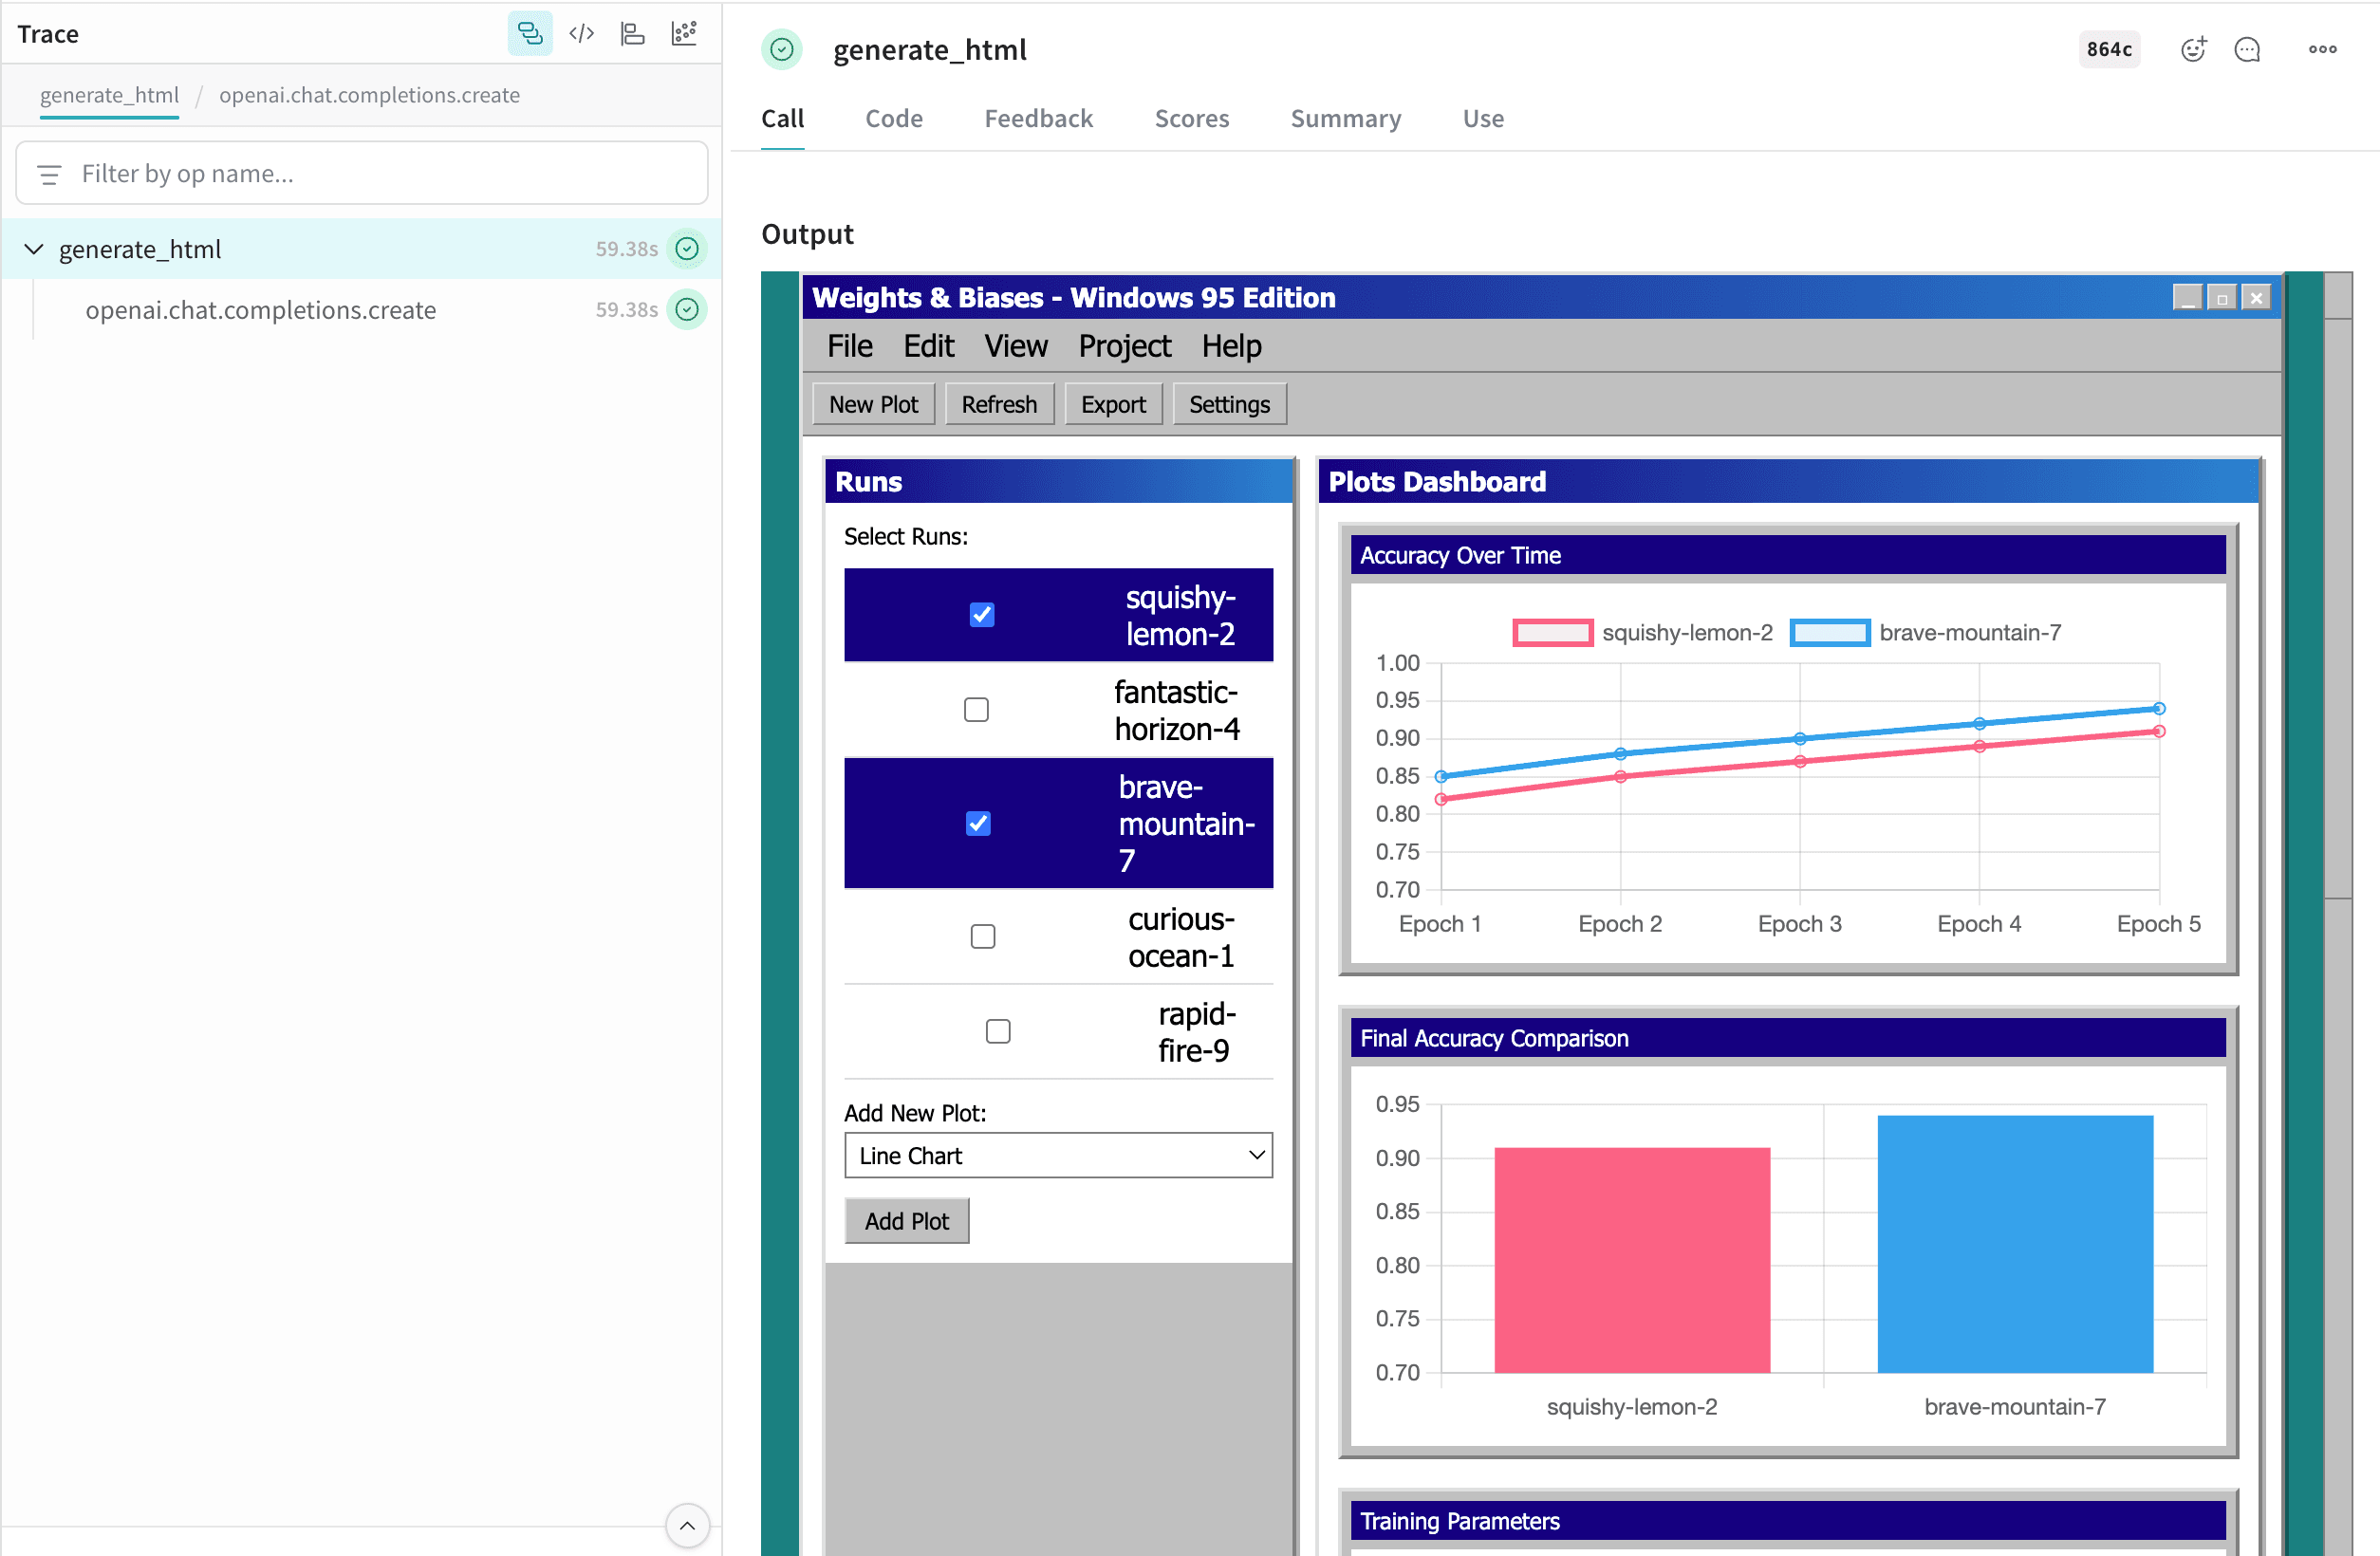
Annotated[bytes, Content[Literal['html']]]를 어노테이션해 대화형 HTML을 로깅합니다.다음 예시에서는 최소한의 HTML 페이지를 생성해 Weave에 로깅합니다:고급 예시: Serverless Inference를 사용해 독립형 HTML 페이지를 생성하고 Weave에 로깅하기
이 예시에서는 Serverless Inference를 사용해 독립형 HTML 페이지를 생성하고 이를 Weave에 로깅합니다:file_name.html 셀을 클릭해 전체 화면으로 여세요. 원본 .html 파일을 다운로드할 수도 있습니다.
Contents API
Content API는 Python에서만 사용할 수 있습니다.
사용
타입 어노테이션
직접 초기화
- 기본 애플리케이션(예: PDF 뷰어)으로 파일을 엽니다.
- 자체 블롭 storage(예: S3)에 업로드할 수 있도록 모델을 JSON으로 덤프합니다.
Content블롭과 연결할 맞춤형 메타데이터를 전달합니다(예: 이를 생성하는 데 사용한 모델).
Content.from_path- 파일 경로에서 생성합니다.Content.from_bytes- 원시 바이트에서 생성합니다.Content.from_text- 텍스트 문자열에서 생성합니다.Content.from_base64- base64로 인코딩된 데이터에서 생성합니다.
맞춤형 MIME 유형
타입 어노테이션이 포함된 맞춤형 MIME 유형
직접 초기화하는 맞춤형 MIME 유형
Content 속성
속성
유틸리티 방법
save(dest: str | Path) -> None: 콘텐츠를 파일로 저장.open() -> bool: 시스템 기본 애플리케이션으로 파일 열기(콘텐츠가 저장되어 있거나 경로에서 로드되어 있어야 함).as_string() -> str: 데이터를 문자열로 표시(bytes는 encoding 속성을 사용해 디코딩됨).
초기화 방법
content 객체를 생성합니다:
content 객체를 생성합니다:
content 객체를 생성합니다:
content 객체를 생성합니다: