メインコンテンツへスキップ
weave.init() を呼び出すと、Weave は ChatNVIDIA ライブラリ経由で実行される LLM Call を自動的にトラッキングしてログします。このガイドでは、ChatNVIDIA を使用する Python 開発者向けに、トレースを取得する方法、独自の関数を Ops としてラップする方法、さらに Weave の Model クラスを使って Experiments を整理する方法を紹介します。これにより、LLM アプリケーションのデバッグ、改善の反復、比較をより効率的に行えます。
最新のチュートリアルについては、Weights & Biases on NVIDIA をご覧ください。

トレース

開発中と本番環境の両方で、LLM アプリケーションのトレースを中央のデータベースに保存すると、問題のデバッグに役立つだけでなく、アプリケーションの改善時に評価に使う難しいケースのデータセットも構築できます。次のセクションでは、ChatNVIDIA の Call に対して自動トレースを有効にする方法を示します。
Weave は ChatNVIDIA Python ライブラリ のトレースを自動的に取得できます。任意のプロジェクト名を指定して weave.init([PROJECT-NAME]) を呼び出すと、キャプチャを開始できます。
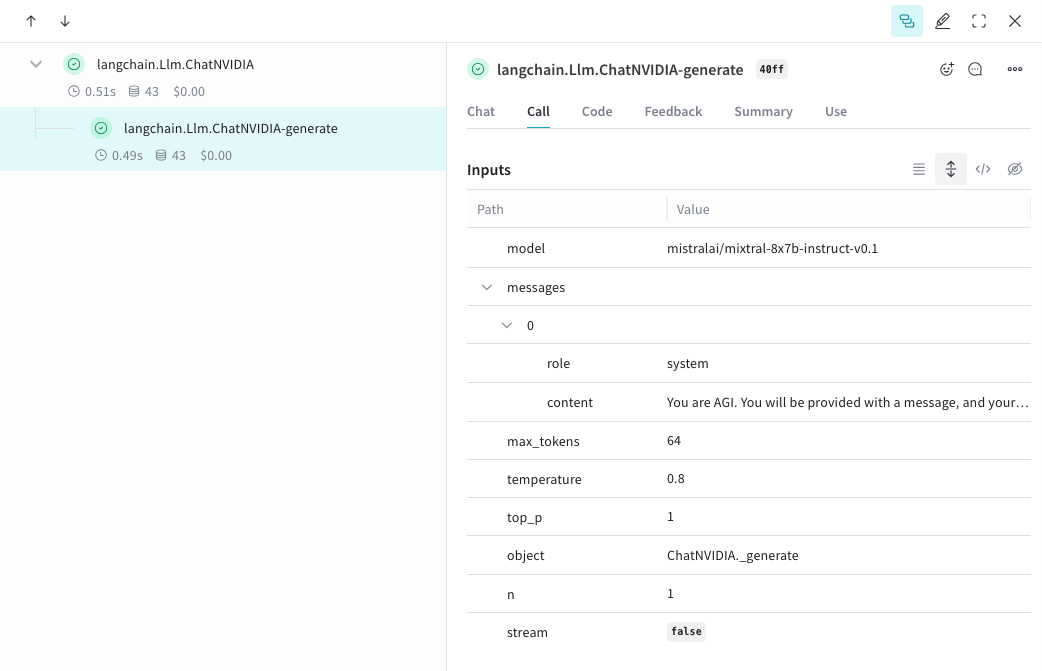
from langchain_nvidia_ai_endpoints import ChatNVIDIA
import weave
client = ChatNVIDIA(model="mistralai/mixtral-8x7b-instruct-v0.1", temperature=0.8, max_tokens=64, top_p=1)
weave.init('emoji-bot')

messages=[
    {
      "role": "system",
      "content": "You are AGI. You will be provided with a message, and your task is to respond using emojis only."
    }]

response = client.invoke(messages)
このコードを実行すると、Weave は指定したプロジェクト名の下で ChatNVIDIA の Call を取得し、入力、出力、メタデータを確認できます。
chatnvidia_trace.png

独自の ops をトラッキングする

関数を @weave.op でラップすると、入力、出力、アプリケーション ロジックの取得が始まり、アプリ内でデータがどのように流れるかをデバッグできるようになります。ops は深くネストでき、トラッキングしたい関数のツリーを構築できます。また、実験を進める中で、まだ Git にコミットしていないアドホックな詳細を取得するためのコードの自動バージョン管理も開始されます。Python ライブラリ を呼び出す @weave.op でデコレートされた関数を作成します。次の例では、2 つの関数が op でラップされています。これにより、RAG アプリの取得ステップのような中間ステップが、アプリケーションの動作にどのように影響するかがわかります。
import weave
from langchain_nvidia_ai_endpoints import ChatNVIDIA
import requests, random
PROMPT="""Emulate the Pokedex from early Pokémon episodes. State the name of the Pokemon and then describe it.
        Your tone is informative yet sassy, blending factual details with a touch of dry humor. Be concise, no more than 3 sentences. """
POKEMON = ['pikachu', 'charmander', 'squirtle', 'bulbasaur', 'jigglypuff', 'meowth', 'eevee']
client = ChatNVIDIA(model="mistralai/mixtral-8x7b-instruct-v0.1", temperature=0.7, max_tokens=100, top_p=1)

@weave.op
def get_pokemon_data(pokemon_name):
    # これは、RAG アプリ内の取得ステップのような、アプリケーション内の 1 つのステップです
    url = f"https://pokeapi.co/api/v2/pokemon/{pokemon_name}"
    response = requests.get(url)
    if response.status_code == 200:
        data = response.json()
        name = data["name"]
        types = [t["type"]["name"] for t in data["types"]]
        species_url = data["species"]["url"]
        species_response = requests.get(species_url)
        evolved_from = "Unknown"
        if species_response.status_code == 200:
            species_data = species_response.json()
            if species_data["evolves_from_species"]:
                evolved_from = species_data["evolves_from_species"]["name"]
        return {"name": name, "types": types, "evolved_from": evolved_from}
    else:
        return None

@weave.op
def pokedex(name: str, prompt: str) -> str:
    # これは、他の ops を呼び出すルート op です
    data = get_pokemon_data(name)
    if not data: return "Error: Unable to fetch data"

    messages=[
            {"role": "system","content": prompt},
            {"role": "user", "content": str(data)}
        ]

    response = client.invoke(messages)
    return response.content

weave.init('pokedex-nvidia')
# 特定のポケモンのデータを取得する
pokemon_data = pokedex(random.choice(POKEMON), PROMPT)
Weave にアクセスし、UI で get_pokemon_data をクリックすると、そのステップの入力と出力を確認できます。
nvidia_pokedex.png

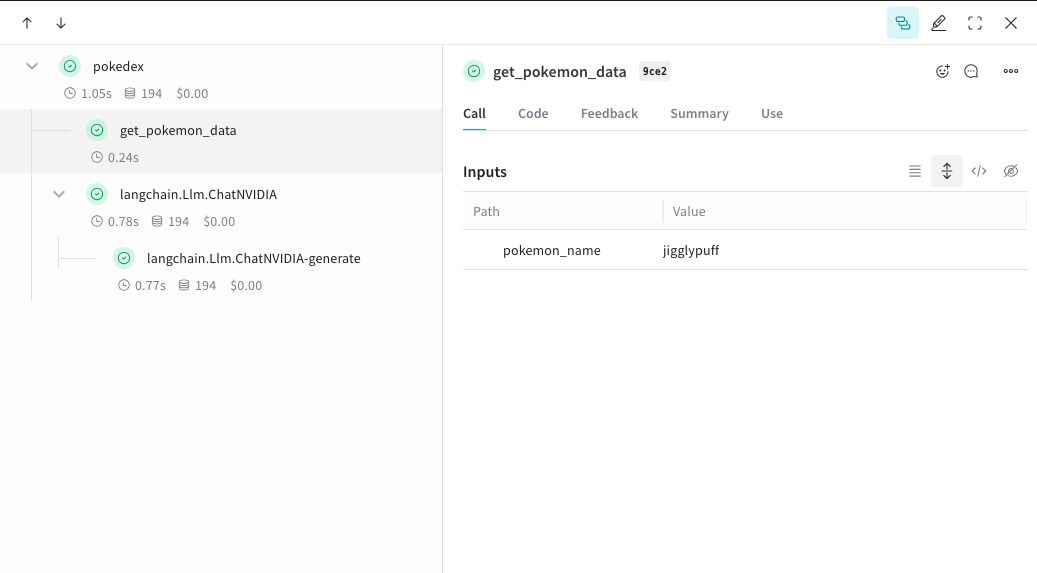
実験をしやすくするための Model を作成する

実験には多くの要素が関わるため、整理が難しくなりがちです。Model クラスを使用すると、システムプロンプトや使用しているモデルなど、アプリの実験に関する詳細を取得して整理できます。これにより、アプリのさまざまなイテレーションを整理して比較しやすくなります。 Model は、コードのバージョン管理や入力と出力の取得に加えて、アプリケーションの動作を制御する構造化されたパラメーターも取得できます。これにより、どのパラメーターが最も効果的だったかを簡単に見つけられます。また、Weave Models は serveEvaluation でも使用できます。次の例では、modelsystem_message を試せます。これらのいずれかを変更するたびに、GrammarCorrectorModel の新しい version が作成されます。
import weave
from langchain_nvidia_ai_endpoints import ChatNVIDIA

weave.init('grammar-nvidia')

class GrammarCorrectorModel(weave.Model): # `weave.Model` に変更
  system_message: str

  @weave.op()
  def predict(self, user_input): # `predict` に変更
    client = ChatNVIDIA(model="mistralai/mixtral-8x7b-instruct-v0.1", temperature=0, max_tokens=100, top_p=1)

    messages=[
          {
              "role": "system",
              "content": self.system_message
          },
          {
              "role": "user",
              "content": user_input
          }
          ]

    response = client.invoke(messages)
    return response.content

corrector = GrammarCorrectorModel(
    system_message = "You are a grammar checker, correct the following user input.")
result = corrector.predict("That was so easy, it was a piece of pie!")
print(result)
chatnvidia_model.png

使用情報

以下のメモでは、ChatNVIDIA インテグレーションでサポートされている内容を説明します。 ChatNVIDIA インテグレーションは、invokestream、およびそれらの非同期版をサポートします。また、ツールの使用もサポートします。 ChatNVIDIA は多くのタイプのモデルでの使用を想定しているため、関数呼び出しはサポートしていません。