Crew 시작하기
weave.init()를 호출하세요. weave.init()의 인자는 Weave가 트레이스를 로깅할 프로젝트 이름입니다.
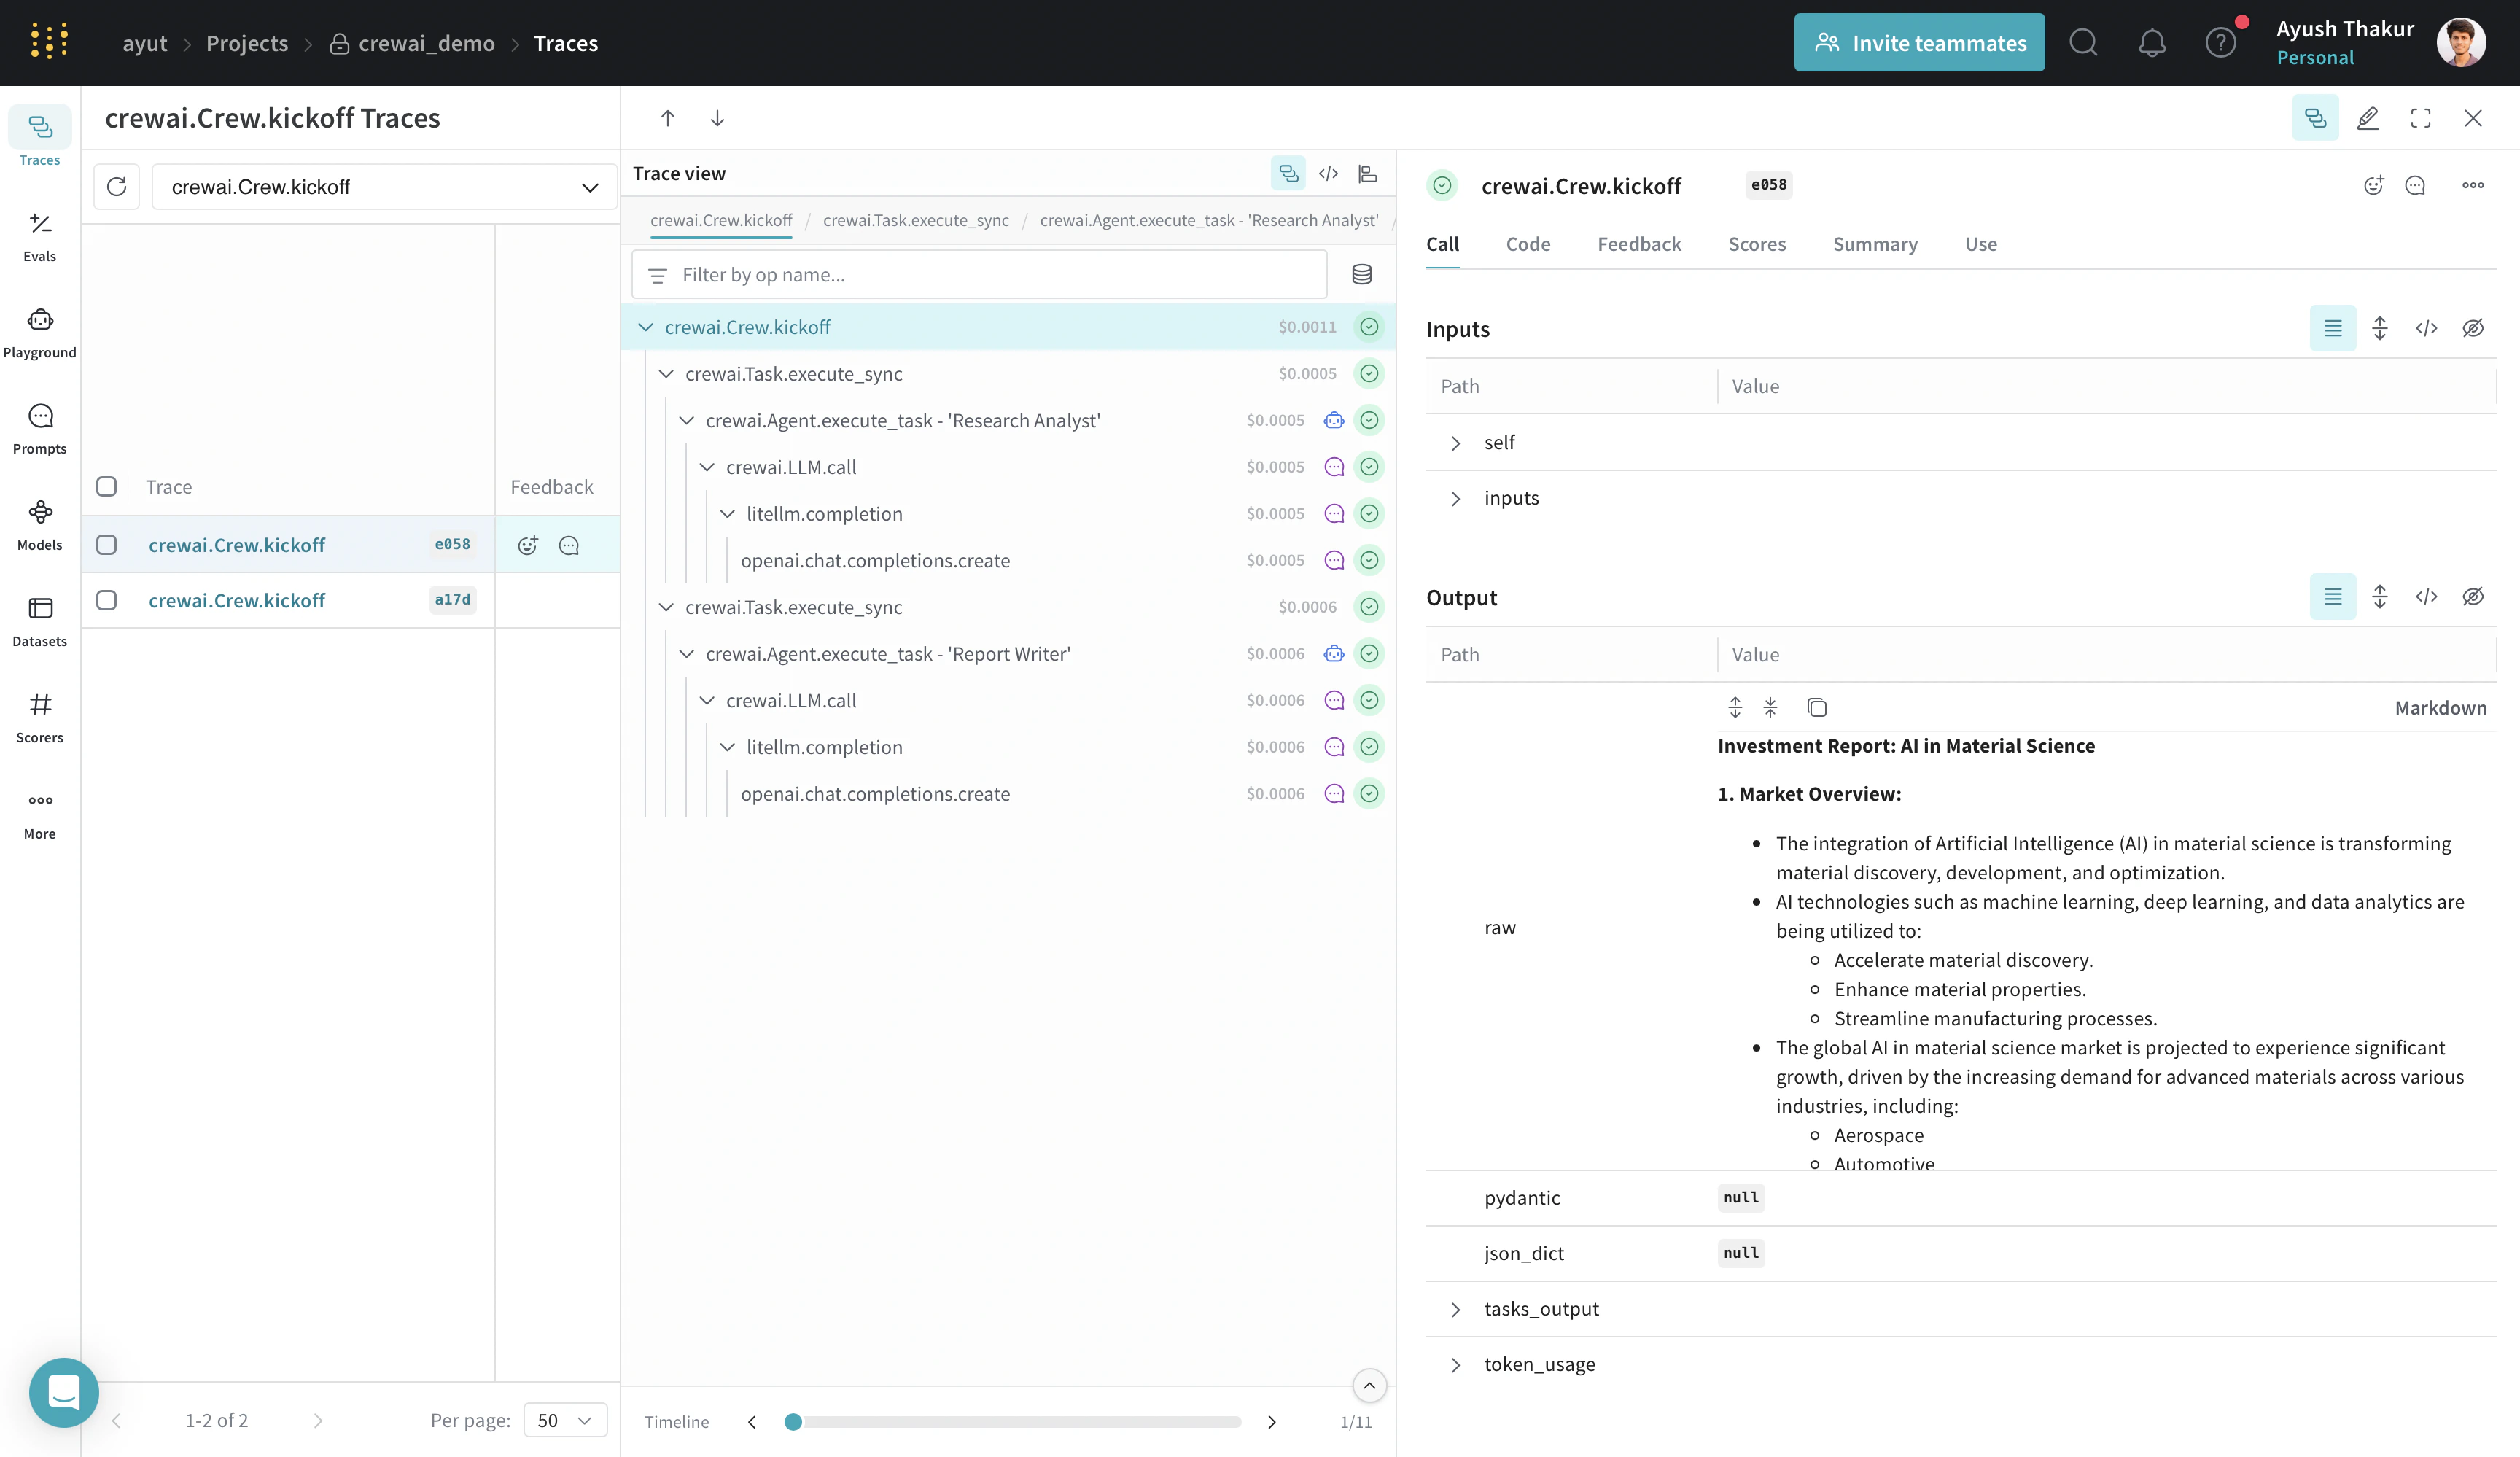
CrewAI는 kickoff 프로세스를 더 세밀하게 제어할 수 있도록 여러 방법을 제공합니다:
kickoff(), kickoff_for_each(), kickoff_async(), kickoff_for_each_async(). 이 인테그레이션은 이러한 모든 방법에서 생성되는 트레이스 로깅을 지원합니다.도구 추적
SerperDevTool을 사용해 ‘Research Analyst’ 에이전트가 인터넷에서 관련 정보를 검색할 수 있도록 합니다. 이 도구와 API 요구 사항에 대한 자세한 내용은 SerperDevTool 문서에서 확인하세요.
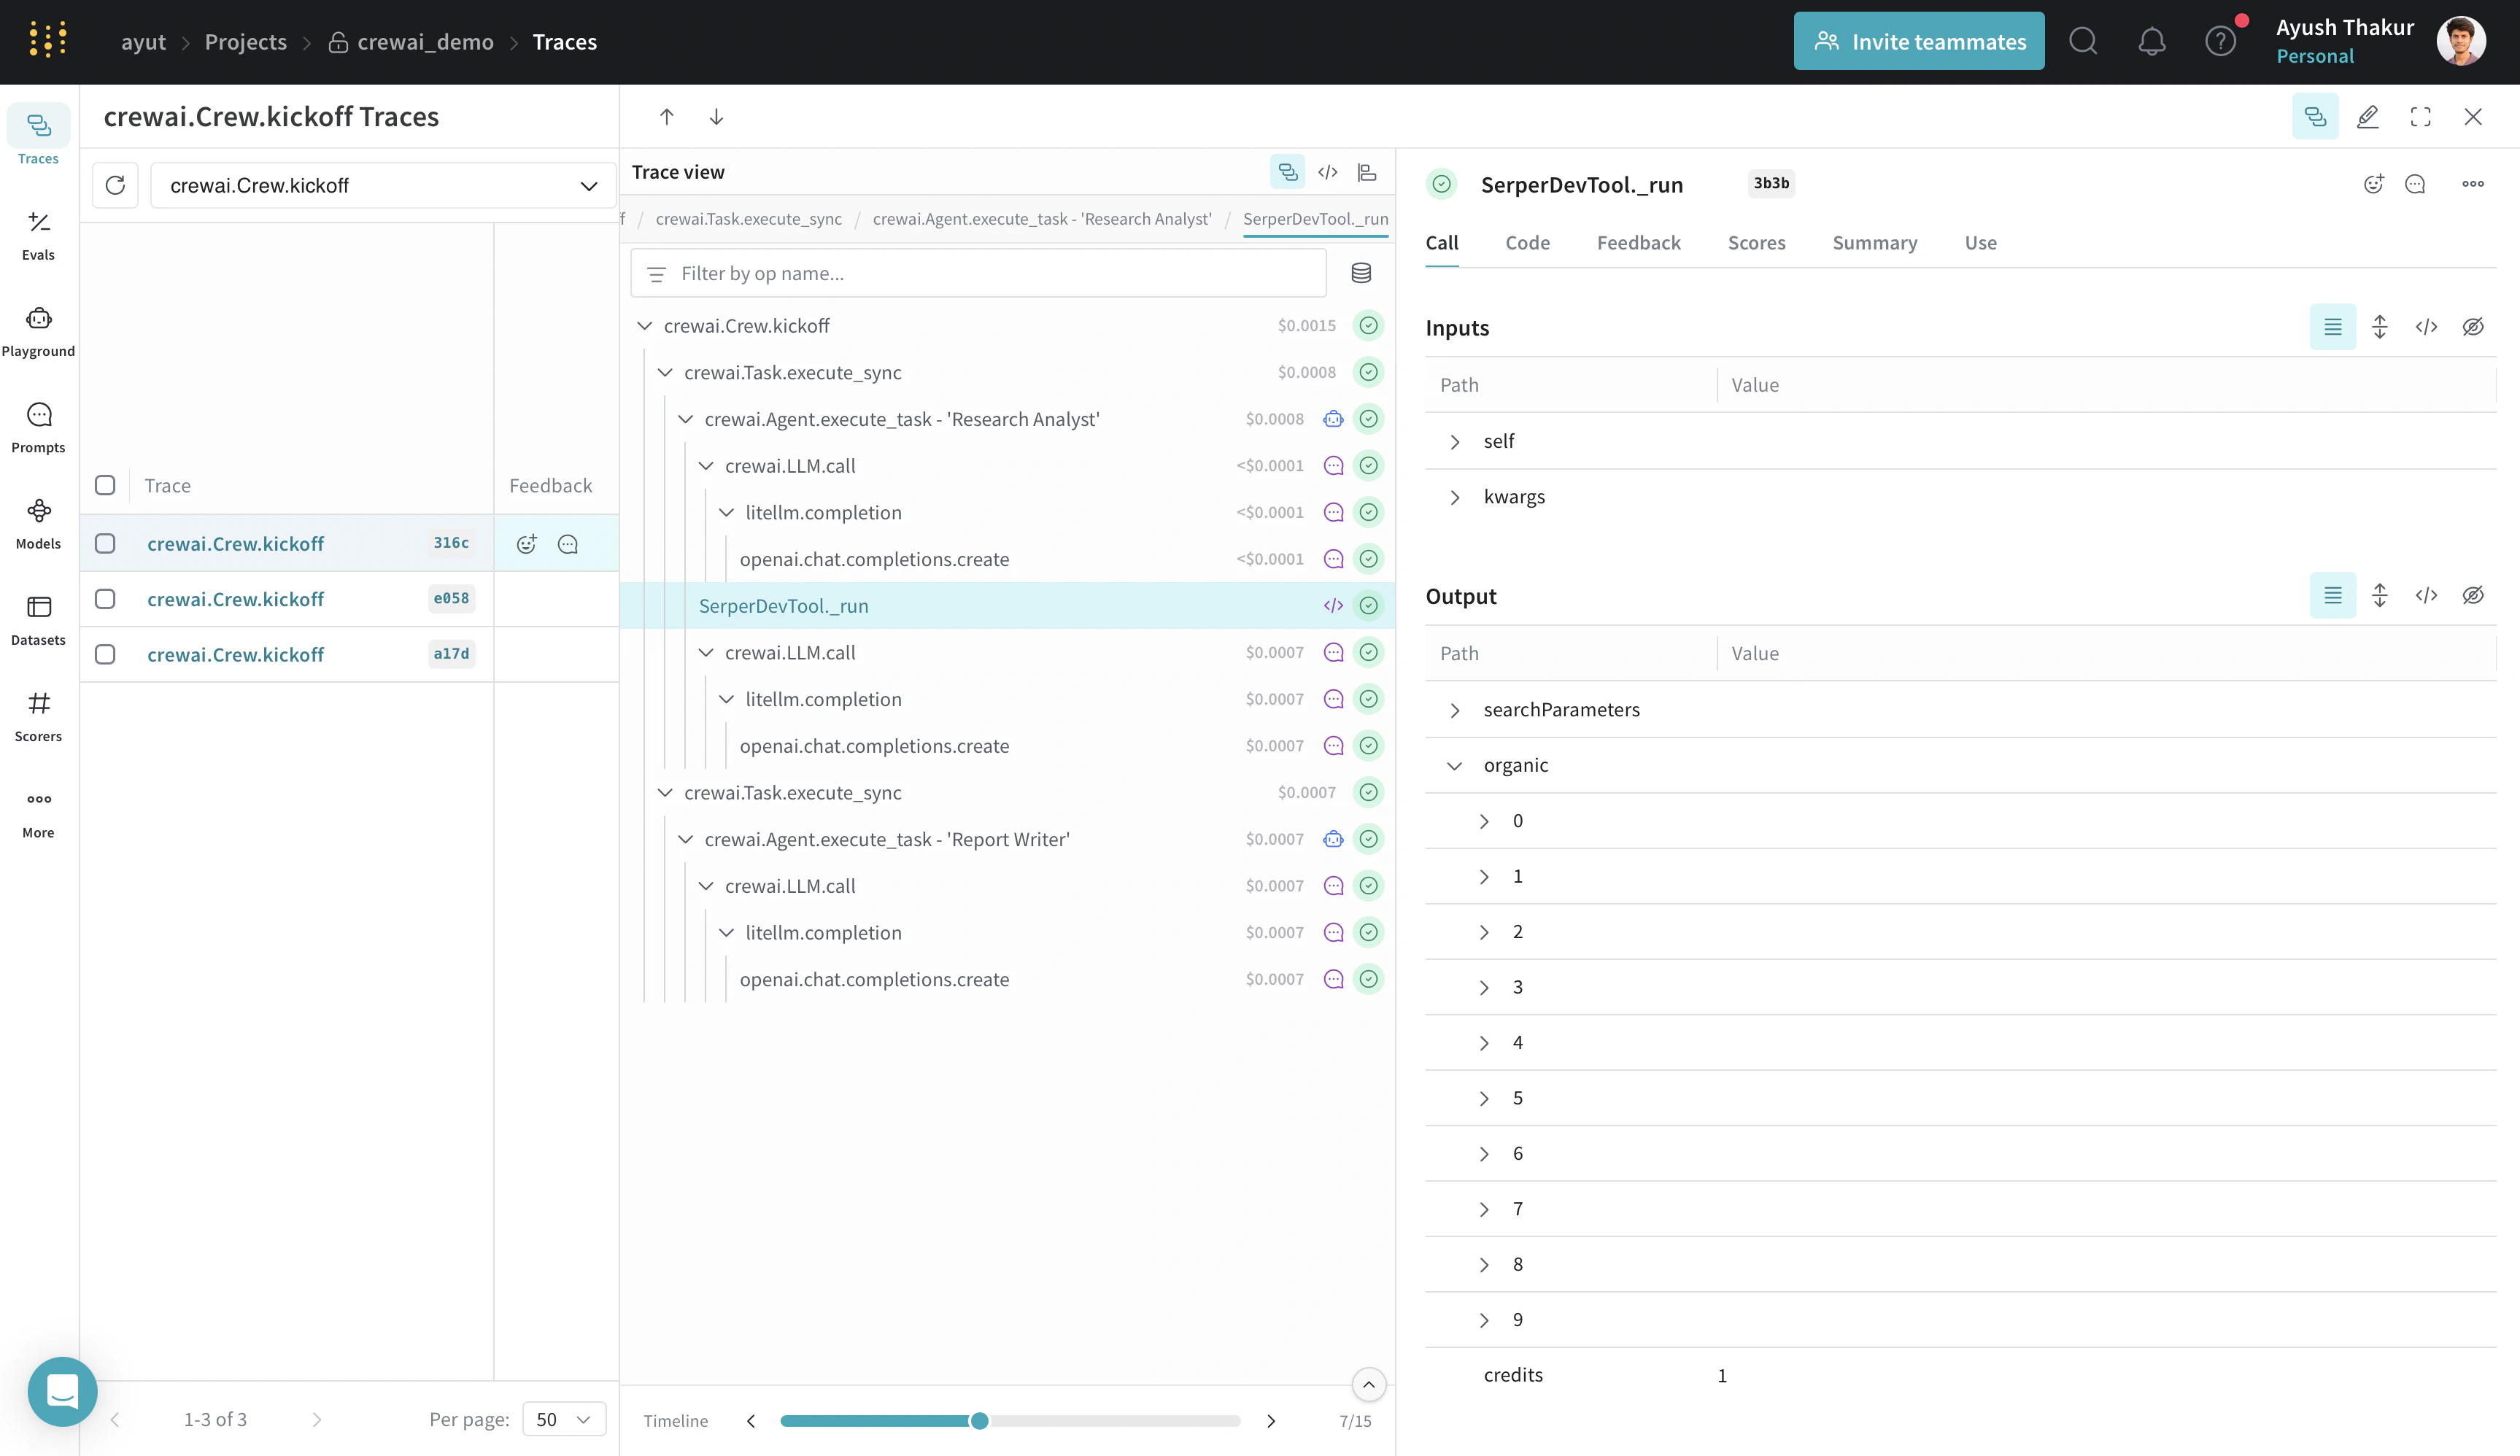
이 인테그레이션은
crewAI-tools 저장소에서 사용 가능한 모든 도구에 자동으로 패치를 적용합니다.Flow 시작하기
Flow.kickoff 엔트리 포인트와 @start, @listen, @router, @or_, @and_ 데코레이터를 자동으로 캡처할 수 있도록 Flow를 정의하기 전에 weave.init()을 호출하세요.
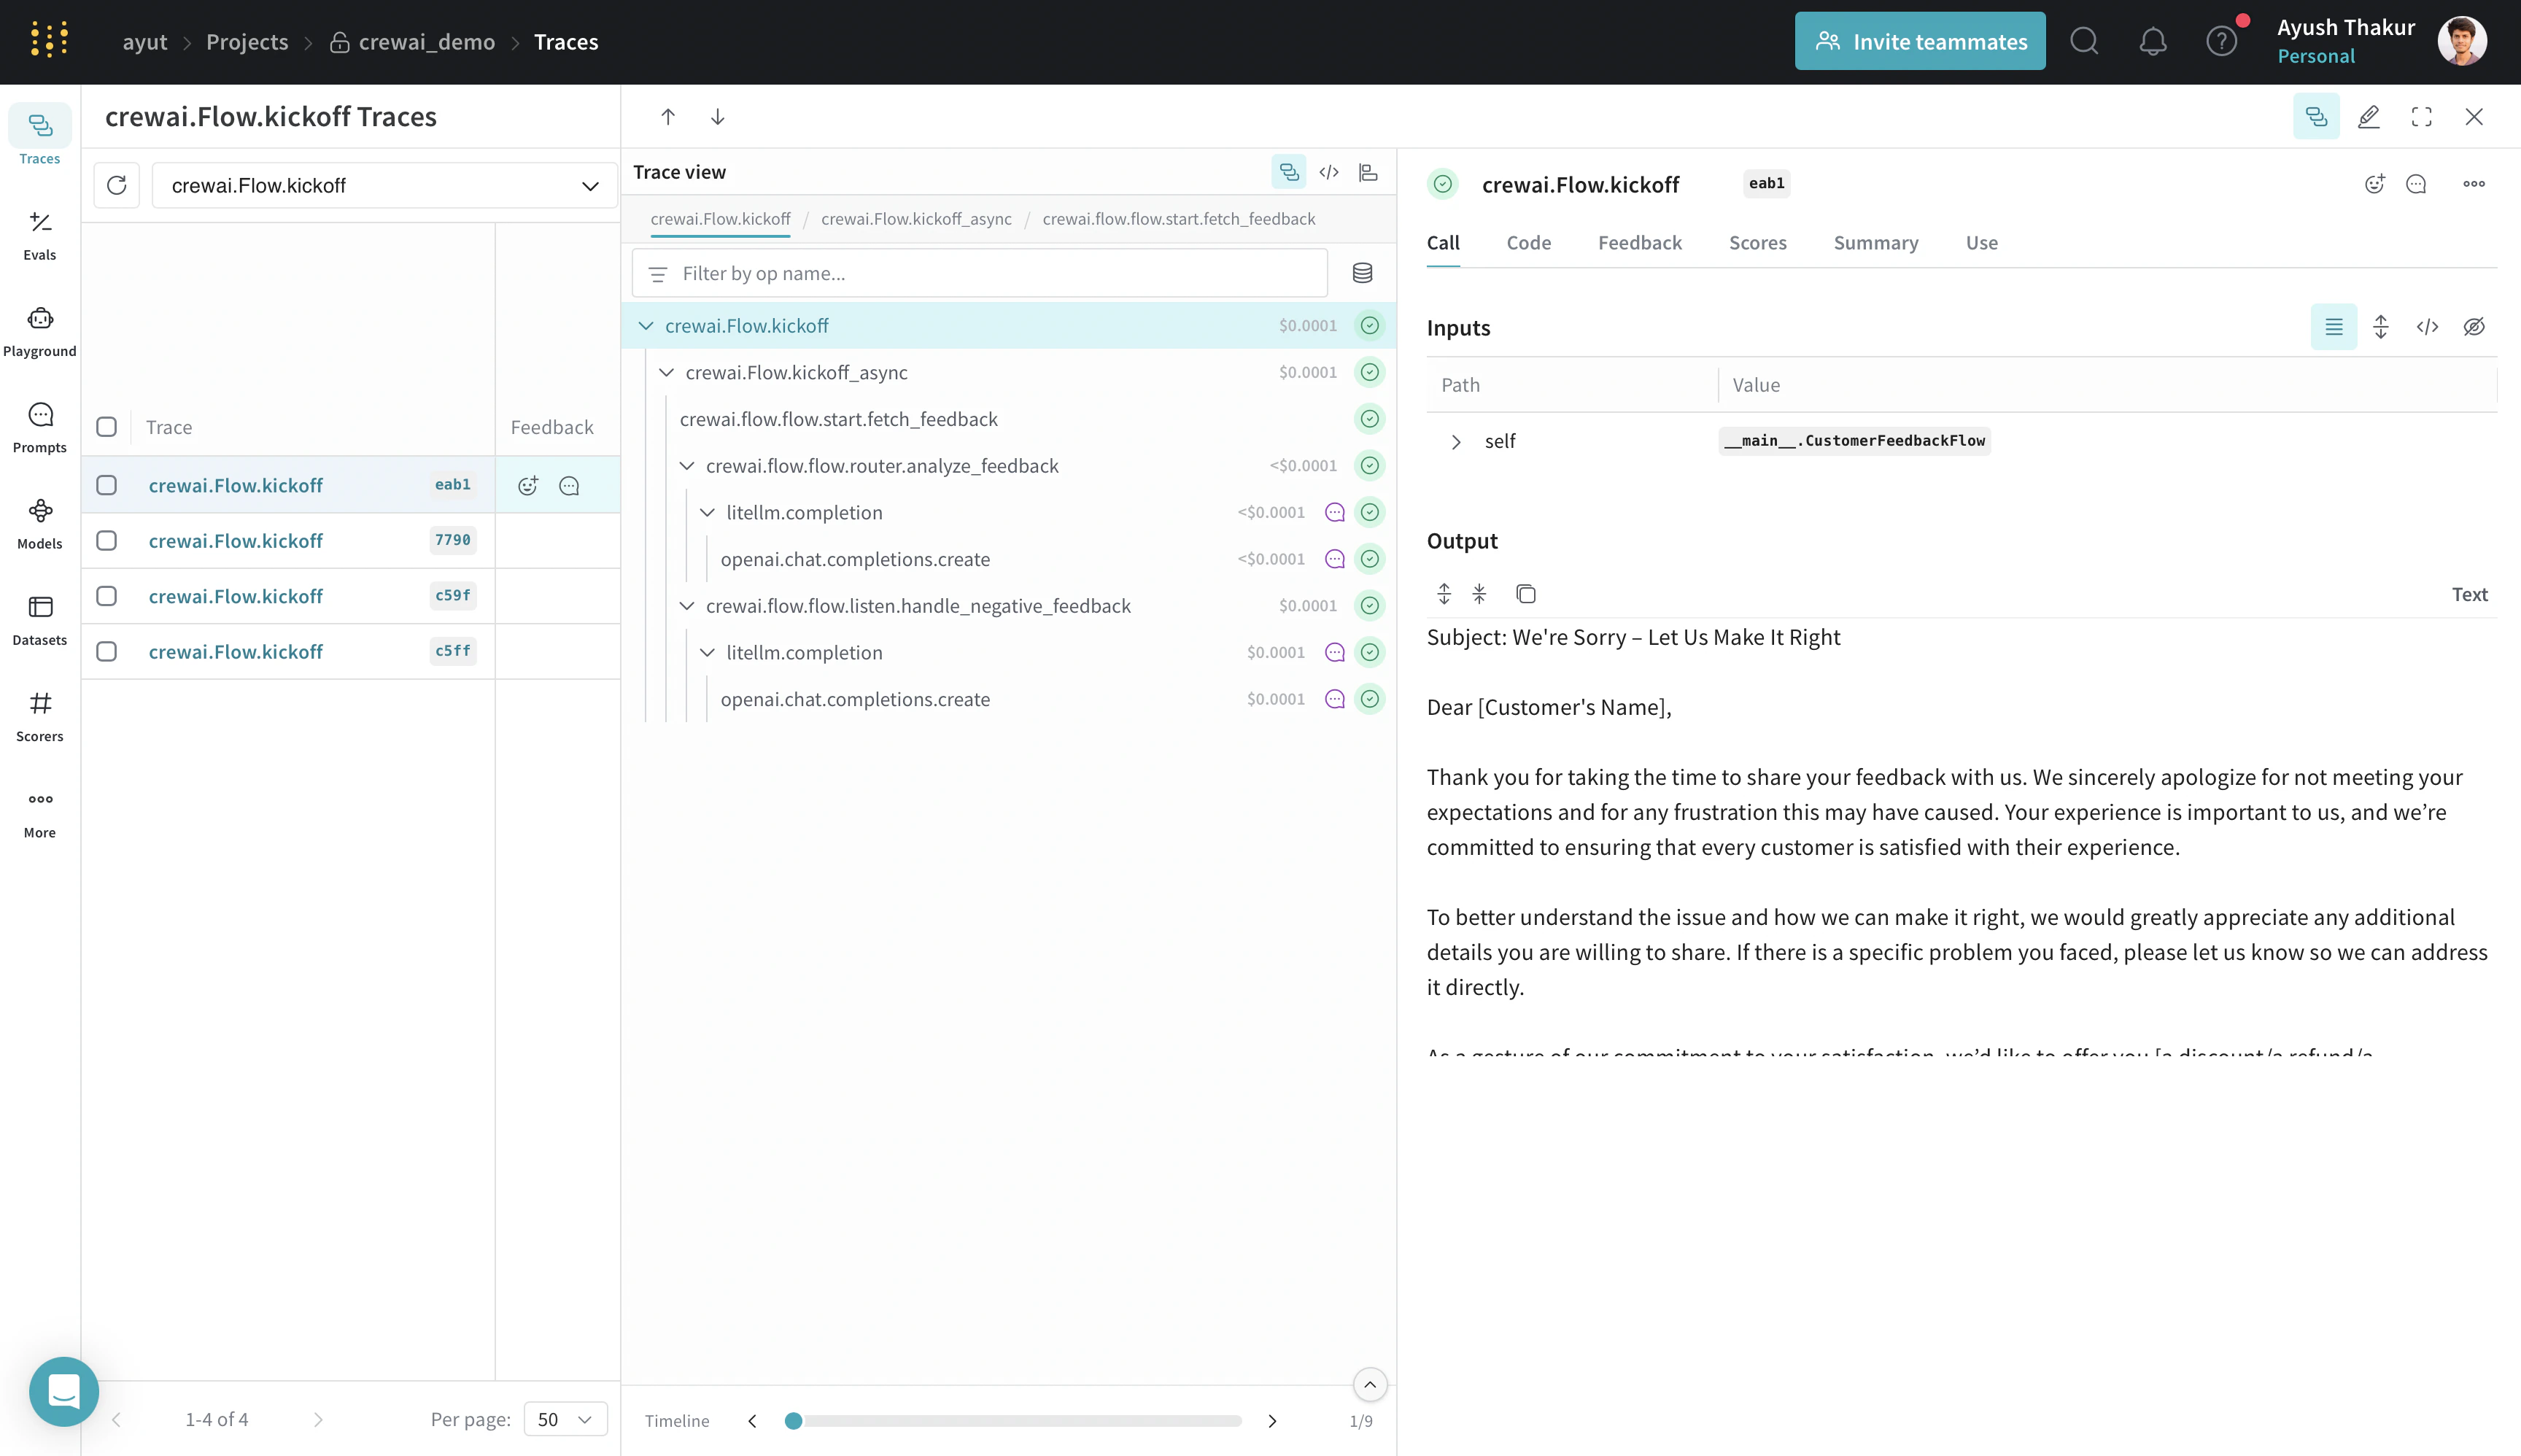
이 인테그레이션은
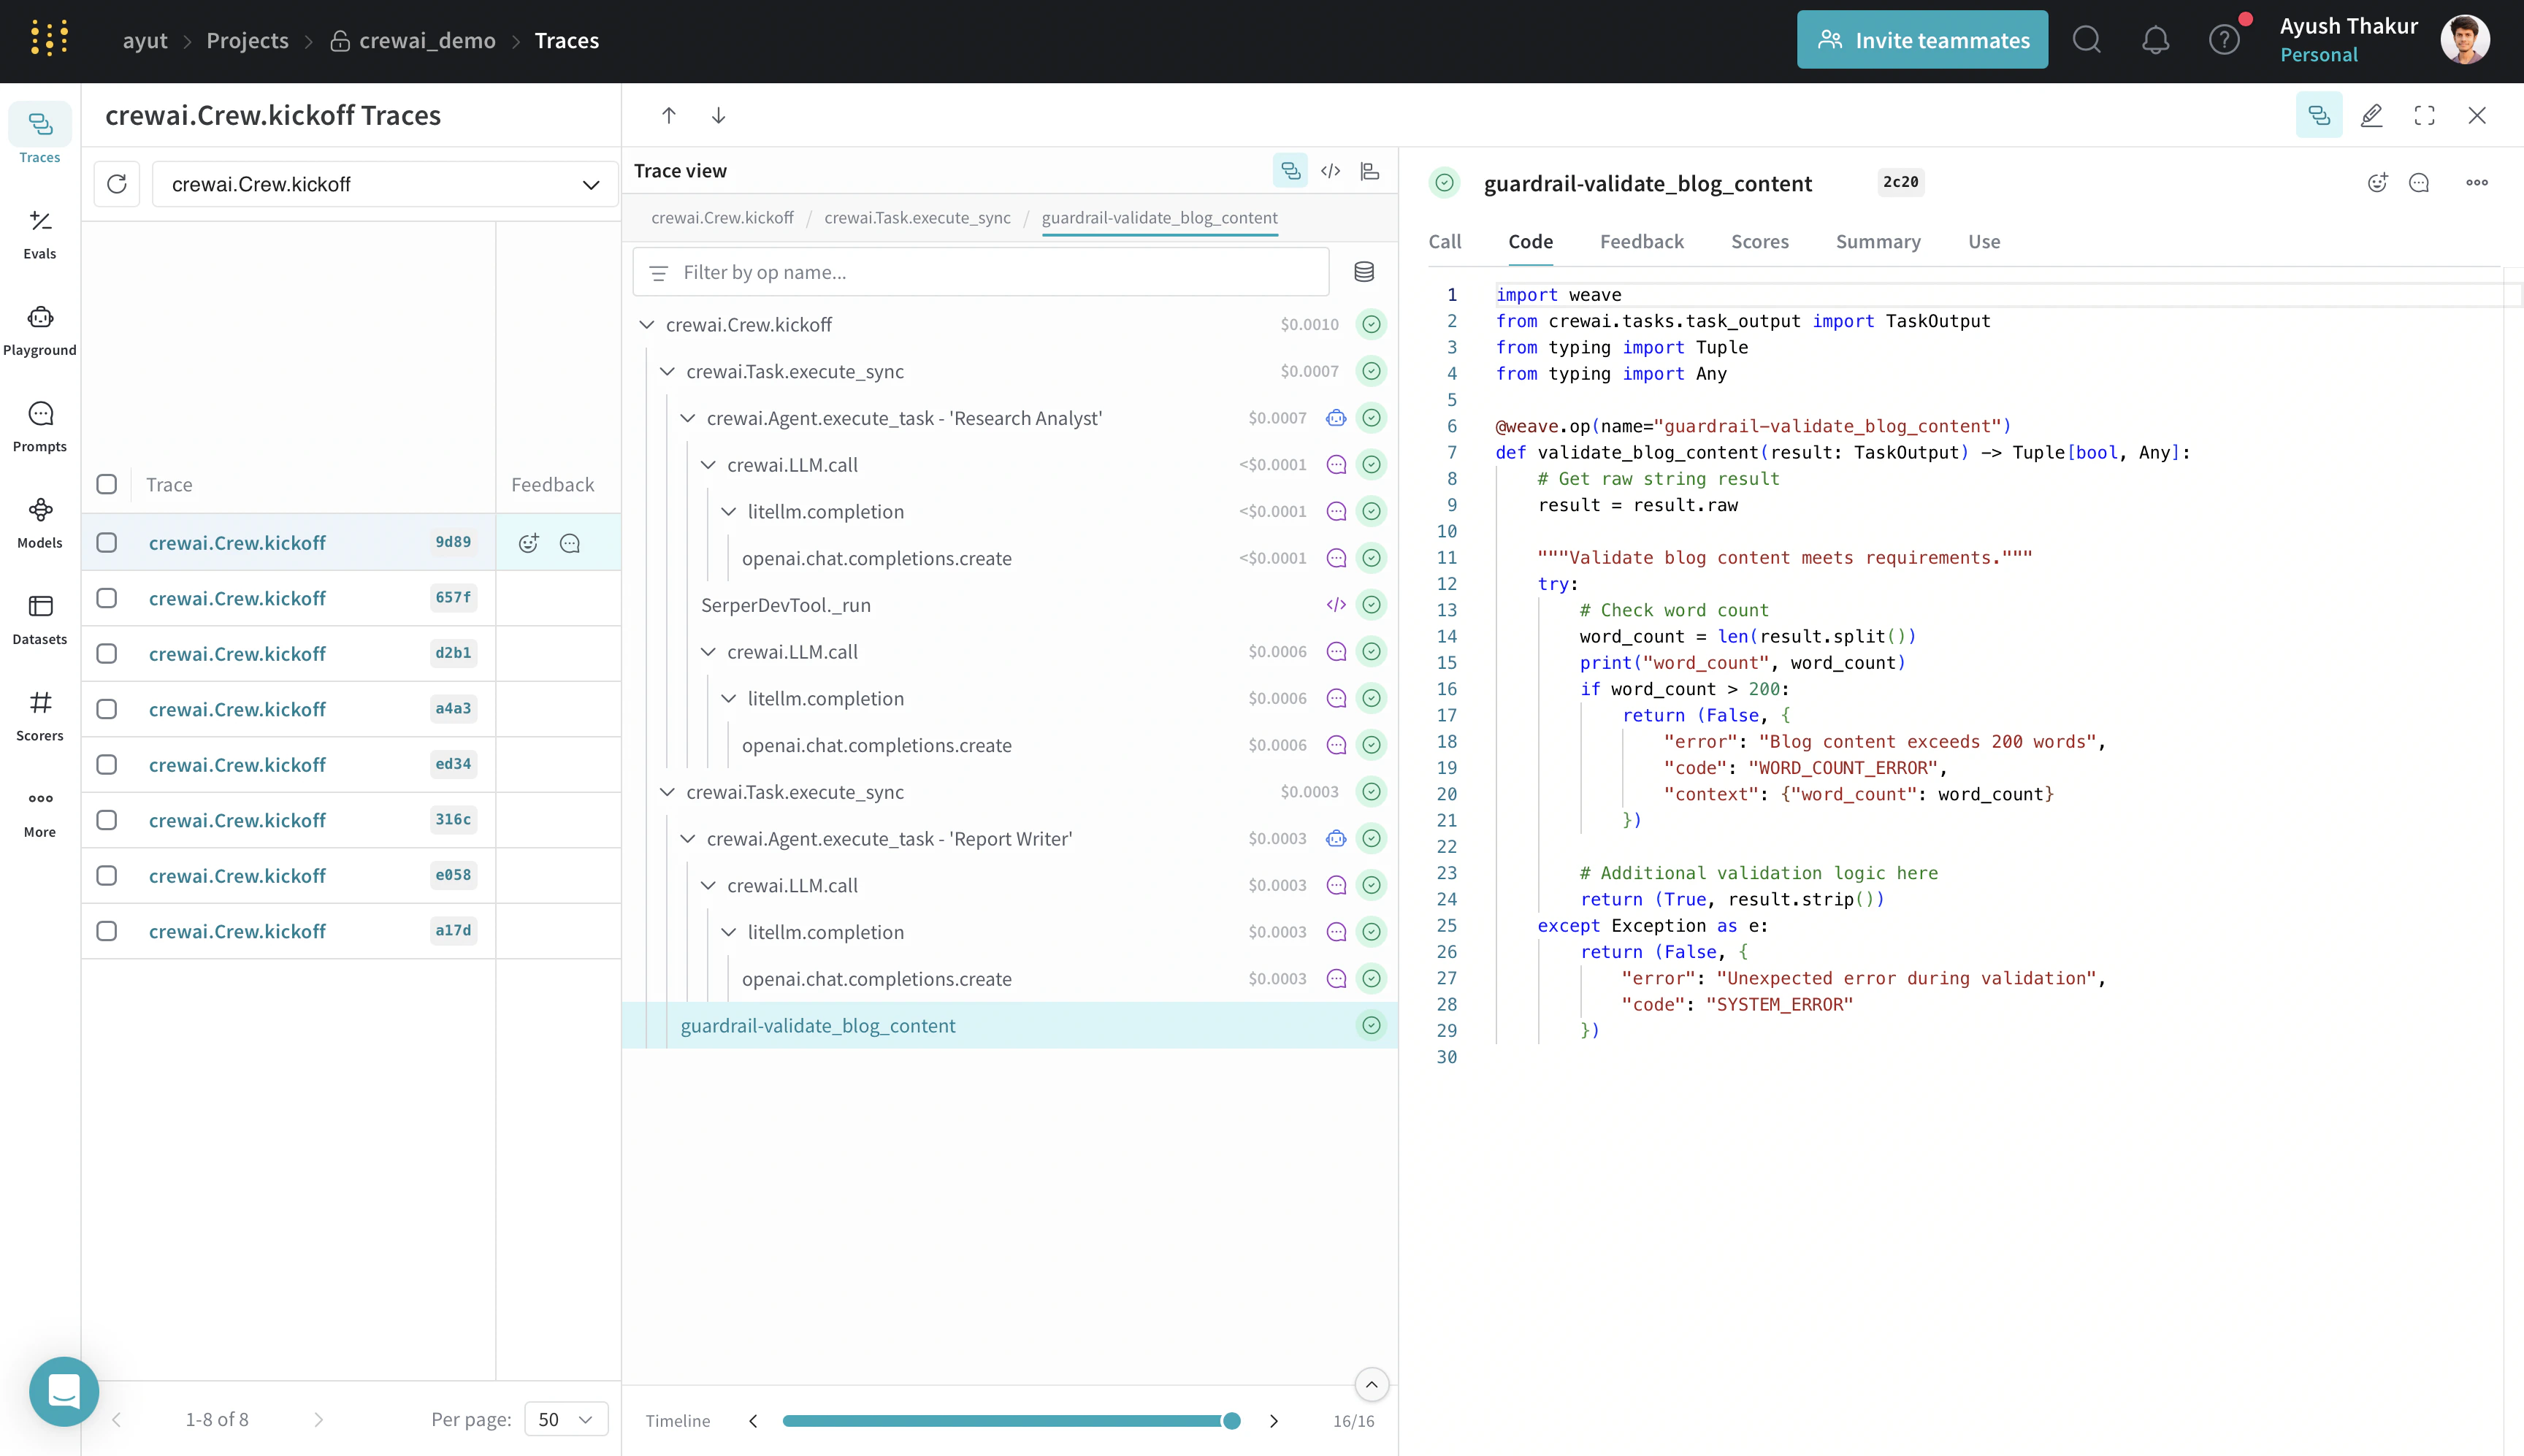
Flow.kickoff 엔트리 포인트와 지원되는 모든 데코레이터(@start, @listen, @router, @or_, @and_)를 자동으로 패치합니다.Crew 가드레일: 직접 ops 추적하기
@weave.op로 감싸면 입력, 출력, 애플리케이션 로직을 캡처하므로 에이전트를 거치면서 데이터가 어떻게 검증되는지 디버그할 수 있습니다. 또한 실험하는 동안 코드 버전도 자동으로 관리되어 git에 커밋되지 않은 임시 세부 정보까지 캡처합니다.
다음 예시에서는 리서치 분석가와 작성자 Crew를 확장하여 생성된 보고서의 길이를 검증하는 가드레일을 추가합니다.
@weave.op 데코레이터를 추가하면 이 함수의 입력과 출력은 물론, 실행 시간, 함수가 LLM을 사용하는 경우의 토큰 정보, 코드 버전 등도 추적할 수 있습니다.